
Gluten Free Yorkshire Pudding


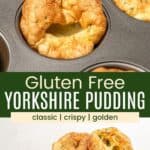
Yes, it’s possible to bake the best Yorkshire pudding that’s delightfully crispy, golden, and gluten-free! This homemade gluten-free Yorkshire pudding recipe is easy to make in a standard muffin pan without yeast or rising time. It’s the perfect side dish for roasts, holidays, and more.

Delicious Details
- Cuisine Inspiration: English
- Primary Cooking Method: Baking
- Dietary Info: Gluten-free
- Skill Level: Medium
I’ve been feeling some serious Sunday Roast vibes lately. Maybe I’ve been influenced by all the British accents while binging The Great British Baking Show. Who knows! But, I’m talking roast beef, gravy, the whole deal. And of course, no roast is complete without a classic and crispy Yorkshire pudding. In this house, that means gluten-free. So, I’ve gone ahead and created what I think is quite possibly the best gluten-free Yorkshire pudding recipe!
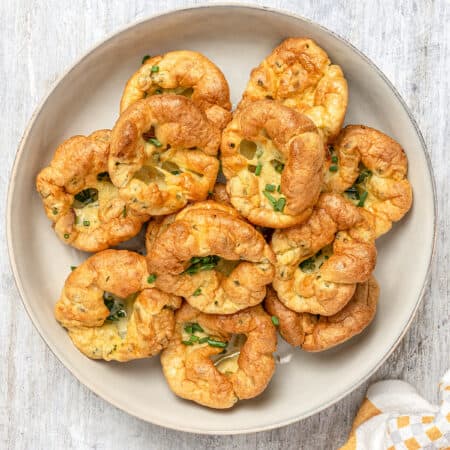
These Yorkshire Puddings Are Puffy, Golden-Brown, and Gluten-Free!
If you have a roast on your horizon, you definitely want homemade Yorkshire pudding on the menu. Here’s why:
- Authentic texture. These bake up light and golden, just like a Yorkshire pudding should be. Pudgy on the bottom, and airy up top. Making these gluten-free was surprisingly easy, too, which is a major bonus.
- Easy method. Unlike yeasted breads and dinner rolls, Yorkshire pudding recipes don’t require leavening, rising, or much fuss. They get their structure from eggs, and the remaining ingredients are gluten-free pantry staples.
- No fancy tools. This Yorkshire pudding recipe bakes up perfectly in a standard muffin pan. No special tools or cooking techniques needed.
- Make them your own. I threw in a sprinkling of fresh chives for good measure, but you can adapt this Yorkshire pudding recipe with different herbs and spices, like rosemary, thyme, or garlic powder. Or, leave them plain and buttery!

What Is Yorkshire Pudding?
Not to be confused with American pudding as a sweet dessert, Yorkshire pudding is from England, where it isn’t a dessert at all. All around England, batter puddings are savory dishes, similar to a popover, served with or before a meal. They tacked “Yorkshire” onto this version, as it was a type of pudding specific to the Yorkshire region. Yorkshire puddings are light, crispy, and airy, traditionally cooked in a shallow roasting tin.
Nowadays, if you walk into a pub in Britain on any given Sunday, you’ll find crispy Yorkshires as a fixture of the British Sunday Roast. They’re served with roast meat and potatoes, gravy, stuffing, and condiments. The full monty!

Ingredients You’ll Need
The ingredients list for a traditional Yorkshire pudding is as basic as it gets. With a few small tweaks to make the recipe gluten-free, below is everything you’ll need (you’ll find precise measurements in the recipe card below):
- Eggs: You’ll need 4 large eggs to make this gluten-free Yorkshire pudding.
- Gluten-Free Flour: I had the best results with King Arthur’s Measure-for-Measure.
- Xanthan Gum: Xanthan gum is an additive that takes the role of gluten in baking, acting as a thickener and binding agent for the other ingredients.
- Milk: Whole milk is recommended for the higher fat content, but 2% milk will also work.
- Chives: I toss a handful of chopped fresh chives into my pudding batter for added flavor. They also add a nice pop of green garnish after the Yorkshire puddings are baked!
- Shortening: Traditionally, Yorkshire puddings were cooked underneath meat while it roasted over a fire. The batter would absorb the drippings from the roast as it cooked. Safe to say, my kitchen isn’t so equipped. Instead, I add lard or shortening to the wells of a muffin tin to bring flavor and get those Yorkshires perfectly puffed up.

How to Make This Yorkshire Pudding Recipe
Gluten-free Yorkshire pudding is surprisingly easy to make. For the best results, try to make the batter a day ahead. It’s not mandatory, but it does lead to even better flavor. Either way, this recipe comes together fairly quickly following the steps below.
- Make the batter. Combine the batter ingredients in a bowl, and whisk until smooth. Then, let the batter rest. Resting enhances the texture and flavor, so if you can, I recommend leaving the batter in the fridge overnight. Otherwise, make sure it rests at room temperature for at least 30 minutes.


- Prepare the pan. If you refrigerated your batter overnight, take it out while you preheat the oven to 450ºF. Drop an equal amount of shortening into each well of a 12-well metal muffin tin. Place the muffin tin into the oven until the lard is smoking hot, about 10 minutes. When you take your tin out of the oven, make sure you place it on a heat-proof surface!


- Divide the batter. Once your pan with the shortening is ready, divide the gluten-free batter between the wells. You should have enough batter to fill each well about ½ to ¾ of the way full.
- Bake. Place the muffin tin with the batter back in the oven right away. Bake for about 15 minutes or so. Take them out when the batter has quadrupled in size, and you’re left with gloriously puffed and golden-brown Yorkshire puddings.


- Serve. Give the puddings a careful poke, and you should find them crisp to the touch. Serve your Yorkshire pudding immediately, with an extra sprinkle of chives if you’d like.

Tips for Success
Like any baking, the perfectly risen Yorkshire pudding is a bit of an art. I’ve had great results with this recipe, and I just know you will too. And if you find that your Yorkshire puddings aren’t rising for whatever reason, don’t worry. It happens to the best of us. But here are some tips to avoid a deflated Yorkshire pudding:
- Leave the oven door closed. Resist the temptation to open the door before the Yorkshire puddings are done baking. You don’t want your Yorkies deflating. Set a timer and trust the process!
- Get the shortening hot enough. Sizzling hot shortening is the secret to fluffy, risen Yorkshire pudding. It should be bubbling when you add your batter to the tins. You can do a test drizzle, and if it’s not sizzling, that’s a sign you need to heat up the lard even more.
- Don’t overfill the pan. Too much batter will cause the puddings to collapse under the weight. Stick to ¾ of the way up each well, at most.

What to Serve With Yorkshire Pudding
As a classic side dish, there are so many ways to serve this savory gluten-free Yorkshire pudding! Here are just a few easy meal ideas:
- Roasts. There’s a reason Yorkshire pudding is a staple of British Sunday Roasts. Serve this with Prime Rib, Marinated Tip Roast, Slow Cooker Pot Roast, or Herb Roast Turkey at Thanksgiving (with Gluten Free Gravy, of course!). The popover-like texture is perfect for mopping up sauces and gravy.
- Other Main Dishes. Why stop at roasts? Try Yorkshire pudding as a side to French Onion Stuffed Meatloaf, Easy Slow Cooker Corned Beef, Beef Wellington, or Maple Glazed Air Fryer Ham.
- Casseroles. Yorkshire pudding goes great with beefy casseroles like Shepherd’s Pie.
- Veggies. Serve Yorkshire pudding as a complement to vegetable sides like Roasted Carrots, Roasted Vegetables, Baked Potatoes, and Mashed Potatoes.
- Soups and Stews. Did I mention that Yorkshire pudding is great for soaking and dipping? Serve it with Chicken Corn Chowder, Split Pea Soup with Ham, Crockpot Beef Stew, and Homemade Beef Chili.

Storing and Reheating Leftovers
- Refrigerate. I always enjoy my Yorkshire pudding the most on the day it’s made. However, you can also store leftovers once they’re cooled. Transfer the Yorkshires to an airtight container lined with a paper towel, and store them in the fridge for up to 3 days.
- Reheat. To reheat Yorkshire pudding, place it in a hot oven for a few minutes until the outsides are crisped and it’s warmed through. I like to use a muffin tin for this, too!
- Freeze. You can store Yorkshire pudding frozen for up to 1 month. Place the cooked and cooled Yorkies into an airtight container or freezer bag for storage. Reheat the frozen puddings straight from frozen, at 425ºF for about 6 minutes, or until baked through again.

More Gluten-Free Holiday Side Dishes
Gluten Free Yorkshire Pudding
Ingredients
- 4 large eggs
- 1 cup gluten-free flour + 2 teaspoons (I use King Arthur Measure-for-Measure)
- ¼ teaspoon xanthan gum
- ¾ cup whole milk
- ½ teaspoon salt
- 2 tablespoons water
- ¼ cup chives chopped
- 6 tablespoons shortening melted
Instructions
- Combine eggs, flour, xanthan gum, milk, water, salt and chives in a medium bowl and whisk until a smooth batter is formed. Let batter rest at room temperature for at least 30 minutes. For the best results, transfer the batter to an air tight container and store overnight in the refrigerator. Remove from the refrigerator while you preheat the oven.
- Preheat oven to 450°
- Divide the shortening equally between the wells of your muffin tin. Place muffin tin with shortening in the oven for 10 minutes, until the fat is smoking hot.
- Transfer the muffin tin to a heat-proof surface and divide the batter evenly between each well. The wells should be filled between 1/2 and 3/4 of the way up the sides. Immediately return to the oven. Bake until the puddings have just about quadrupled in size. The puddings should be brown all over and crisp to the touch, approximately 14-15 minutes.
- Serve immediately and garnish with fresh chives.

Did you make this?
Leave a star rating to help others know that they should make this recipe.
Share a photo and tag @cupcakesandkalechips on Instagram!
I love Yorkshire puddings, and haven’t made them in years. Thanks for this gluten-free version, because I often have gluten-free friends over.
Wonderful, enjoy!