
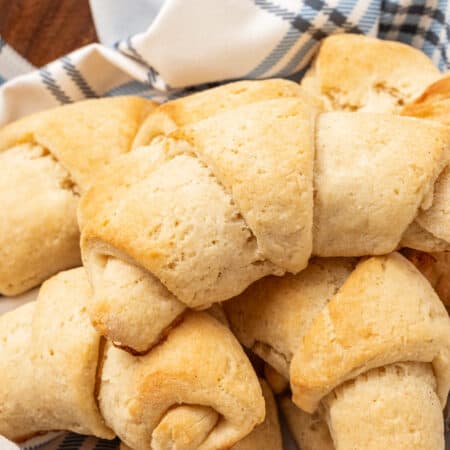
Gluten Free Crescent Rolls


These tender, flaky homemade gluten-free crescent rolls have a deliciously buttery, melt-in-your-mouth flavor. They’re easy to make, lightly brushed with milk and honey for extra richness. Crescents really are the perfect homemade dinner rolls! Serve them as a holiday side, and with your favorite meals year-round.

Delicious Details
- Cuisine Inspiration: American
- Primary Cooking Method: Oven
- Dietary Info: Gluten-free
- Skill Level: Moderate
I don’t think any holiday meal is complete without a tender, buttery dinner roll. That being said, I can’t really imagine any meal that wouldn’t be improved by a basket of warm, fresh-from-the-oven gluten-free crescent rolls! These rolls couldn’t be easier to make, and I’m SO excited for you to try them. Serve your fluffy crescent rolls with sides like roasted vegetables or mashed potatoes at your favorite family meals and holiday dinners.
What Makes This the Best Gluten-Free Crescent Rolls Recipe
Move over, Doughboy, because here’s why you’ll love these homemade crescent rolls:
- Just as good as you remember. I can only attempt to describe how melt-in-your-mouth and buttery these tender and flaky gluten-free crescent rolls are! Your family is going to love them. They rival just about anything I’ve tried from the grocery store’s refrigerated section.
- A versatile favorite. These crescent rolls are an easy side for family dinners, holidays, or whenever we entertain. They’re perfect eaten alone, smothered with butter, or dunked in sauce, gravy, soup, or chili.
- Repurpose the dough. This homemade crescent roll dough can be used in more delicious recipes, like pigs in a blanket, baked brie en croute (“in crust”), and more ideas I share below.
Yummy! I can’t remember the last time I had a biscuit or croissant for Thanksgiving! I made the dough the night before then all I needed to do was roll out cut & roll up! I did roll too thick at first but quickly adjusted! Thank you so much, Brianne! – Patricia

What You’ll Need
These soft and golden gluten-free crescent rolls come together with under 10 ingredients. Here’s a shopping list for you (you’ll find precise measurements in the recipe card below):
- Gluten Free Flour: These rolls turned out wonderfully with Bob’s Red Mill Gluten Free 1:1 Baking Flour.
- Xanthan Gum: In place of gluten, xanthan gum lends structure and texture to the dough.
- Sugar: This can be white granulated sugar or light brown sugar.
- Instant Yeast: Also called “fast rising yeast,” this type of yeast doesn’t require proofing.
- Baking Powder: For leavening. Be sure to check the dates on the packaging to ensure that ingredients like the yeast and baking powder you’re using aren’t expired.
- Butter and Egg: You’ll need cold, unsalted butter from the fridge, cut into cubes.
- Whole Milk: Whole milk adds creaminess and moisture to the dough.
- Honey: I like to combine honey with a bit of additional milk to make a sweet wash for the crescent rolls before baking them in the oven.

Is Crescent Dough the Same as Croissant Dough?
Croissants and crescent rolls may look similar in shape; however, the doughs aren’t quite the same. Croissant dough is a puff pastry dough with many thin, airy layers, separated by pockets of steamed butter. Meanwhile, crescent rolls, like the iconic Pillsbury Crescents, are made from a bread-like dough with a texture like a soft dinner roll. This recipe is my homemade, gluten-free version of a ready-to-bake crescent roll!
Repurpose this gluten-free copycat Pillsbury crescent dough in more recipes! Wrap the dough around hot dogs or kielbasa sausage to make gluten-free pigs in a blanket. Or, stuff it with marinara sauce and mozzarella cheese for homemade pizza rolls. You can even use it as the topping on sopapilla cheesecake bars!

How to Make Gluten-Free Crescent Rolls
There’s just a bit of prep, a bit of chilling, and then some rolling involved to make these tender homemade crescent rolls. Even if you’re new to baking with yeast, this recipe is very beginner-friendly. Follow these steps:
- Mix the wet and dry ingredients separately. In a mixing bowl, whisk together the gluten-free flour and dry ingredients, then cut in the cold butter cubes. In a separate bowl, whisk together the milk and egg.
- Make the dough. Add the wet mixture to the dry ingredients and stir to combine to form a sticky ball. Wrap the dough and place it in the fridge to chill for about half an hour.


- Shape the dough. On a floured work surface, roll the dough out into a rectangle, then fold it into thirds. Rotate the dough and roll it out again, then fold and repeat. After 3 more times, wrap up the dough again to chill for another half hour.
- Cut the dough into triangles. While your oven preheats to 400ºF, give your workstation another dusting with flour. Roll the chilled dough out into a circle. Next, slice the dough into 8 triangles, like a pizza (a pizza cutter actually works great for this if you have one!).


- Shape the crescent rolls. Roll each triangle into a crescent shape one at a time, beginning at the wide end and ending with the point.
- Brush the rolls. Move the finished rolls to a parchment-lined baking sheet. Lastly, whisk some milk with a bit of honey for the wash, and brush this over the crescent rolls.


- Bake. Bake these gluten-free crescent rolls in the oven for about 12 minutes or so, until puffed up and golden.

Tips for Perfect Crescent Rolls
- Use fast-rising yeast. Also called instant yeast, this type of yeast allows you to skip the proofing stage. It really gives the best results with this recipe and makes it extra speedy!
- Add the extra xanthan gum. Yes, 1:1 flour blends usually contain it, but a little extra helps the stretchiness of the dough.
- Prevent the dough from sticking. The gluten-free crescent roll dough will be a bit sticky, and that’s normal. Be sure to flour your work station as well as your rolling pin (and even your hands if needed!) to keep the dough from sticking too much as you work with it.
- Make the dough ahead of time. Go ahead and prepare the crescent dough up to a day or two in advance, to keep in the fridge. Just roll out and roll up the dough to bake whenever you’re ready to serve your crescent rolls. You can also easily freeze these homemade crescent rolls once they’re baked. See the section further down for more freezing and storing tips!

Make It a Meal
A tender crescent roll fresh from the oven is my go-to versatile dinner roll. The soft, rich texture is seriously the best for soaking up everything from Gluten Free Gravy to the Best Chili Recipe Ever. For this reason, these rolls are just as perfect to serve with a holiday dinner as they are with a cozy weeknight meal! Here are more easy dinner ideas to pair them with:
- Soups, stews, and chili. These rolls are delicious with a comforting meal of Crockpot Beef Stew, Chicken and Orzo Stew, or Creamy Instant Pot White Chicken Chili.
- Family dinners. Air Fryer Rotisserie Chicken or Air Fryer Chicken Tenders with a side of Honey Dijon Peas and Carrots for a simple weeknight dinner.
- Pasta. An easy pasta dinner of Spaghetti Bolognese and a Romaine Wedge Salad.
- Casseroles. Amp up an easy Gluten-Free Chicken Rice Casserole or Shepherd’s Pie with a side of fluffy rolls.
- Special occasions. For date night or something a bit more special, pair your crescent rolls with a Bottom Round Roast and Creamed Spinach.

How to Store and Reheat Extras
- Store at room temperature. Gluten-free crescent rolls are at their freshest just after they’re baked! However, leftover rolls will keep well enough when stored airtight on the countertop for 3-5 days.
- Reheat. These rolls are easy to reheat in the microwave for a few seconds or in the oven, wrapped in foil until warmed through.
- Freeze. Baked crescent rolls are great to freeze and defrost for easy reheating. To freeze the rolls, let them cool completely. I recommend pre-freezing them in a single layer on a baking sheet, then transferring them to an airtight container or freezer bag. Store your crescents frozen for up to 2 months. They can be reheated in the oven right from the freezer, on low heat for 10-15 minutes, or until warmed through.
More Easy Gluten-Free Bread Recipes
Gluten Free Crescent Rolls
Ingredients
- 1 1/2 cups (222 grams) 1:1 gluten free flour (I use Bob's Red Mill 1-to-1 Gluten Free Flour)
- 1/8 teaspoon xanthan gum
- 1 1/2 Tablespoons granulated sugar
- 1 teaspoon fast rising yeast
- 1/2 teaspoon baking powder
- 1/2 teaspoon kosher salt
- 1/2 cup unsalted butter, cold and cut into pieces
- 1/2 cup whole milk
- 1 large egg
For the milk and honey wash:
- 2 Tablespoons whole milk
- 1 teaspoon honey
Instructions
- Place the flour, xanthan gum, sugar, yeast, baking powder and salt into a large mixing bowl and whisk to combine. Add in the cold pieces of butter. Use a pastry blender to cut in the butter until only small pieces remain.
- In a small bowl, whisk together 1/2 cup of milk and 1 egg. Add egg mixture to the flour. Use a spatula or wooden spoon to stir the mixture until the dough begins to form a ball. Be sure the dough is well combined. The dough will feel sticky.
- Wrap the dough in plastic wrap and place in fridge for 30 minutes.
- Dust your work surface with flour and roll the dough out to form a rectangle shape, about a half and inch thick. Fold the dough into thirds. Turn the dough 90° and roll out again. Fold and repeat this process 3 more times. Wrap the dough again in plastic wrap and chill for another 30 minutes.
- Preheat your oven to 400°F.
- Dust your work surface with flour and roll your dough into a 15 inch circle. Cut the dough into 8 triangles. Roll each triangle, starting at the wide end until you have created a crescent roll.
- Move the finished rolls to a parchment-lined baking sheet. Whisk the milk and honey in a small bowl and brush this over the crescent rolls.
- Bake at 400°F for 12-14 minutes until puffed and golden brown.
Notes
- The dough will be a little sticky. Use flour on the work surface and also on your rolling pin to prevent the dough from sticking when you roll it out.
- Be sure to use fast rising yeast. This will allow you to skip the proofing step.

Did you make this?
Leave a star rating to help others know that they should make this recipe.
Share a photo and tag @cupcakesandkalechips on Instagram!
If your wanting to freeze this recipe, what’s the best way to do it?
Detailed freezing and reheating instructions are in the post. But in short, pre-freeze them in a single layer on a baking sheet, then transfer to an airtight container or freezer bag.
The ads on your site cover up the directions… the last thing I can see is “until you have created a triangle.” How long to bake?
I’m so sorry! It’s not the ads. It actually looks like the last two steps got deleted. I added it back in!
Yummy! I can’t remember the last time I had a biscuit or croissant for Thanksgiving! I made the dough the night before then all I needed to do was roll out cut & roll up! I did roll too thick at first but quickly adjusted! Thank you so much, Brianne!
I’m so happy!