
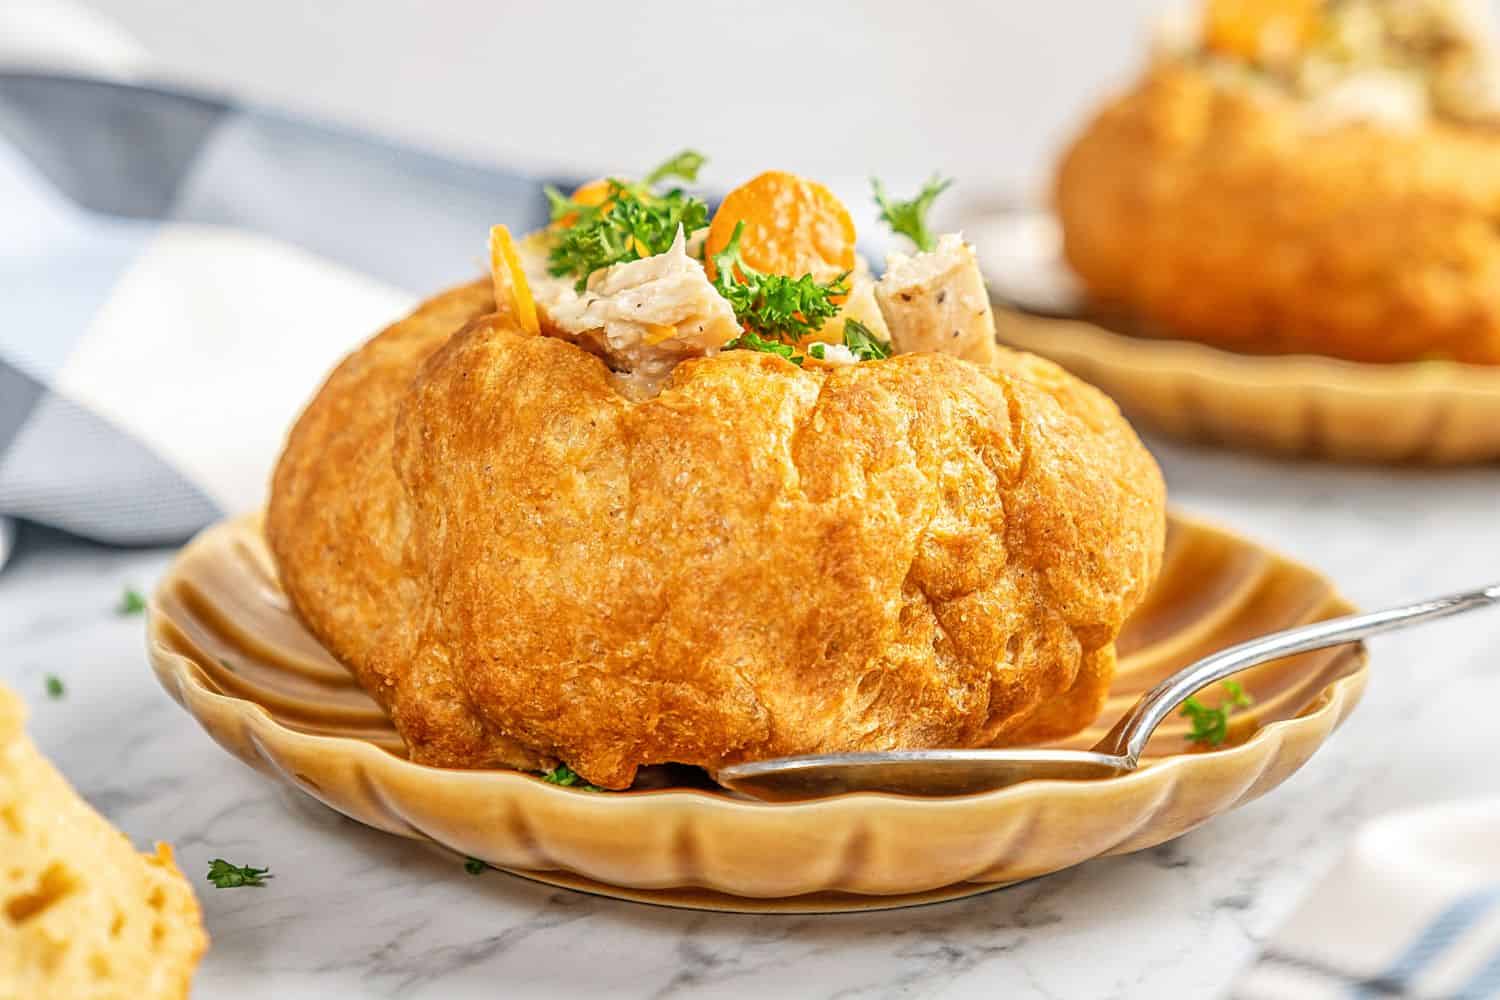
Gluten Free Bread Bowls


Load up these versatile Gluten Free Bread Bowls with your favorite soups, dips, chilis, and more, all winter long! Homemade bread bowls are the ultimate way to skip the dishes. Tear off chunks of crusty gluten-free bread while you eat, for a hearty meal or easy appetizer.

Gluten-Free Homemade Bread Bowls
Bread bowls give a whole new meaning to the idea of a “one-bowl” meal. I’ll take a hearty, crusty gluten-free bread bowl filled with cozy soup over a sink full of dishes any day!
This recipe for homemade bread bowls is blissfully basic and turns out great every time. The gluten-free dough is easy enough to prepare, and after a couple of hands-off rises, it’s ready for the oven. You’re going to love filling these crusty yet tender bread bowls with all your favorite fillings (I’ve included some of ours later on in this post).
This recipe is great for football season and the holidays, too, as a bread bowl makes a perfect party appetizer filled with hot dip!

What Is a Bread Bowl?
A bread bowl is essentially a large, homemade yeasted bread roll that’s been hollowed out to make space for soups, chilis, dips, and other fillings. If you’ve ever been to a Panera Bread restaurant, you’ll know that they’re famous for them! Bread bowls are made from crusty, sturdy bread that’s still soft enough to pull apart, similar to French Bread or Gluten Free Bagels.

Ingredients You’ll Need
I love this gluten-free bread recipe because you only need a handful of basic ingredients! Below is an overview, with the full amounts available in the recipe card:
- Active Dry Yeast: You’ll combine active yeast with a couple of cups of warm water (110°F) and a few teaspoons of sugar in order to activate it. Water heated over 130ºF will kill the yeast, so be sure to use a kitchen thermometer to check that it’s at the right temperature.
- Sugar: This will feed the yeast, creating the bubbles needed to help the dough rise. Regular granulated white sugar is best here.
- Gluten-Free Flour: For this recipe, I like to use Bob’s Red Mill Gluten-Free All Purpose Baking Flour, as it yields a sturdy, crusty bread bowl.
- Xanthan Gum: Added as a binding and thickening agent in place of gluten in this gluten-free bread recipe.
- Baking Powder and Salt: Baking powder gives this gluten-free bread dough the extra boost it needs to bake up nice and fluffy, while salt helps control the production of the yeast and enhances the flavors.

How to Make Gluten Free Bread Bowls
You’re going to be amazed by how easy it is to make your own bread bowls that are just as delicious as anything you’ll find at Panera!
- Activate the Yeast: Stir the dry yeast into warm water with the sugar. After about 5 minutes the mixture should be foamy.
- Combine the Ingredients: Whisk together the flour and other dry ingredients in the bowl of your stand mixer. When the yeast is ready, add it to the dry ingredients and slowly mix to form a soft and slightly sticky ball of dough.


- Rest the Dough: Cover the bowl with plastic wrap and leave the dough to rest overnight (anywhere between 12-18 hours is ideal).
- Add Baking Powder: Once your dough is rested, sprinkle it with a teaspoon of baking powder, then stir the dough with a wooden spoon. Use your hands to shape it back into a ball, then cover and leave the dough to rest for another hour and a half to two hours. This dough recipe won’t double in size, but it will rise a little more while it rests a second time.


- Prepare to Bake: Preheat the oven to a hot 450°F, and place an oven-safe cast iron skillet with a lid in there to heat through. Once your dough is ready to bake, you’ll lower the oven temperature to 400ºF.
- Portion and Bake: Divide your gluten-free bread dough into 4 even-sized balls, dropping them gently into the hot skillet. Don’t let the dough balls touch. Next, close the lid and bake the bread for 45 minutes. A quick way to tell if your bread is done baking is to use a thermometer to check that the internal temperature reaches 200ºF.


- Cool and Carve Out the Bread Bowls: Once they’re out of the oven, transfer the bread loaves to a wire rack to cool. Afterward, use a sharp knife to cut and hollow out the center of the bread. Now, your gluten-free bread bowls are ready to load up with all your favorite soups and fillings!


Tips for Success
Try these helpful tips when making your homemade gluten-free bread bowls:
- When proofing the yeast, the yeast mixture should be bubbling and foaming after a few minutes. If it’s not, your yeast may be dead or expired, and you’ll need to try again with fresh yeast before proceeding.
- Give the bread enough time to cool before you carve it. Wait at least a half hour before scooping out your bread bowls, this way the hot bread won’t become gummy.
- Upcycle the leftover bread. No need to discard all that gloriously fresh-baked gluten-free bread you’ve scooped out from the bowls. Dice it up to use for dunking or dipping, or dry it out for homemade croutons or gluten-free breadcrumbs.

What to Serve in a Bread Bowl
The possibilities are endless when it comes to ways to fill your gluten-free bread bowls! Here are just some of our many favorite meal ideas:
- Soups: If you really want to recreate the Panera experience, try creamy and chunky soups like Broccoli Cheese Soup, Chicken Corn Chowder, and Gluten Free Chicken Wild Rice Soup work great in a bread bowl.
- Dips: Bread bowls make excellent vessels for holding homemade dips like this Kentucky Hot Brown Dip or Spinach Parmesan White Bean Dip. Chop up the leftover bread you carved out to use for dipping!
- Chilis: Enjoy a cozy bread bowlful of hearty Homemade Beef Chili or White Chicken Chili. And don’t forget about Crockpot Beef Stew.
- Pot Pie: Instead of a pie crust, fill these gluten-free bread bowls with your favorite Chicken Pot Pie or Shepherd’s Pie recipe.
- Curries: A bread bowl is perfect for filling with saucy recipes like Butter Chicken.

Storing Homemade Bread Bowls
Store your leftover gluten-free bread bowls airtight at room temperature for 2-3 days, or keep them in the fridge for up to 1 week.
Can I Freeze Gluten-Free Bread?
Yes! Once wrapped or stored airtight, these bread bowls can be frozen for up to 3 months. Thaw the bowls overnight and then let them sit on the counter for a bit before serving.
Things You’ll Need
- STAND MIXER: A good mixer makes it so much easier to prepare gluten free yeast doughs, and KitchenAid is the best.
- INSTANT-READ THERMOMETER: You’ll be happy you have one to check the temperature of the water for activating the yeast and confirming your bread bowls are baked through.
- CAST IRON SKILLET: One of these enameled cast iron casserole-style skillets with a lid is perfect for baking the rolls.
- XANTHAN GUM: Yes, you definitely need this in the recipe to get the texture you are looking for.
Gluten Free Bread Bowls
Ingredients
- 2 cups warm water, at 110° F
- 4 teaspoons active dry yeast
- 4 teaspoons granulated sugar
- 3 cups Gluten Free All-Purpose Baking Flour, I used Bob’s Red Mill
- 8 teaspoons xanthan gum
- 2 teaspoons salt
- 1 teaspoons baking powder
Instructions
- Activate the yeast by combining warm water, yeast and sugar, stir and set aside for 5 minutes. The mixture should be foamy and bubbly, which indicates that the yeast is still active. If it does not bubble after 5 minutes, the yeast is no longer working and you need to get new yeast before proceeding with the recipe.
- While the yeast is proofing, in a stand mixer, combine flour, xanthan gum, and salt. Use the whisk attachment to mix until combined.
- When your yeast is finished proofing, add it to the flour mixture. Using the paddle attachment on your stand mixer, combine on low speed until a dough forms. The dough will be soft and a bit sticky but will form into a ball. Cover with plastic wrap and allow to rest for between 12 and 18 hours in a draft-free place.
- After your dough has rested, sprinkle it with the baking powder. Using a wooden spoon, stir the dough well to knock out any air. Form the dough back into a ball and cover and rest again for 1 1/2 to 2 hours. The dough will rise a bit more but not double in size.
- When the dough is almost ready to bake, preheat your oven to 450°F. Place a large covered cast iron pan or dutch oven in the preheated oven and allow to heat through.
- When you are ready to bake your bread bowls, lower the temperature to 400°F. Divide the dough into 4 equally sized balls. Carefully, place the balls into your heated cast iron pan or dutch oven, making sure they are not touching. Replace the lid and bake for 45 minutes. Check to see if the internal temperature is at 200°F. If it needs more time, cook uncovered for an additional 15 minutes or until the bread reaches the desired internal temperature.
- Remove the bread bowls from the cast iron pan or dutch oven and allow them to cool for at least 30 minutes on a wire rack.
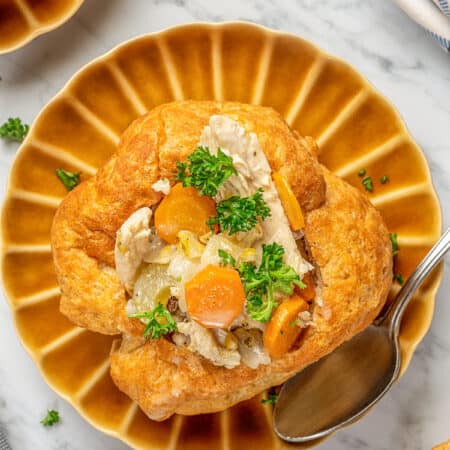
- Using a knife, carve out a deep hole in the bread. It doesn’t need to be perfect.
- Add your favorite soup and enjoy.

Did you make this?
Leave a star rating to help others know that they should make this recipe.
Share a photo and tag @cupcakesandkalechips on Instagram!
If the flour has xanthan gum already in it, should I add the additional xanthan gum?
Yes, it adds more pliability to the dough.
I added the baking powder in too early, have I ruined it? It’s currently in a bowl covered in plastic wrap, resting overnight… any advice is much appreciated.
It shouldn’t affect it.
Do you have any tips for the bread having a better flavor or maybe I measured wrong? The yeast flavor was very strong and over took the bread flavor so I don’t know what I did wrong!
Can you tell me which brand of flour you used? Some flours have a stronger flavor, but if it was the yeast, it is possible that your yeast wasn’t fresh or maybe it wasn’t in a warm enough area, so it did not proof as much as it should have.