
Gluten Free English Muffins

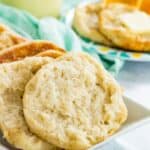


Have you missed soft, airy, perfect English muffins since going gluten-free? You’re not alone, and you’re going to love these homemade Gluten-Free English Muffins! They have all the authentic texture and nooks and crannies that we love, made completely from scratch!

Extra Fluffy Gluten-Free English Muffins
Let’s talk about gluten-free English muffins. One thing I realized quickly after going gluten-free is that many bread brands don’t often offer much in that department! I’ve spent countless shopping trips willing authentic, gluten-free English muffins to manifest, with mixed success.
Then I asked myself the question: Why spend my time scouring stores for the perfect gluten-free English muffins, when I can make my own? And that’s where this recipe comes in.
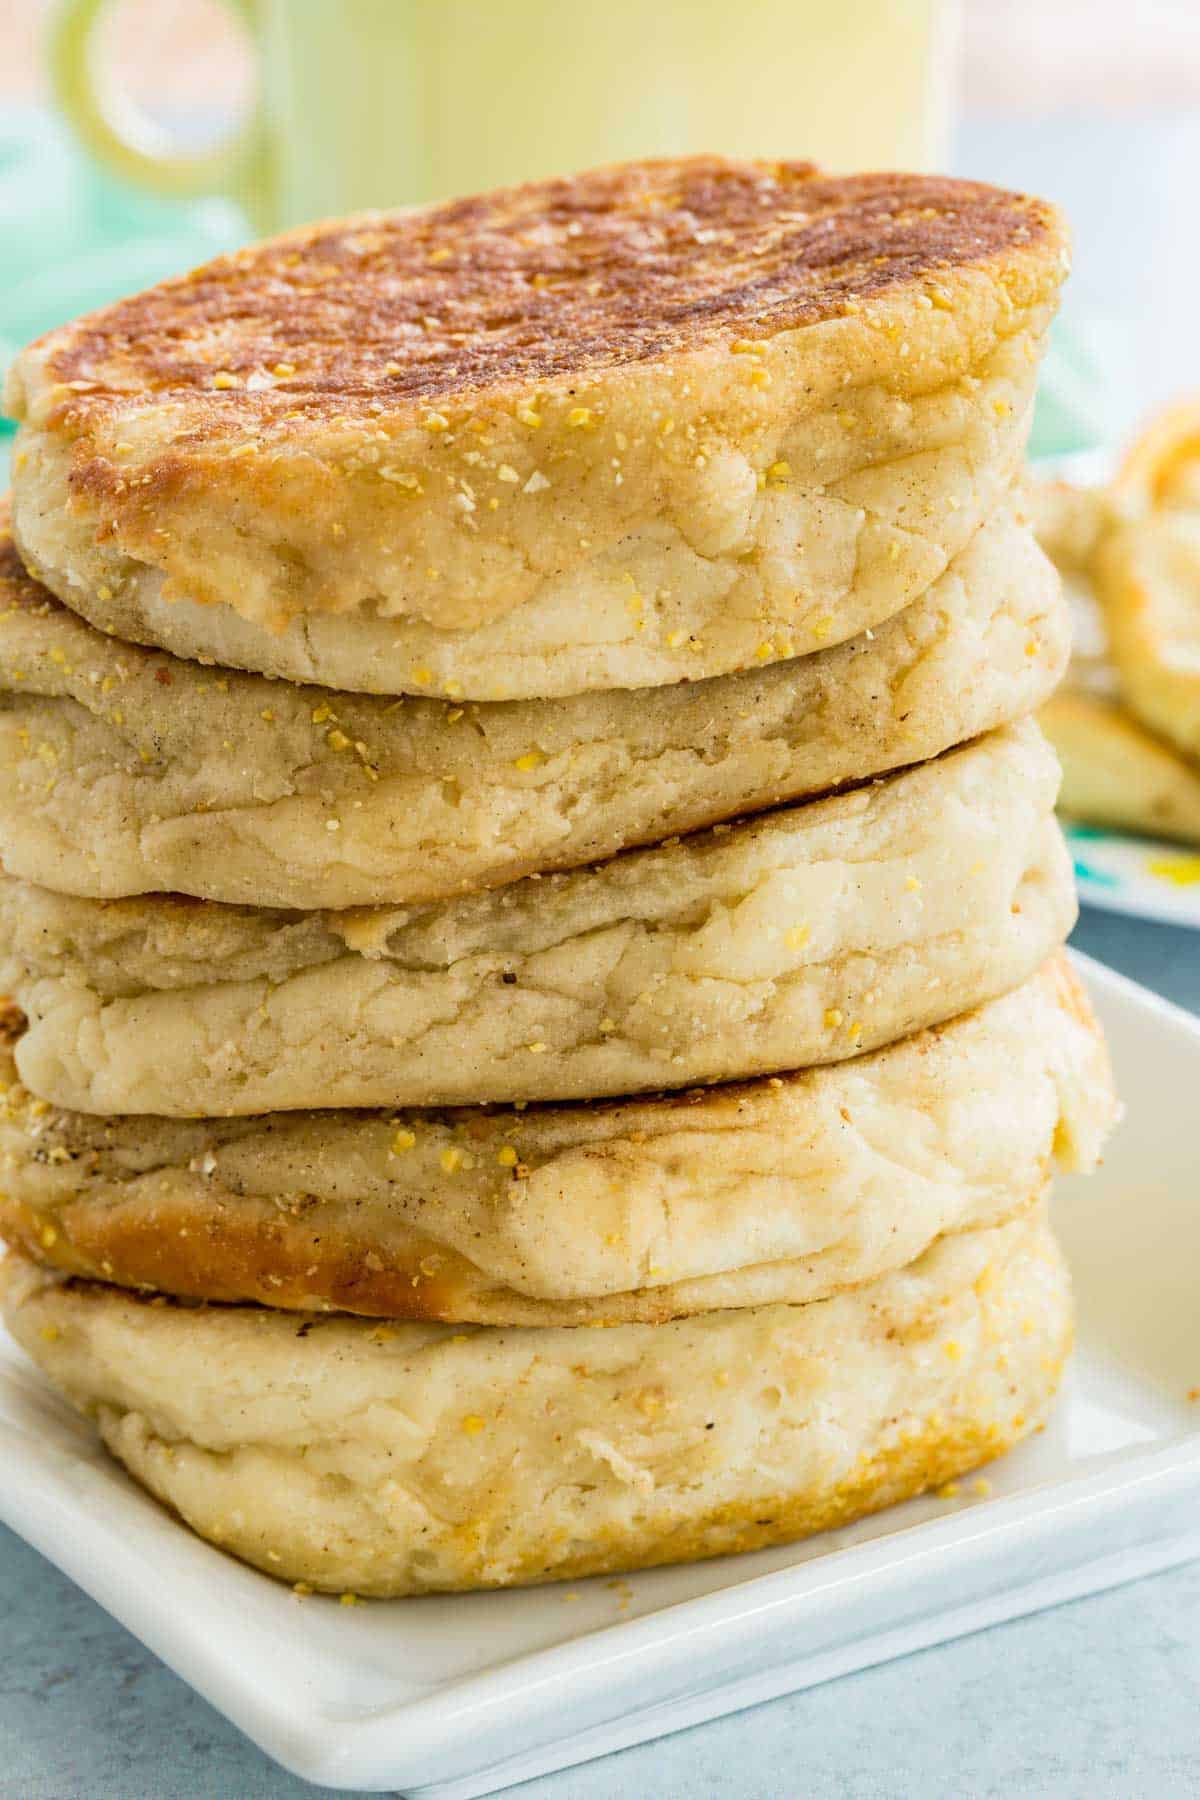
These homemade English muffins are so light and fluffy, they’re like little golden, delicious clouds that you can make in your own kitchen! Aside from some rising time in the fridge, the dough is quick and easy to make and the muffins sear up perfectly in the skillet.
My extra soft gluten-free English muffins taste better than anything I’ve ever bought from a store! They’re a perfect easy and healthy breakfast for the whole family.
What is an English Muffin?
If you live in the US, chances are you’ve heard of an English muffin. But what is it exactly?
Essentially, an English muffin is a round, crumpet-like flatbread, invented by an English immigrant named Samuel Thomas (yes, of Thomas’ English Muffins fame). At Thomas’ bakery in New York, English muffins were baked on a griddle, and made so they could be easily pulled apart with a fork.
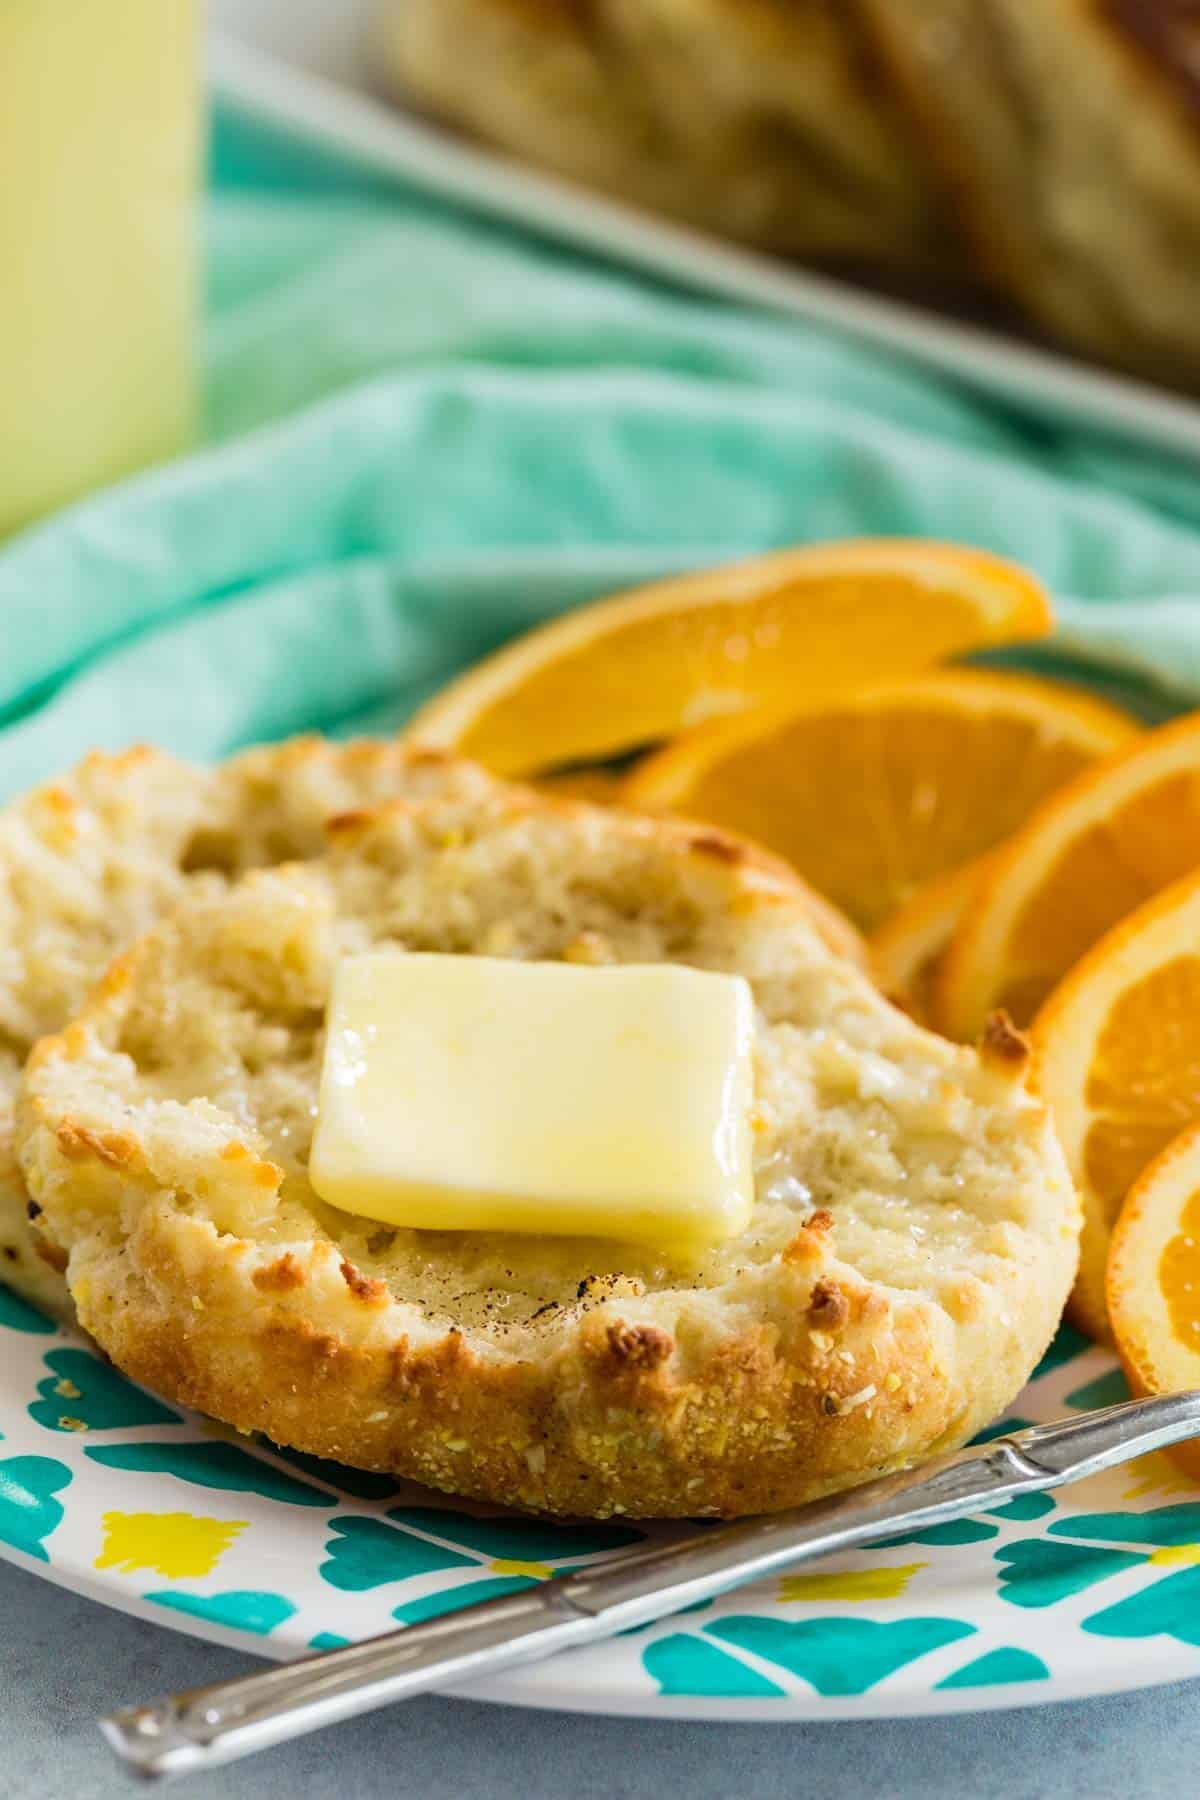
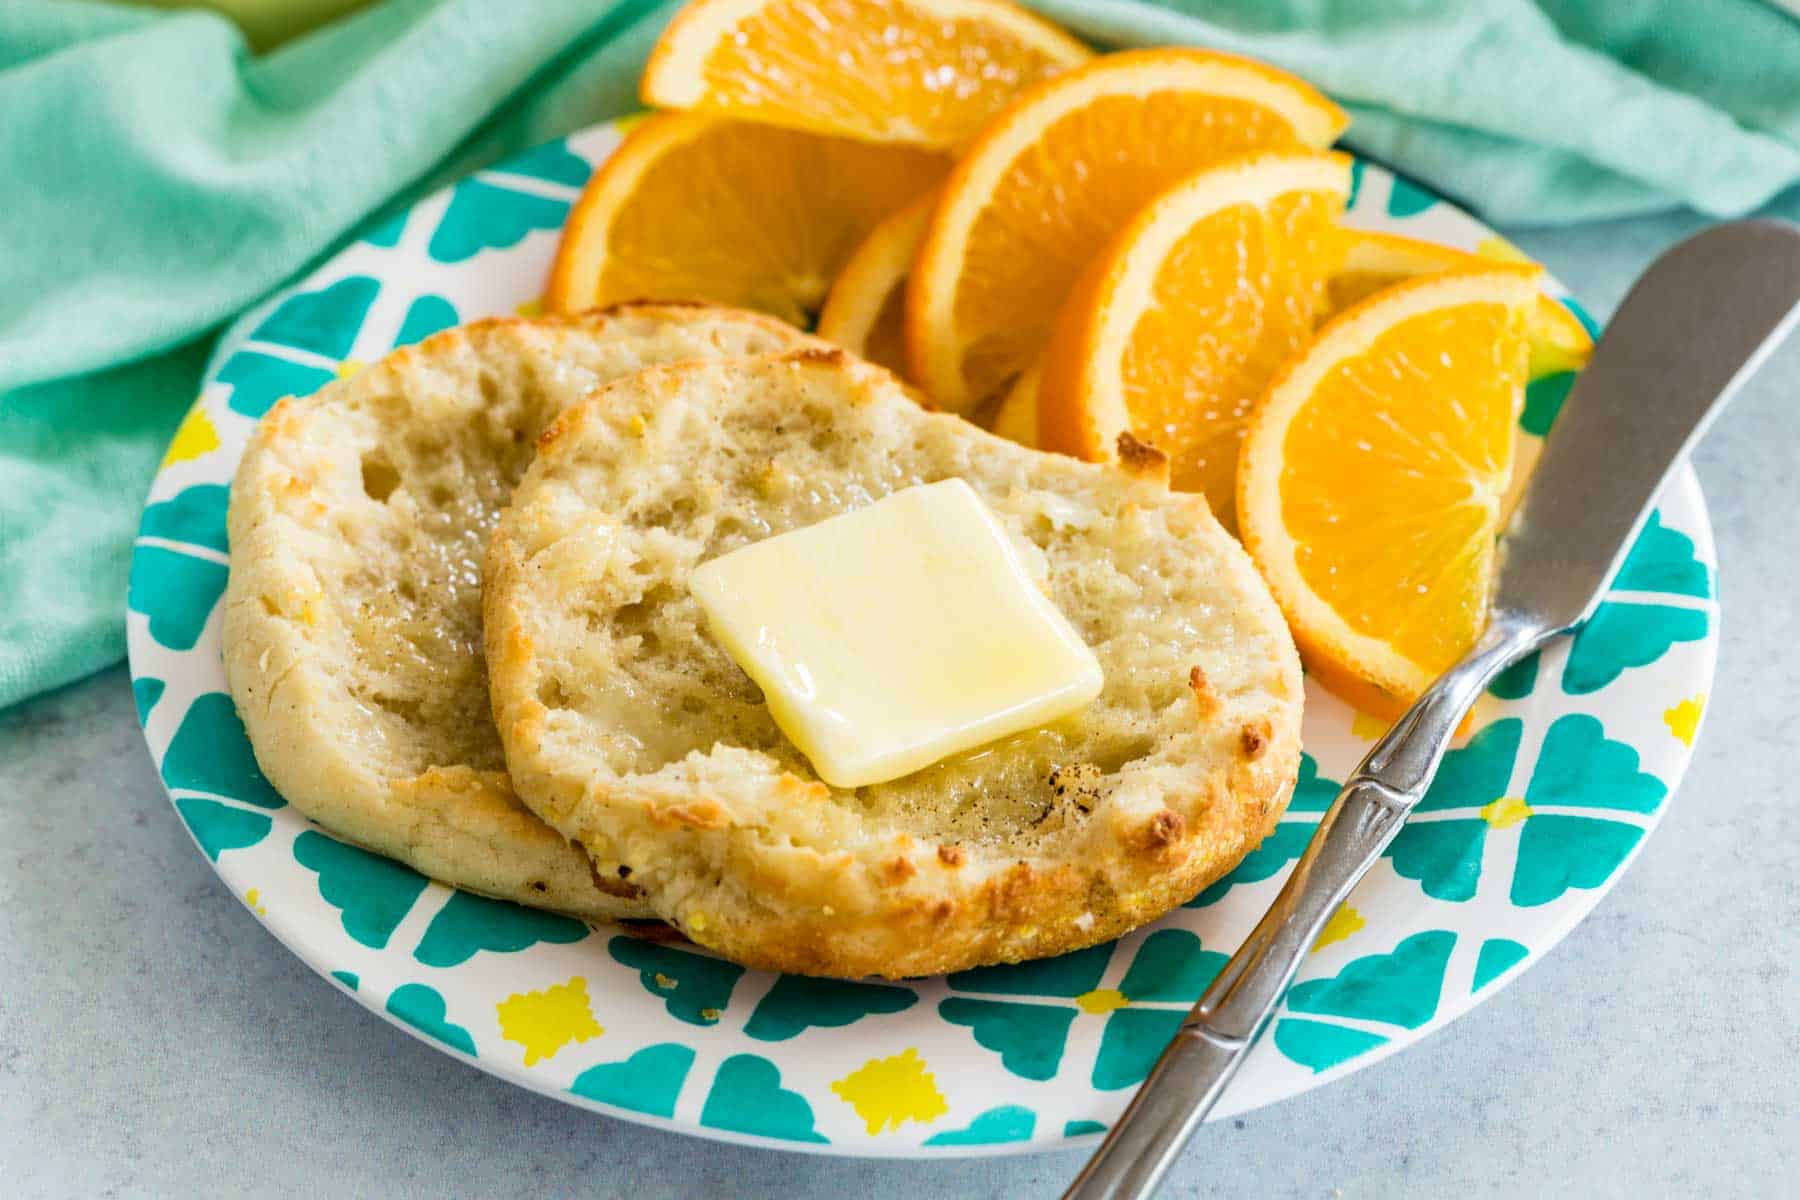
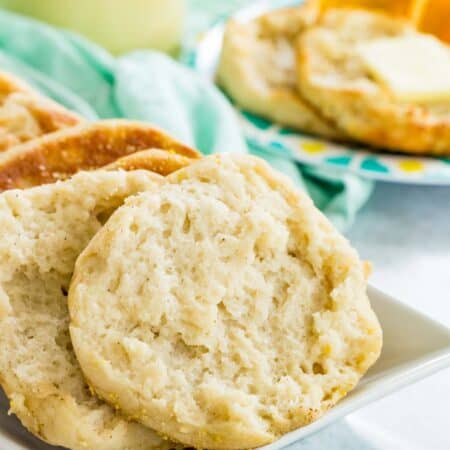
English muffins are renowned for their soft, spongy texture and “nooks and crannies”: small air bubbles that form in the dough as it bakes on the griddle, similar to a pancake. Once the muffin is split in two, these nooks and crannies are perfect for catching melted butter and toppings!
Recipe Ingredients
When it comes to making gluten-free versions of our favorite baked goods, ingredients are key! Here’s what you’ll need to make these perfect gluten free English muffins:
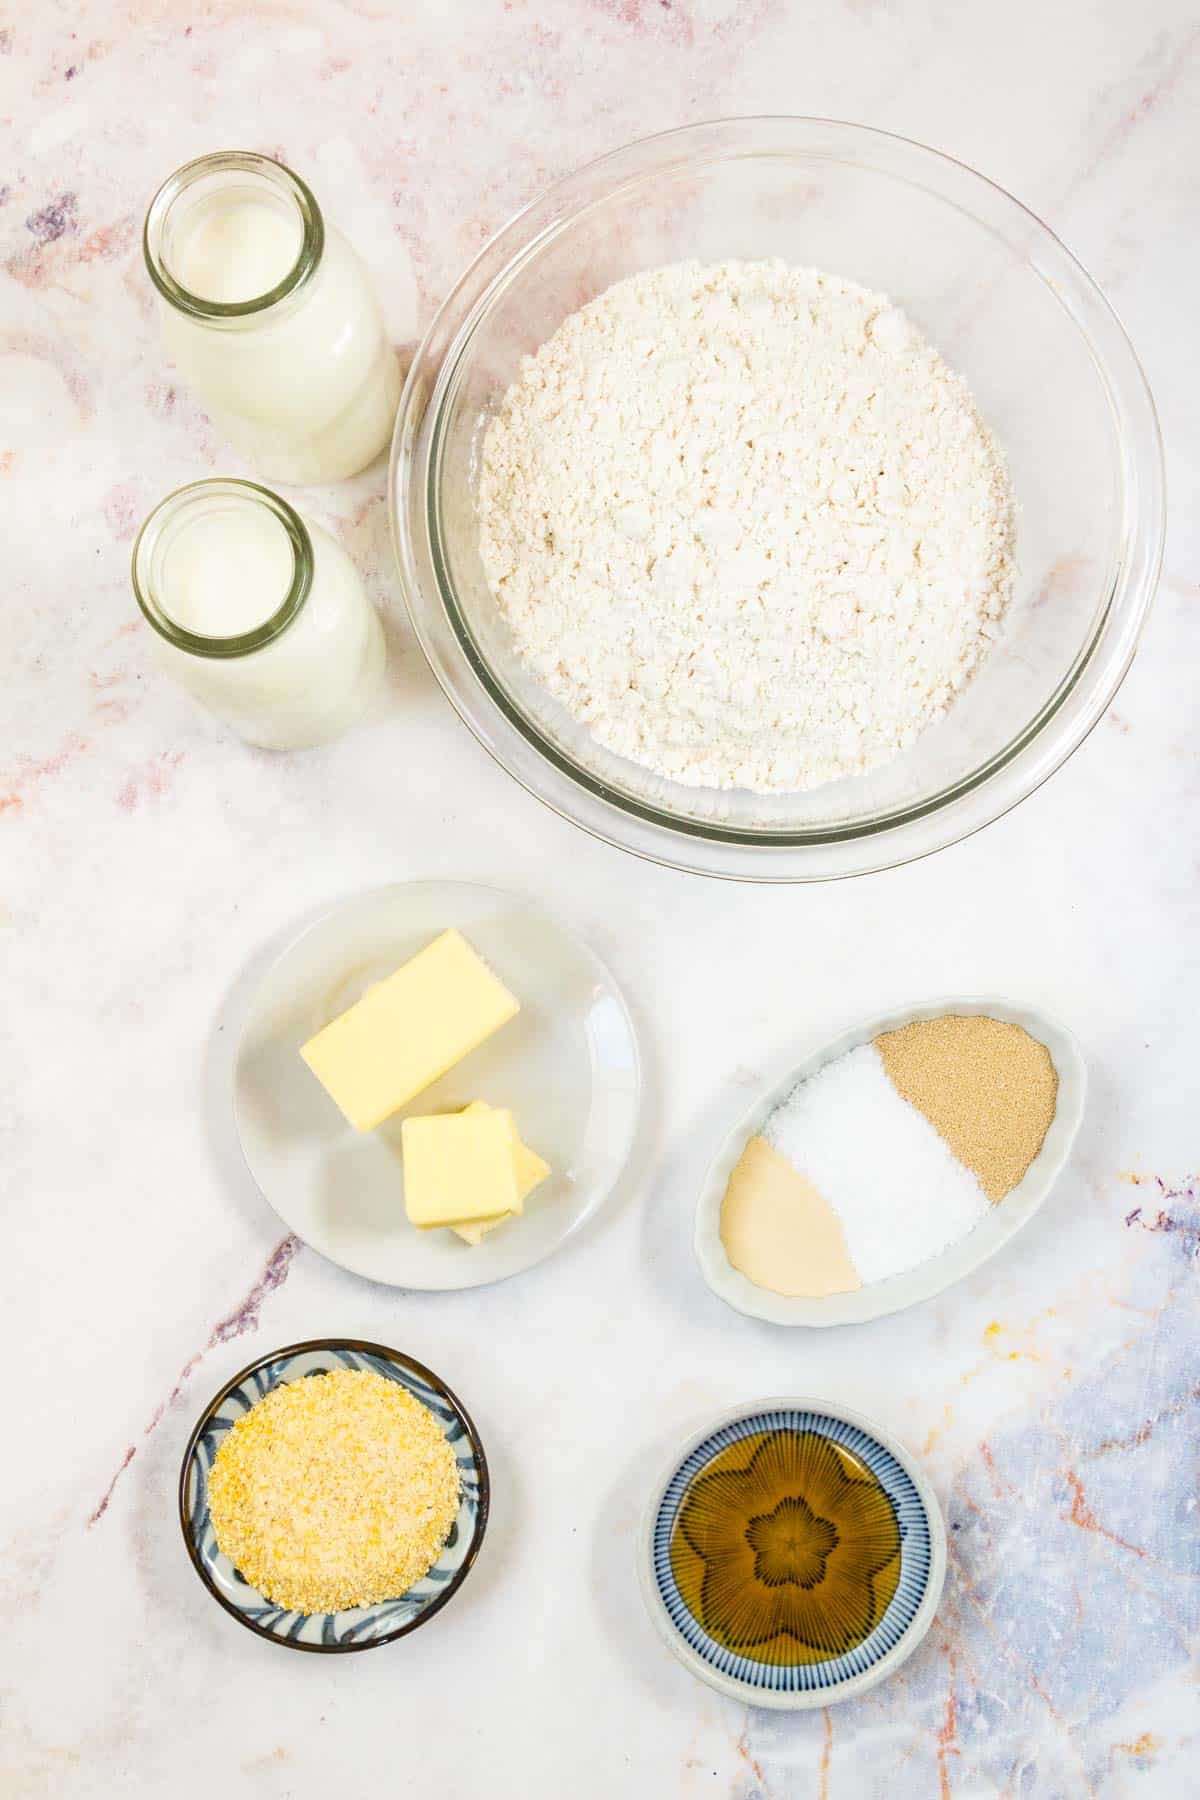
- Gluten-Free Flour: I use Bob’s Red Mill 1-to-1 Baking Flour, but you can use any 1:1 gluten free flour you prefer. Just note that the results may vary!
- Instant Yeast: Dry instant yeast is super quick and easy to use. Be sure to check the expiration date on your package.
- Honey: I use honey in place of sugar to feed the yeast, and lend a little sweetness to the dough.
- Xanthan Gum: A staple of gluten-free baking that binds and thickens the dough ingredients (much in the same way that gluten would). You will need this aditional amount beyond what is in your baking blend.
- Butter: Unsalted offers the most control over the saltiness of the dough. I recommend leaving your butter out for a bit, to let it get to room temperature.
- Buttermilk: Buttermilk gives your homemade English muffins their soft, spongy texture plus a bit of tang.
- Milk: Whole milk is best.
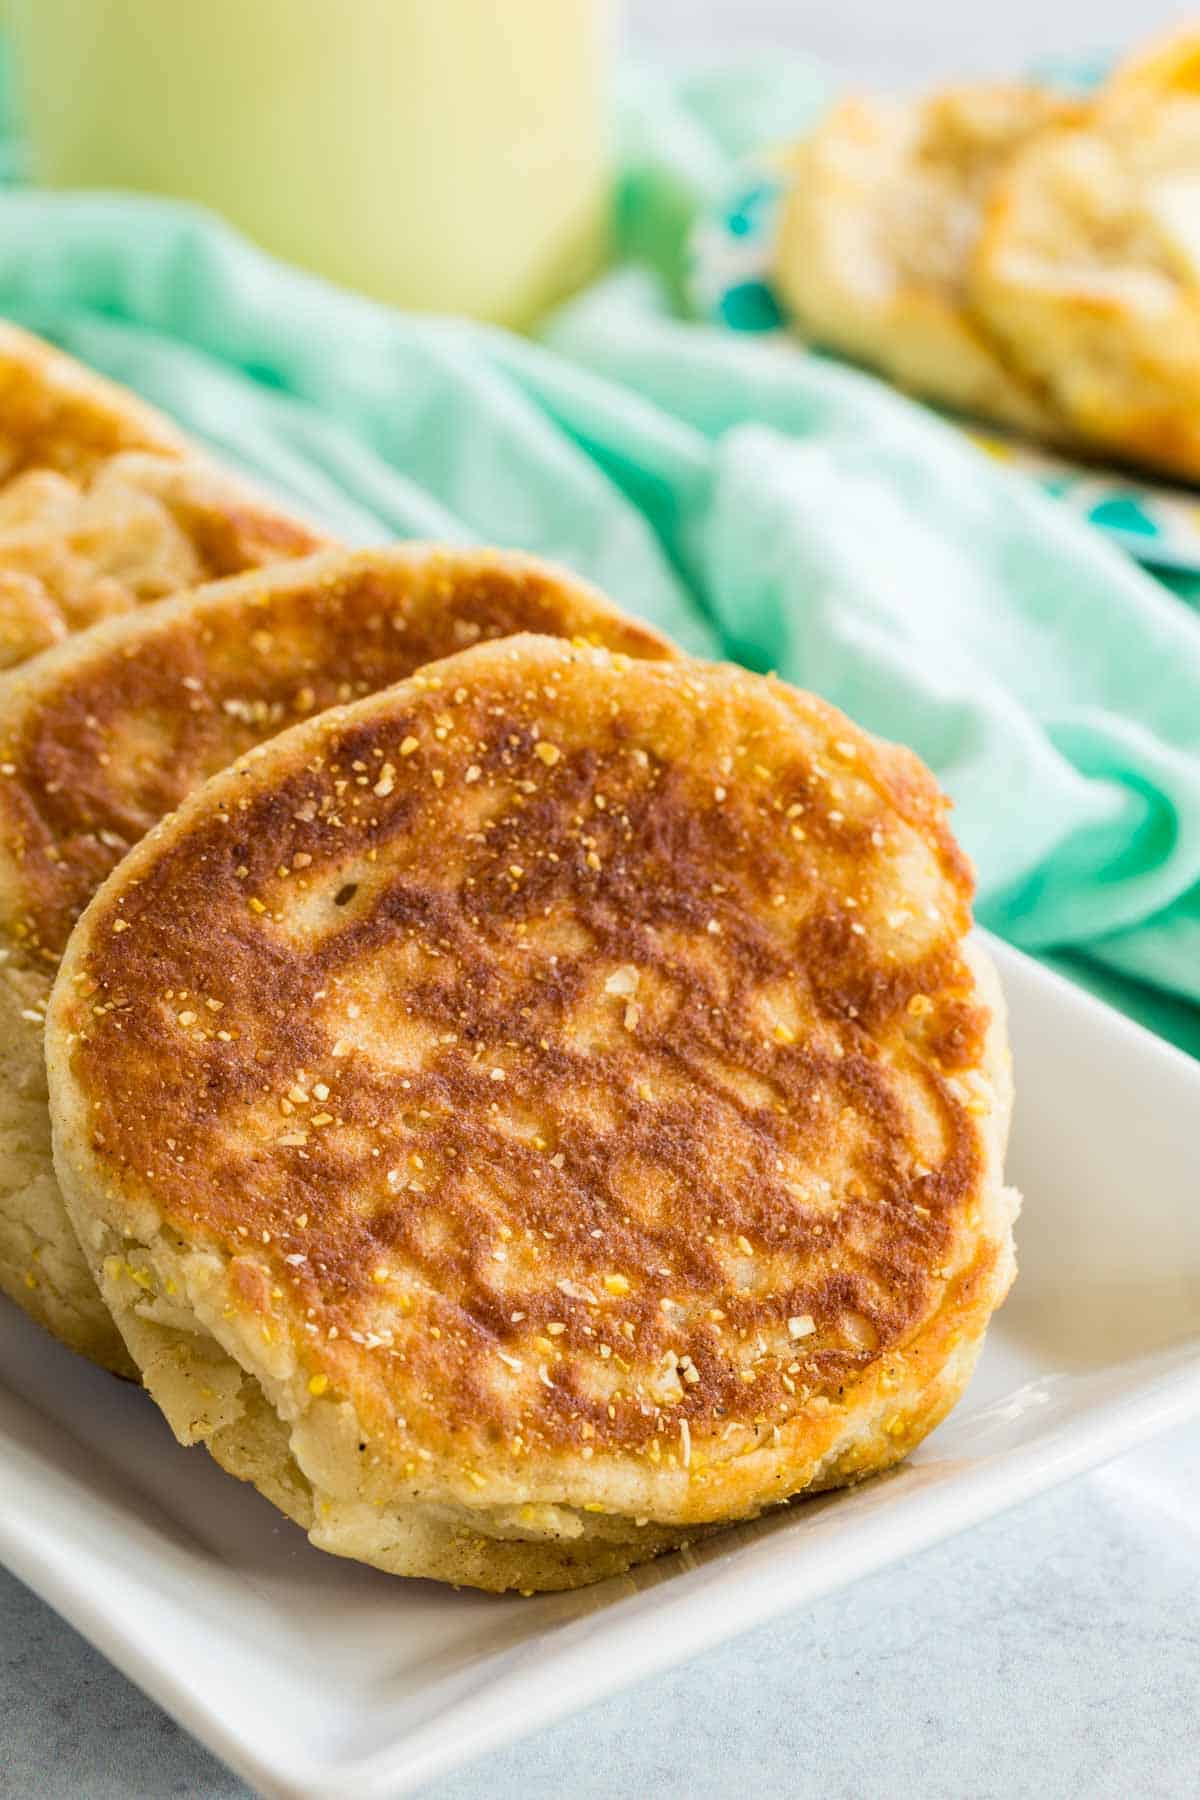
- Cornmeal: If you’ve ever had an English muffin, you know that they have a distinctly grainy exterior. This comes from cornmeal (make sure you get the gluten-free kind). However, the muffins will still turn out delicious even if this isn’t added.
- Salt
How to Make Gluten-Free English Muffins
Have your spatulas at the ready, and let’s griddle some English muffins!
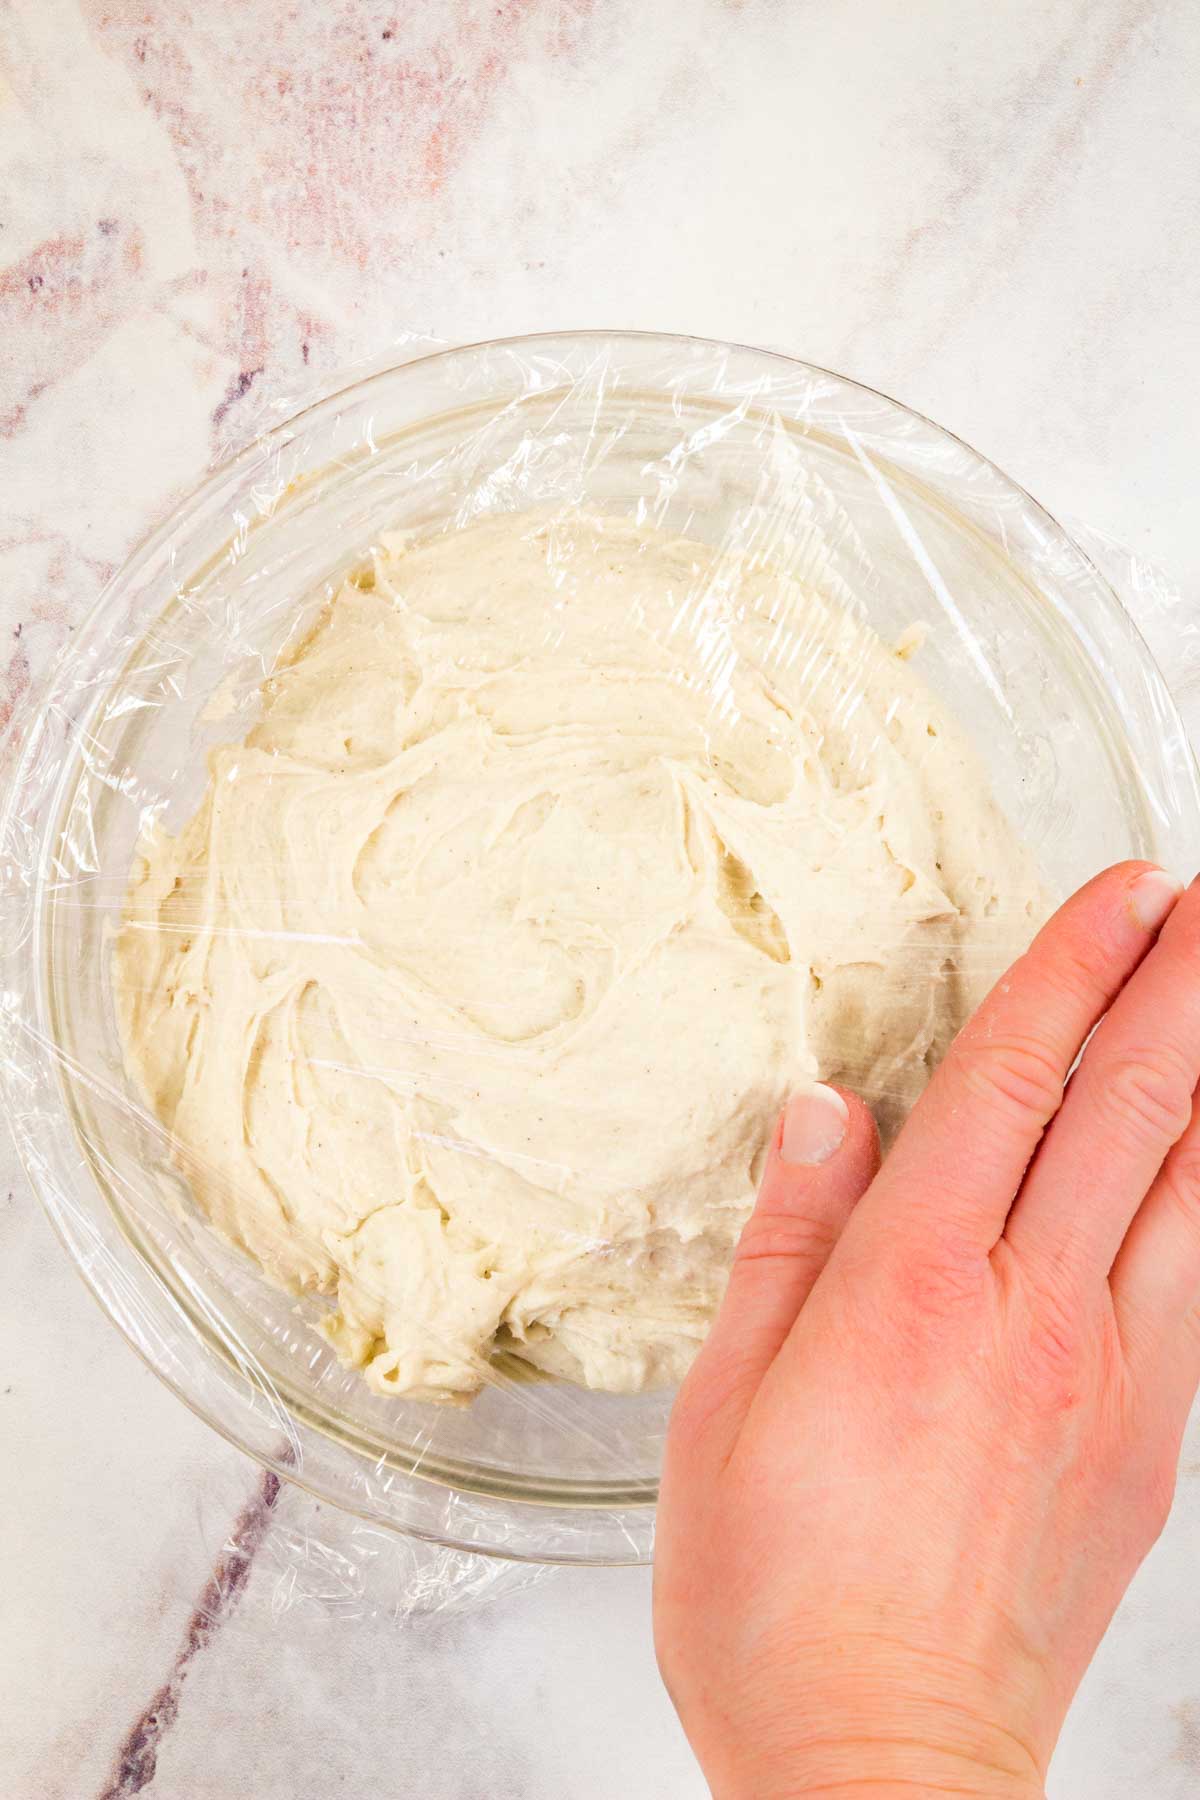
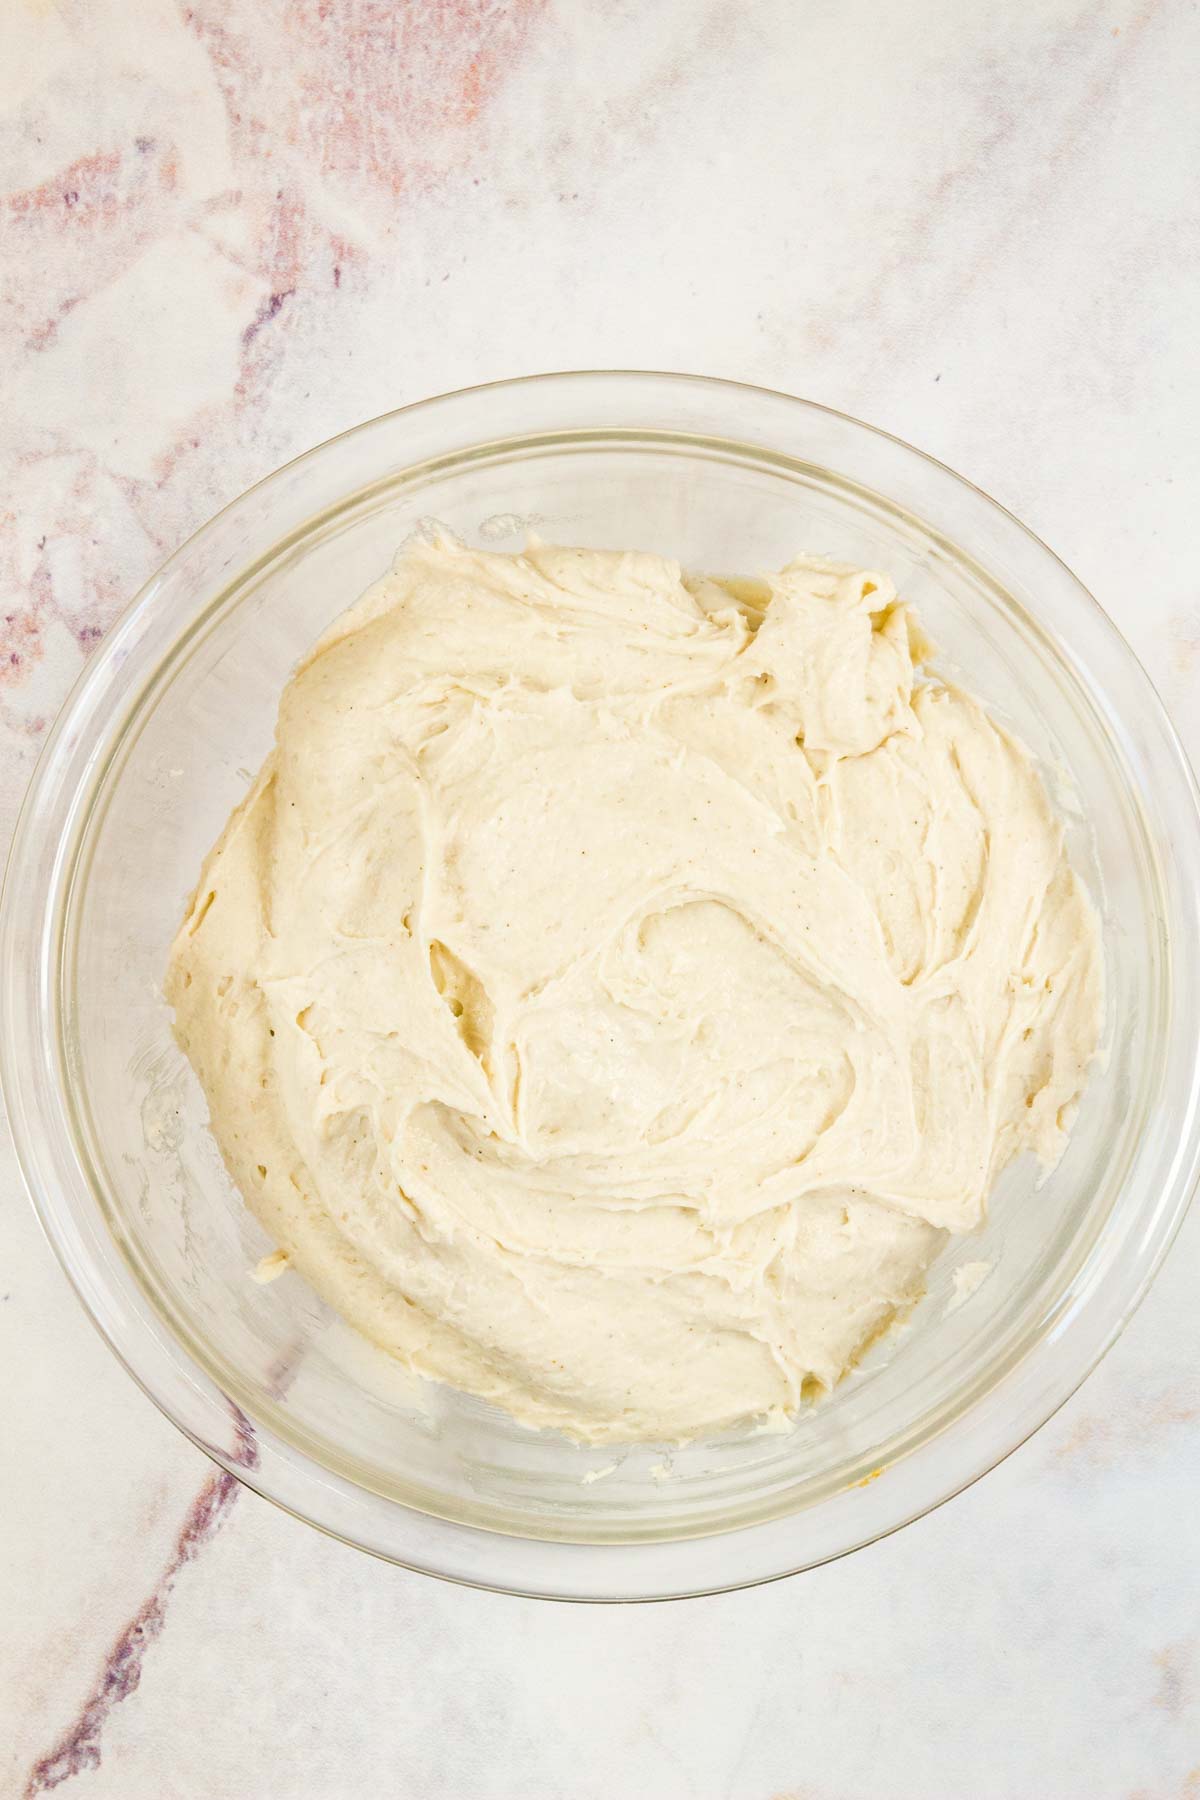
Make the Dough: To start, make the dough by first combining the dry ingredients in a mixing bowl, then adding in the melted butter and honey, milk and buttermilk. Beat until the dough forms a sticky consistency. You can add extra flour if the dough seems too wet.
Proof: Refrigerate the dough, covered, overnight. You can chill it for less time, but the minimum I’d leave it in for is four hours.
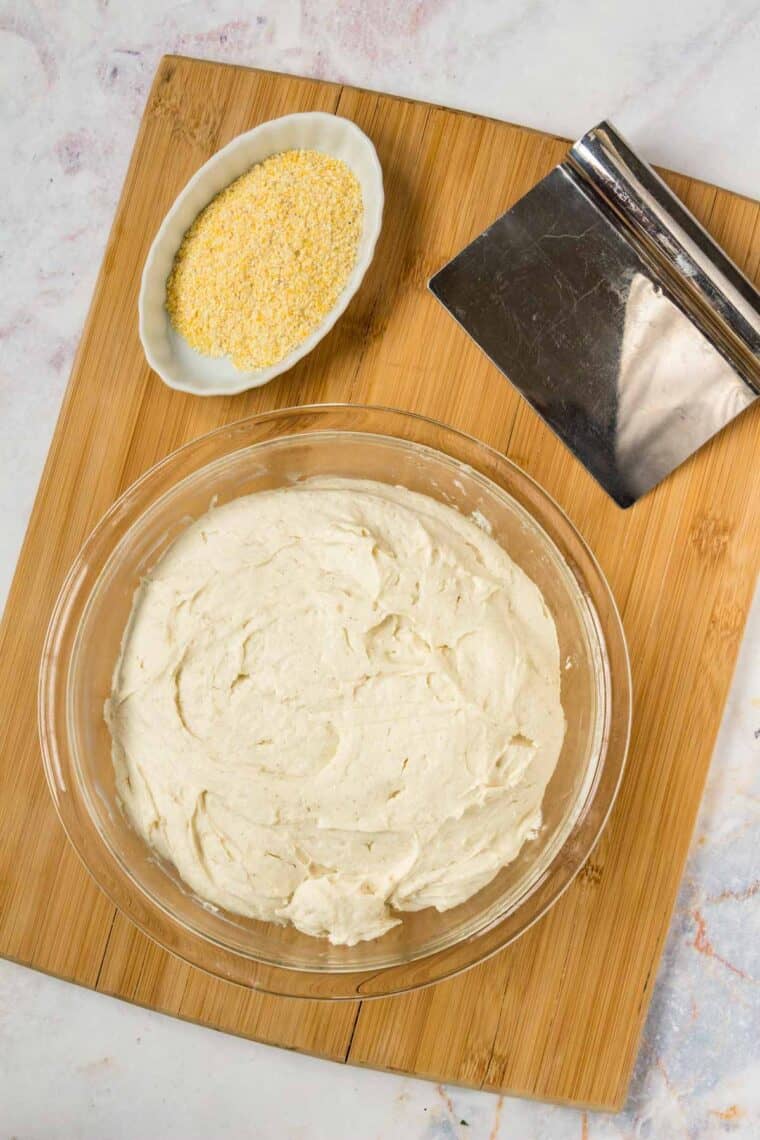
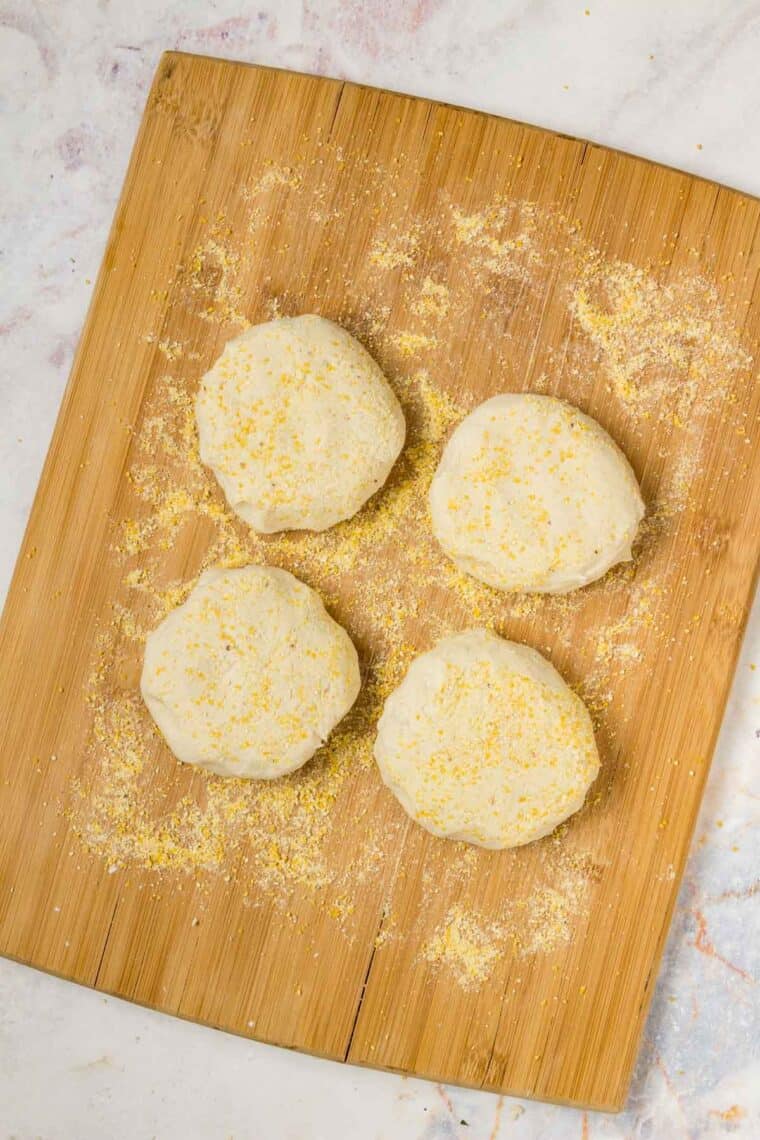
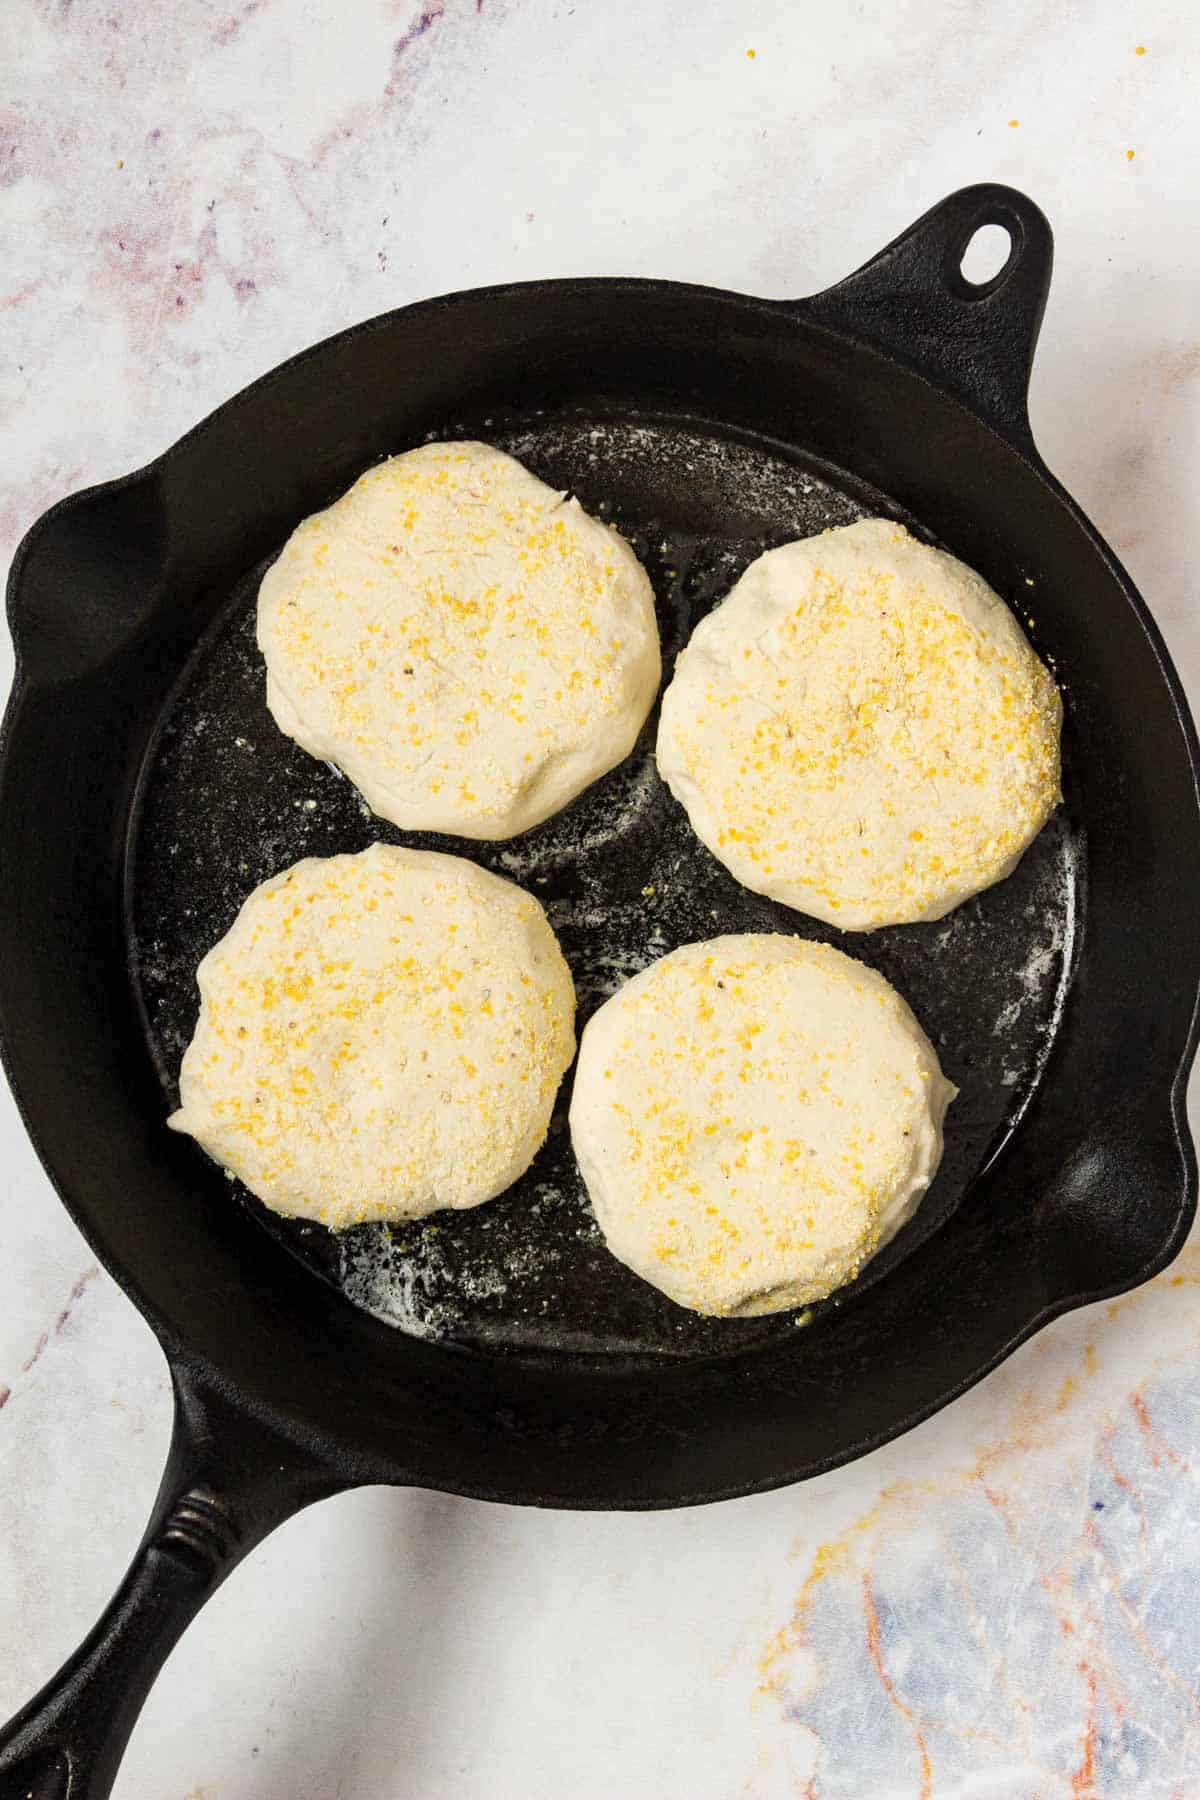
Shape: Working in batches, divide and shape the dough into even-sized muffins. Shape and cook one batch to start, and repeat with the remaining dough (leave this chilling in the fridge for now). Use cornmeal to keep the dough from sticking too much as you shape it, and the muffins should come together easily.
Cook: Cook the muffins on a skillet or griddle coated with melted butter, covered with a lid. Flip half way through to get the muffins nice and browned on both sides, and the center cooked through. Place the cooked muffins on a wire rack to cool.
If you have a stove that tends to run very hot, the English muffins may get too dark on the outside (or possible even burn) before they are cooked thourhg,m leacving you with a gummy interior. In this case, cook the muffins in the skillet for about 5 minutes per side until nice browned, then finish in a 375°F oven for 5-10 minutes.
Tips for Success
- Make More Muffins: The English muffins that come out of this recipe are on the larger size. If you’d rather make smaller ones, cook them in three batches and make 12 muffins instead.
- Don’t Skip the Proofing: Letting the dough proof for hours in the fridge allows the bubbles to form, giving these English muffins their classic texture. Give it as much time to rise as possible!
- Can I Use Muffin Rings?: I personally freestyle my English muffins on the griddle. However, you can use a muffin ring, or even an egg ring, if you’re more comfortable! I’ve heard that some people have had success making their own rings out of foil (doubling it up to make it sturdy enough), or using the lids of mason jars (minus the seal).
- Boost the Nooks and Crannies: Covering the pan while the muffins are cooking traps the steam, which helps the nooks and crannies to develop.
- Make It Easy to Fork-Split: Use a fork to pierce around the edge of the English muffins. This makes it easier to split the muffin in half by hand and keep all the nooks and crannies intact.
How to Serve English Muffins
Once I’ve used a fork to split my homemade English muffins in two, my favorite way to serve them is the old school way! I toast them until they’re crispy and smother them with butter while they’re still warm. Bliss!
You can really serve your English muffins however you like, topped with jam or fruit preserves, with Nutella or peanut butter. These English muffins taste amazing with my Cranberry Orange Butter, too!

Make it a Meal
Center your breakfast around these gluten-free English muffins! Enjoy them alongside scrambled eggs and bacon, or make a homemade Eggs Benedict. You can even load these up with egg and sausage for a satisfying breakfast sandwich.
Try serving your English muffins as part of a healthy meal with any of these other easy breakfast ideas. First, start with some satisfying eggs:
- Tomato Broccoli Sausage Crustless Quiche
- Cheesy Veggie Gluten Free Breakfast Casserole
- Spinach Feta Frittata with Tomato
Then round it out with some sides:
- Family Brunch: Put out a spread that includes Healthy Mixed Berry Baked Oatmeal.
- Make Sunday Breakfast: Toast your muffins and have them with bacon and Easy Cheesy Hashbrown Casserole .
- Have a Quick Morning Meal: Pair with a Blueberry Almond Butter Smoothie on your way out the door.

Storage and Reheating
Store your homemade English muffins in an airtight container at room temperature for up to 2 days. Reheat them in the toaster or on the stovetop to get them crispy again.
Do These Freeze Well?
Yes, these gluten-free English muffins can be frozen for up to 4 months! Once the cooked muffins have cooled off, transfer them to a freezer bag to keep them frozen until you’re ready to use them. Thaw your English muffins in the fridge before serving.
More Gluten-Free Breads to Try
- Banana Bread with Chocolate Chips and Walnuts
- Gluten Free Garlic Breadsticks
- Brazilian Cheese Bread
- Gluten-Free Cornbread
- Gluten Free Pita Bread
Gluten Free English Muffins
Ingredients
- 3 cups gluten-free 1:1 flour plus an additional 2-4 Tablespoons if needed (I use Bob’s Red Mill 1-to-1 Baking Flour)
- 1 tbsp kosher salt
- 2 tsp instant yeast
- 1 tbsp xanthan gum
- 6 tbsp unsalted butter divided
- 1 tbsp honey
- 1 cup buttermilk
- 1 cup whole milk
- gluten free cornmeal
Instructions
- In a large mixing bowl or stand mixer with the paddle attachment, combine the flour, kosher salt, instant yeast, and xanthan gum.
- Chop 4 tablespoons of the butter into small pieces and add to a microwave-safe bowl with the honey. Cover with wax paper and microwave for about 30-60 seconds, until melted.
- Turn the mixer on low and slowly pour in the buttermilk, milk, and honey-butter mixture. When everything is combined, increase the speed to medium and mix for 5 minutes. The dough should be sticky, but not wet. Add another 2 to 4 Tablespoons of flour, if needed.
- Cover the bowl with plastic wrap and place it in the refrigerator for at least 4 hours and preferably overnight.
- When you’re ready to cook, dust a work surface with cornmeal. Lightly dust your hands with gluten free flour to make the dough easier to handle. Divide the dough in half and place half back in the refrigerator. Divide and shape the first piece of dough into 4 English muffins about 1 inch thick and 3 inches wide, using the cornmeal to prevent it from sticking. Handle the dough as little as possible/ They should come together easily. If the dough starts to warm up too much, put it back in the fridge to chill before shaping.
- Heat a large cast-iron skillet or griddle with a lid to medium. Add a tablespoon of butter.
- When the butter is melted, place four muffins into the skillet and cover. Cook for 7-8 minutes, until the bottom is nicely browned, then flip. Reduce the temperature as necessary to prevent browning, you’ll probably want to lower the skillet to medium-low for the second side. Cover and cook for 8-10 minutes, until the other side is nicely browned and the center is cooked through (the internal temperature must reach at least 190°F). Transfer to a wire rack to cool.If you have a stove that tends to run very hot, the English muffins may get too dark on the outside (or possible even burn) before they are cooked thourhg, leacving you with a gummy interior. In this case, cook the muffins in the skillet for about 5 minutes per side until browned, then finish in a 375°F oven for 5-10 minutes.
- Repeat with the remaining half of the dough and another tablespoon of butter in the pan.
Notes

Did you make this?
Leave a star rating to help others know that they should make this recipe.
Share a photo and tag @cupcakesandkalechips on Instagram!
I tried this English Muffin recipe and it didn’t turn out well. 1 it was too salt.
But the really problem was it was gummy inside. I have had this problem when trying to make bread gluten free too.
I used to make bread and biscuits and such all the time with regular flours with great success.
But I can’t figure out what’s going wrong.
Any thoughts of how I can fix this. I so miss baking.
One thing with this specific recipe is to start off the cooking in the pan and finish it in the oven. In general, sometimes you might need to try a different flour. Which one did you use?
Too much salt. 3x the salt of other recipes. Cut salt in half !!! Otherwise decent.