
Gluten Free Breadsticks

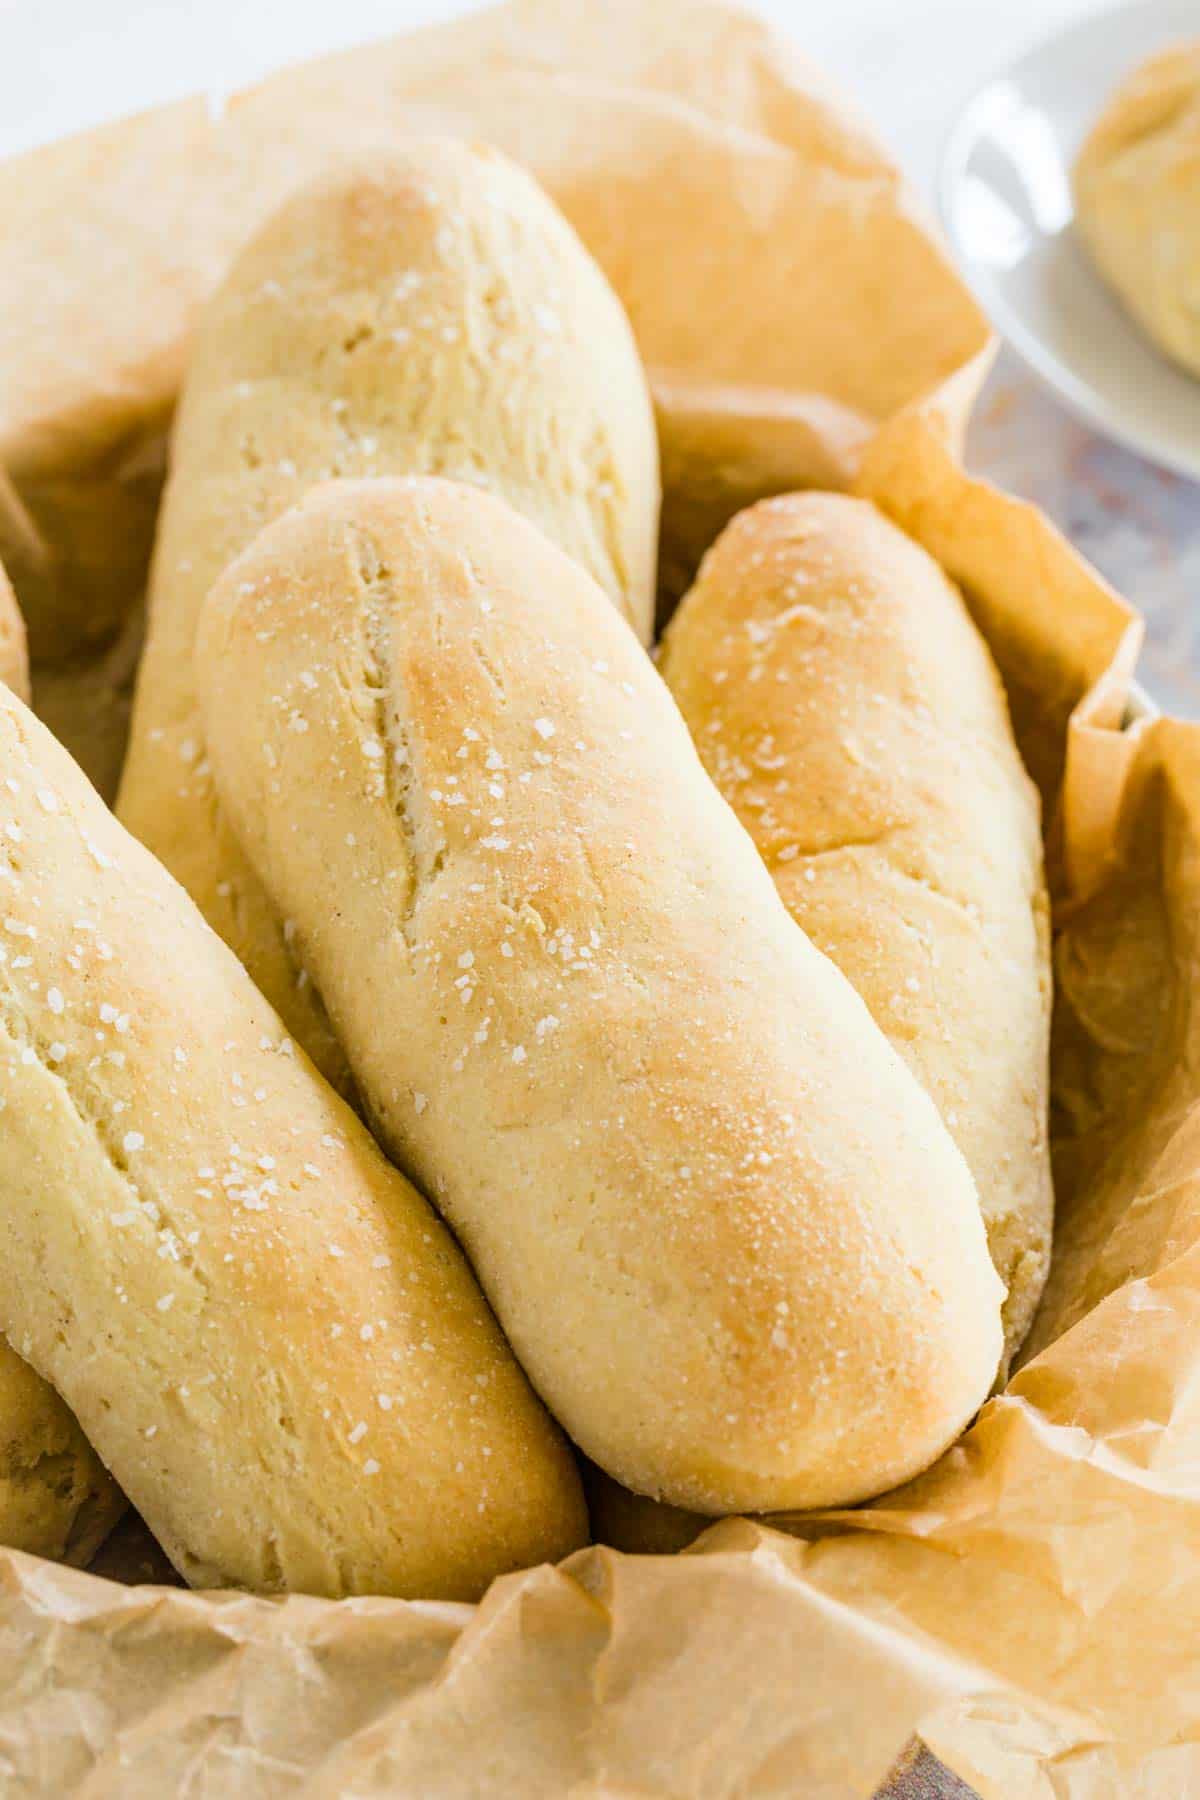
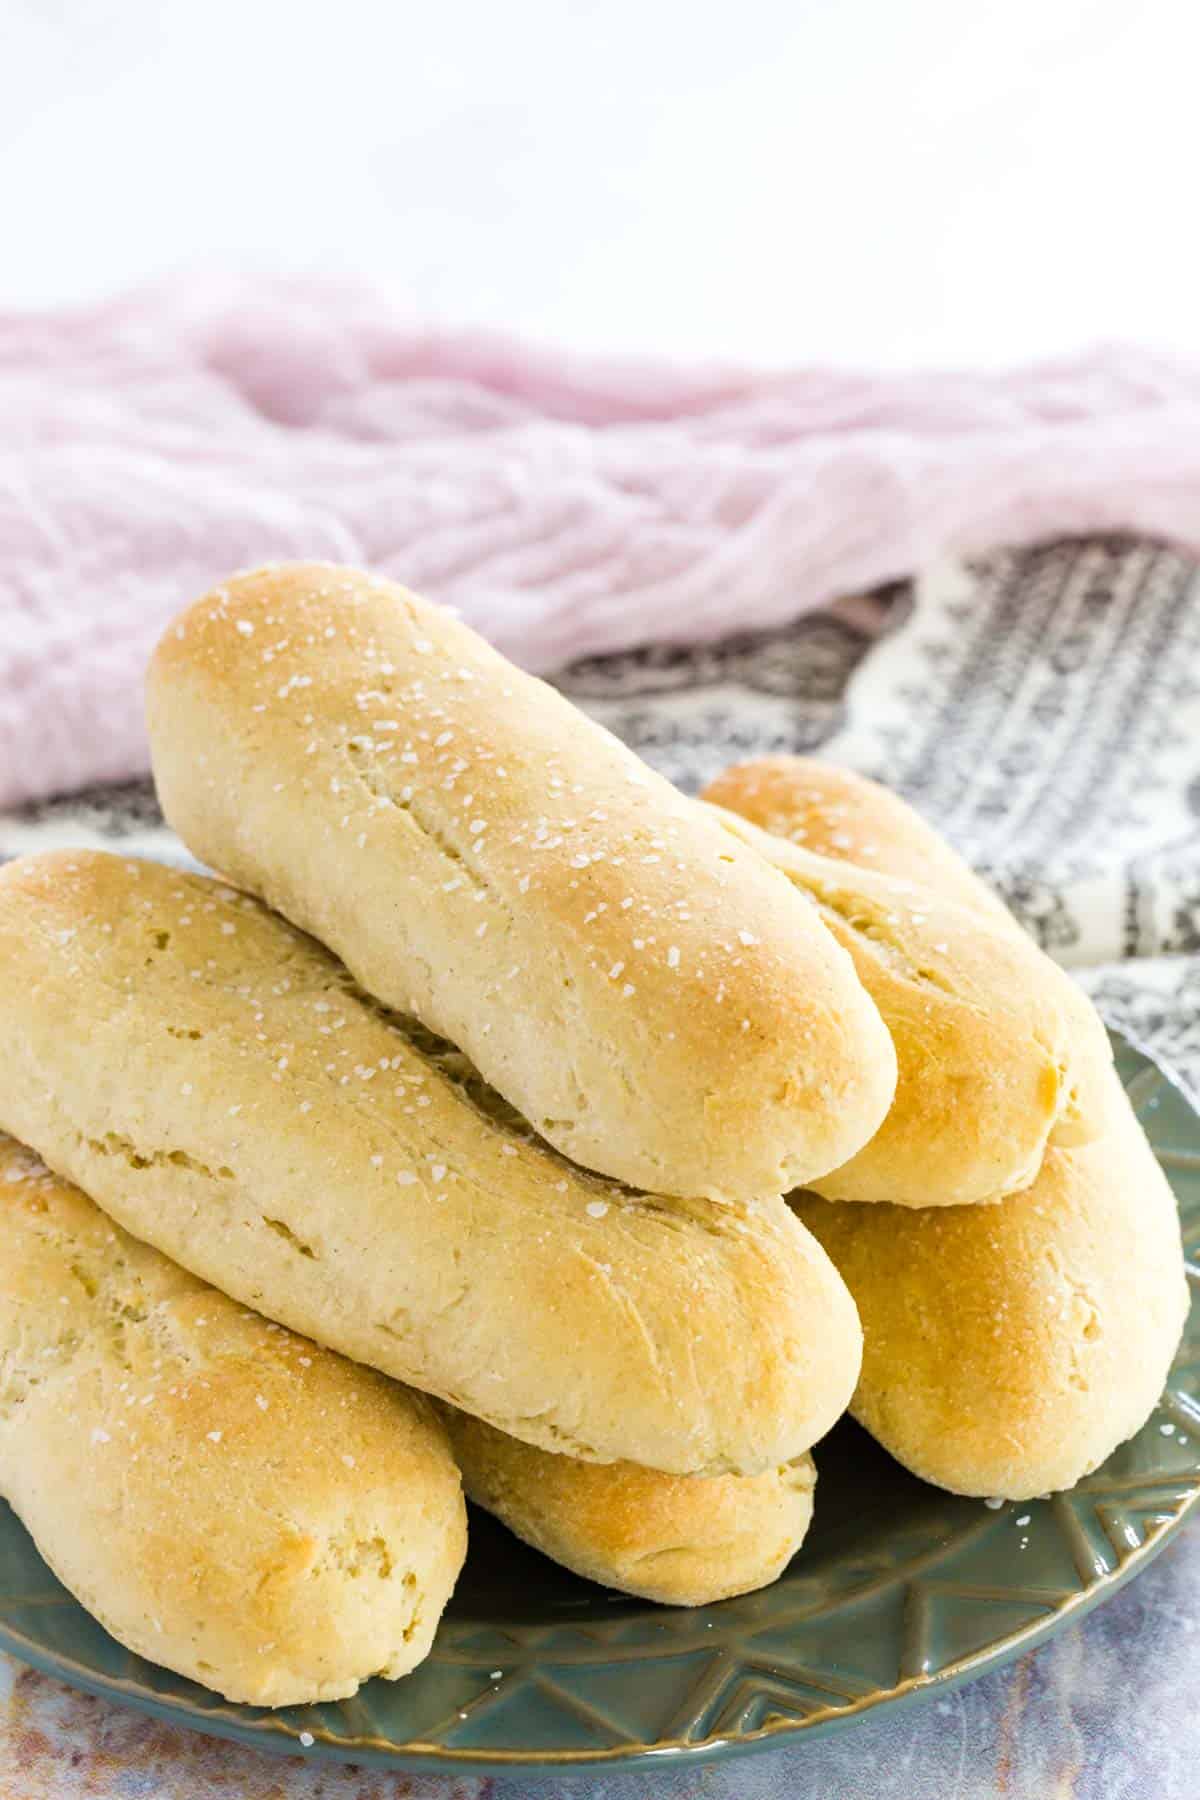
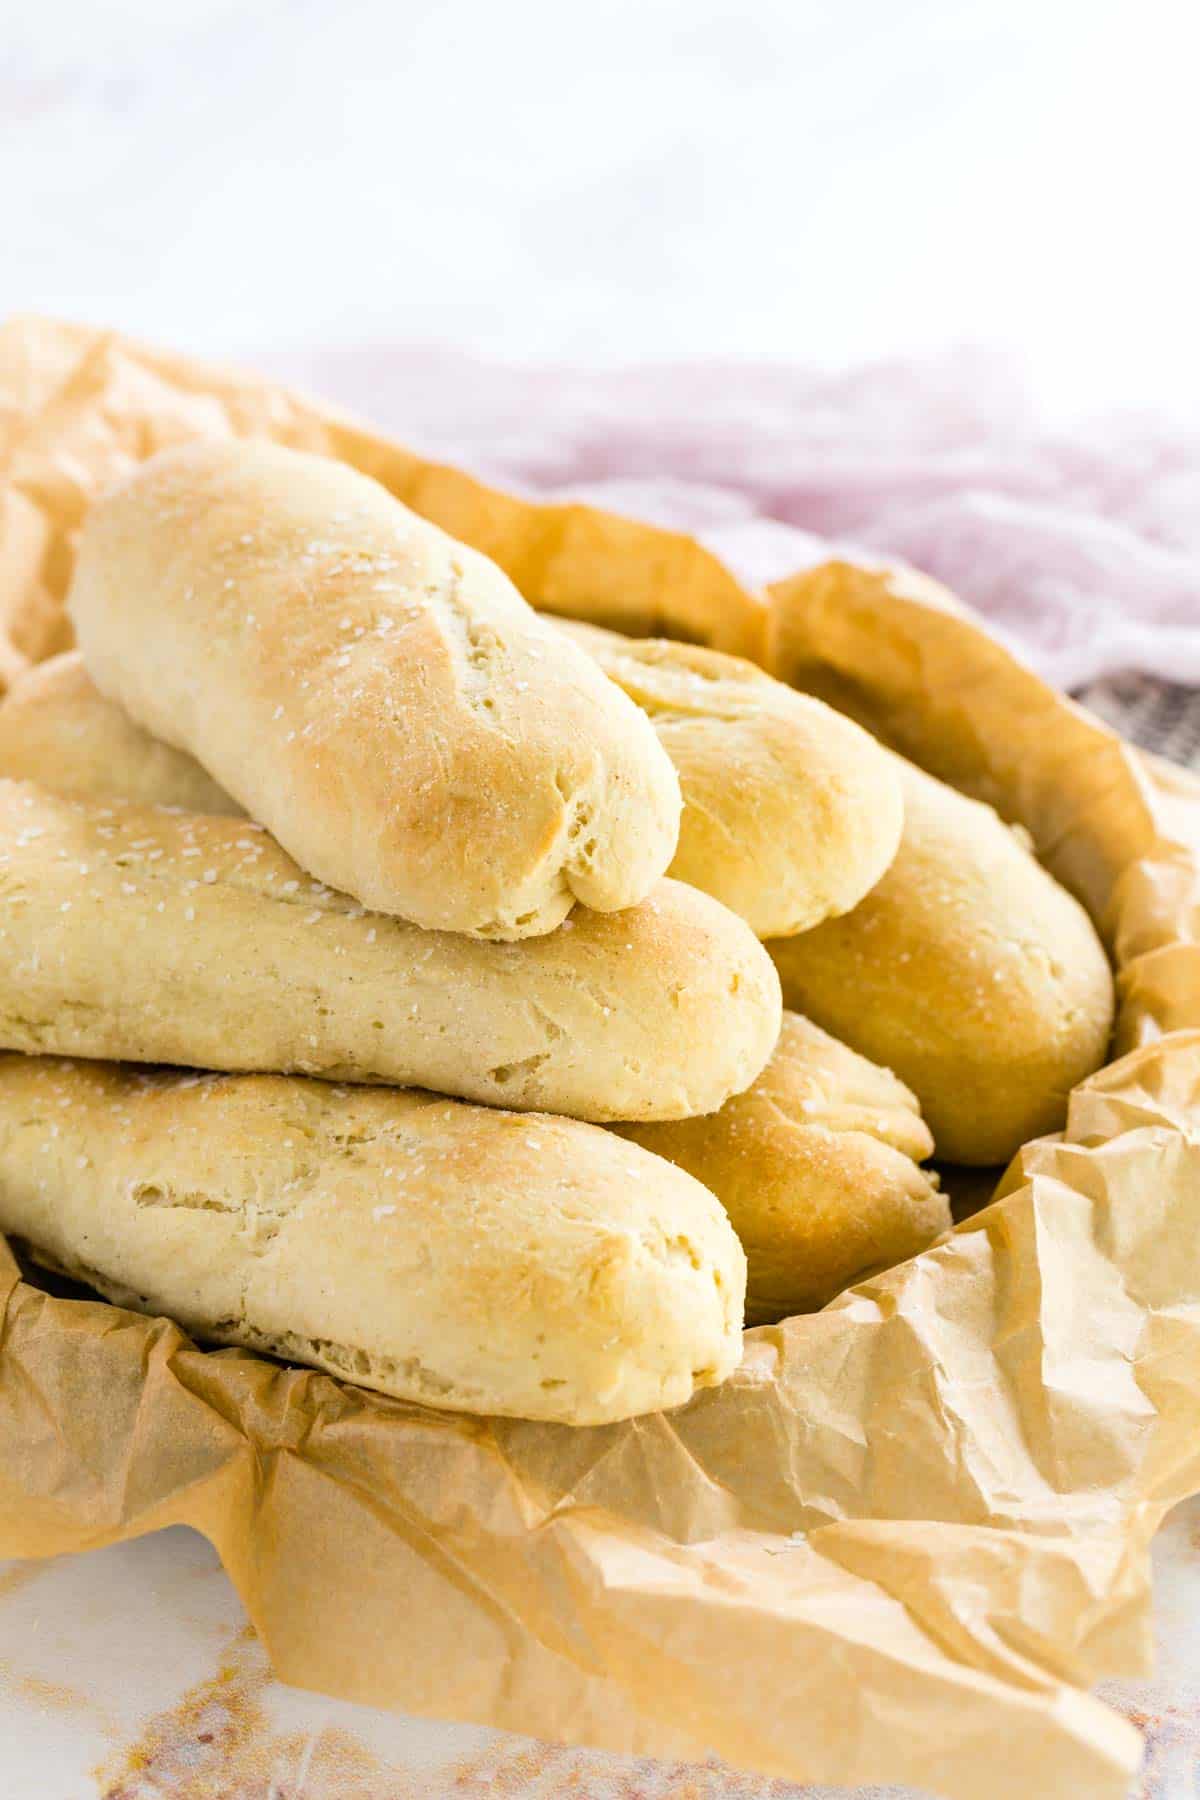
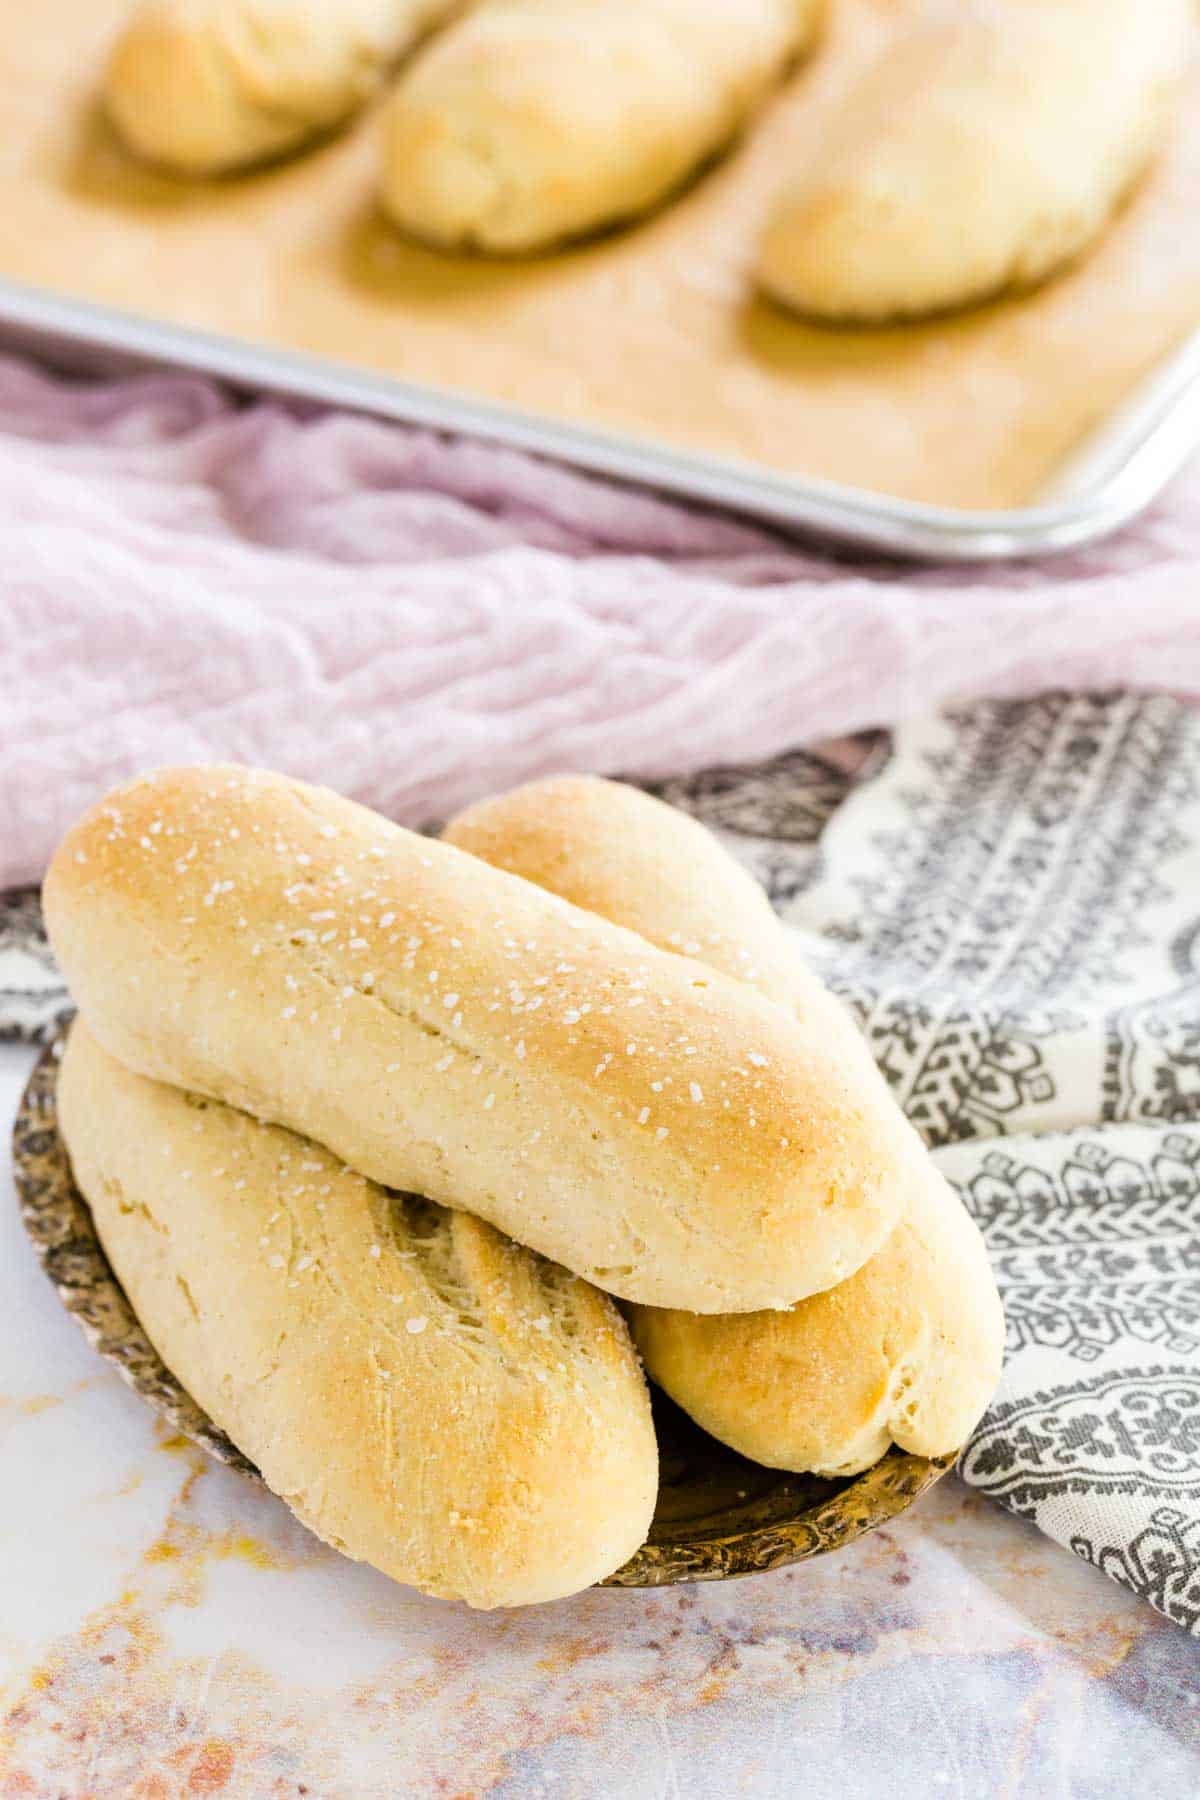
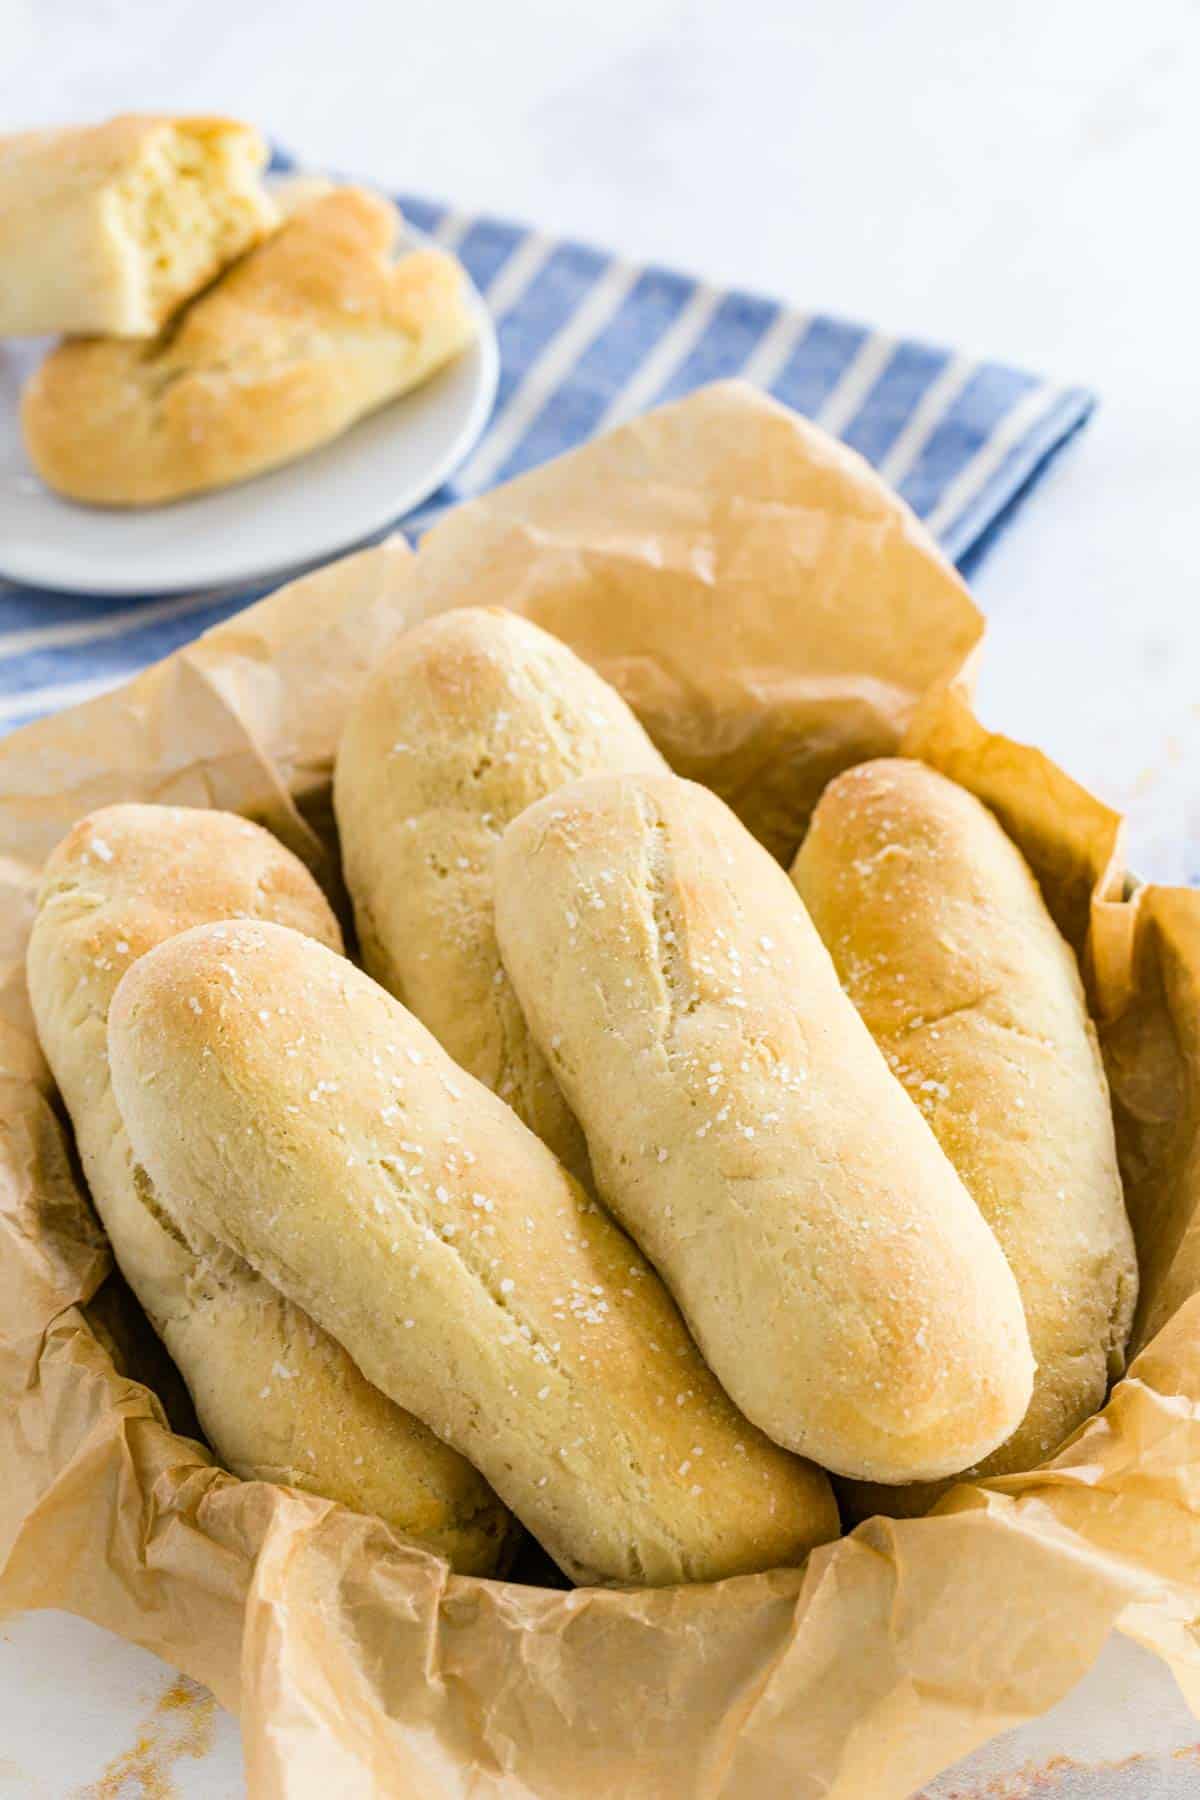
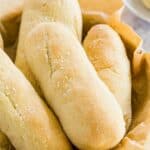
These Gluten Free Breadsticks are the best you’ll ever make from scratch! It’s impossible to resist the soft, fluffy texture of these golden baked beauties. Serve your homemade breadsticks with a meal like soups and pasta or dip them in sauces for a quick and easy appetizer!
This Gluten-Free Recipe Makes the Best Breadsticks Ever!
Is there anyone who can resist a warm breadstick? Or name any meal that isn’t improved with breadsticks for that matter? I think not! Which is why today, I’m super excited to share the most perfect, gluten-free homemade breadsticks that you’ll ever have.
This is the best breadsticks recipe that you can make in your own kitchen. It really checks all of the boxes:
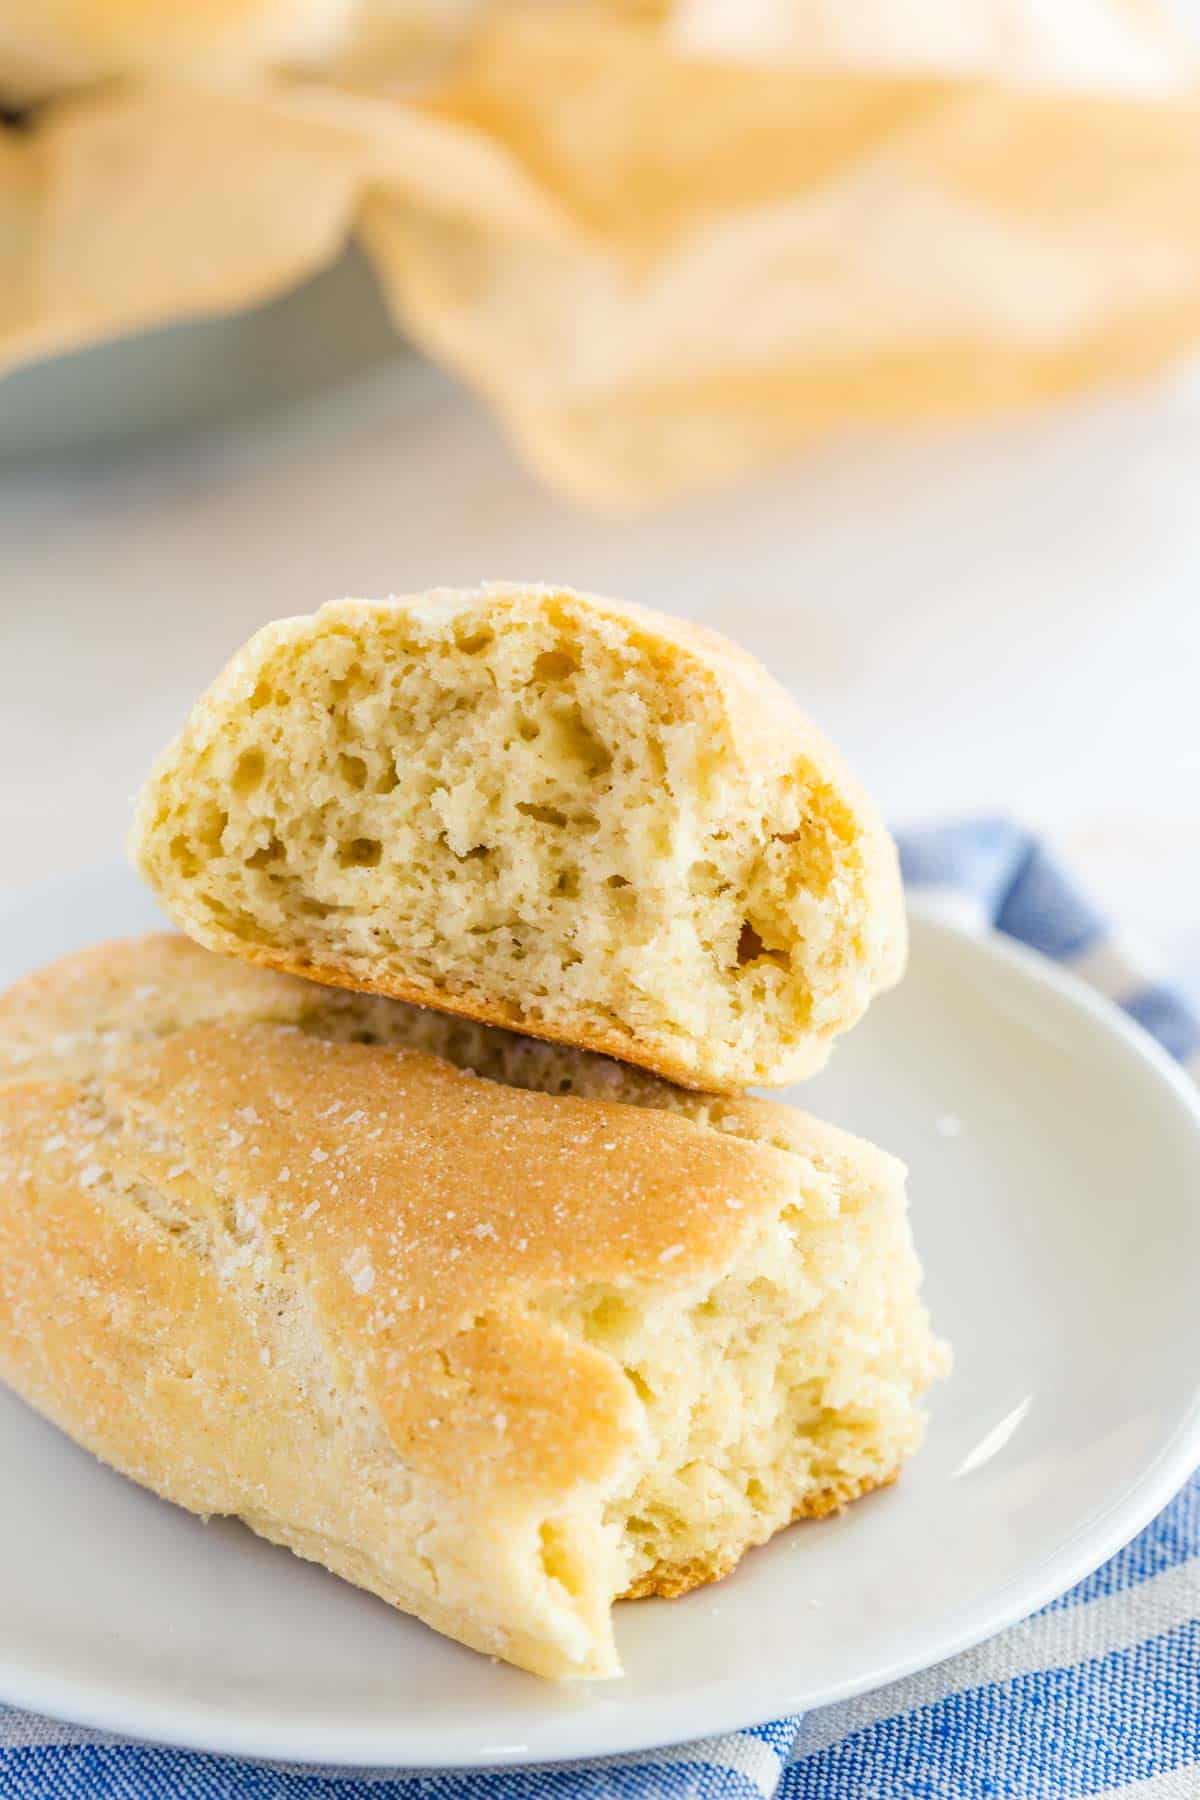
- They’re soft and fluffy. Airy on the insides, with a slight crispy give on the outsides. Like mini French baguettes! These turn out great every time.
- They’re gluten-free. Because I’m not one to let gluten stand in the way of delicious baking.
- They’re great for making ahead. Breadsticks anytime? Don’t mind if I do. This recipe freezes up nicely for easy storage and reheating (more on this later).
- They’re customizable. Reinvent your favorite restaurant-style breadsticks into your own homemade versions! From gluten-free cheesy breadsticks to garlic breadsticks, perfect for dipping in all kinds of sauces.
I could go on. But then we’d never get to the task at hand: getting these incredible breadsticks into your oven and then onto your table, pronto!
What You’ll Need
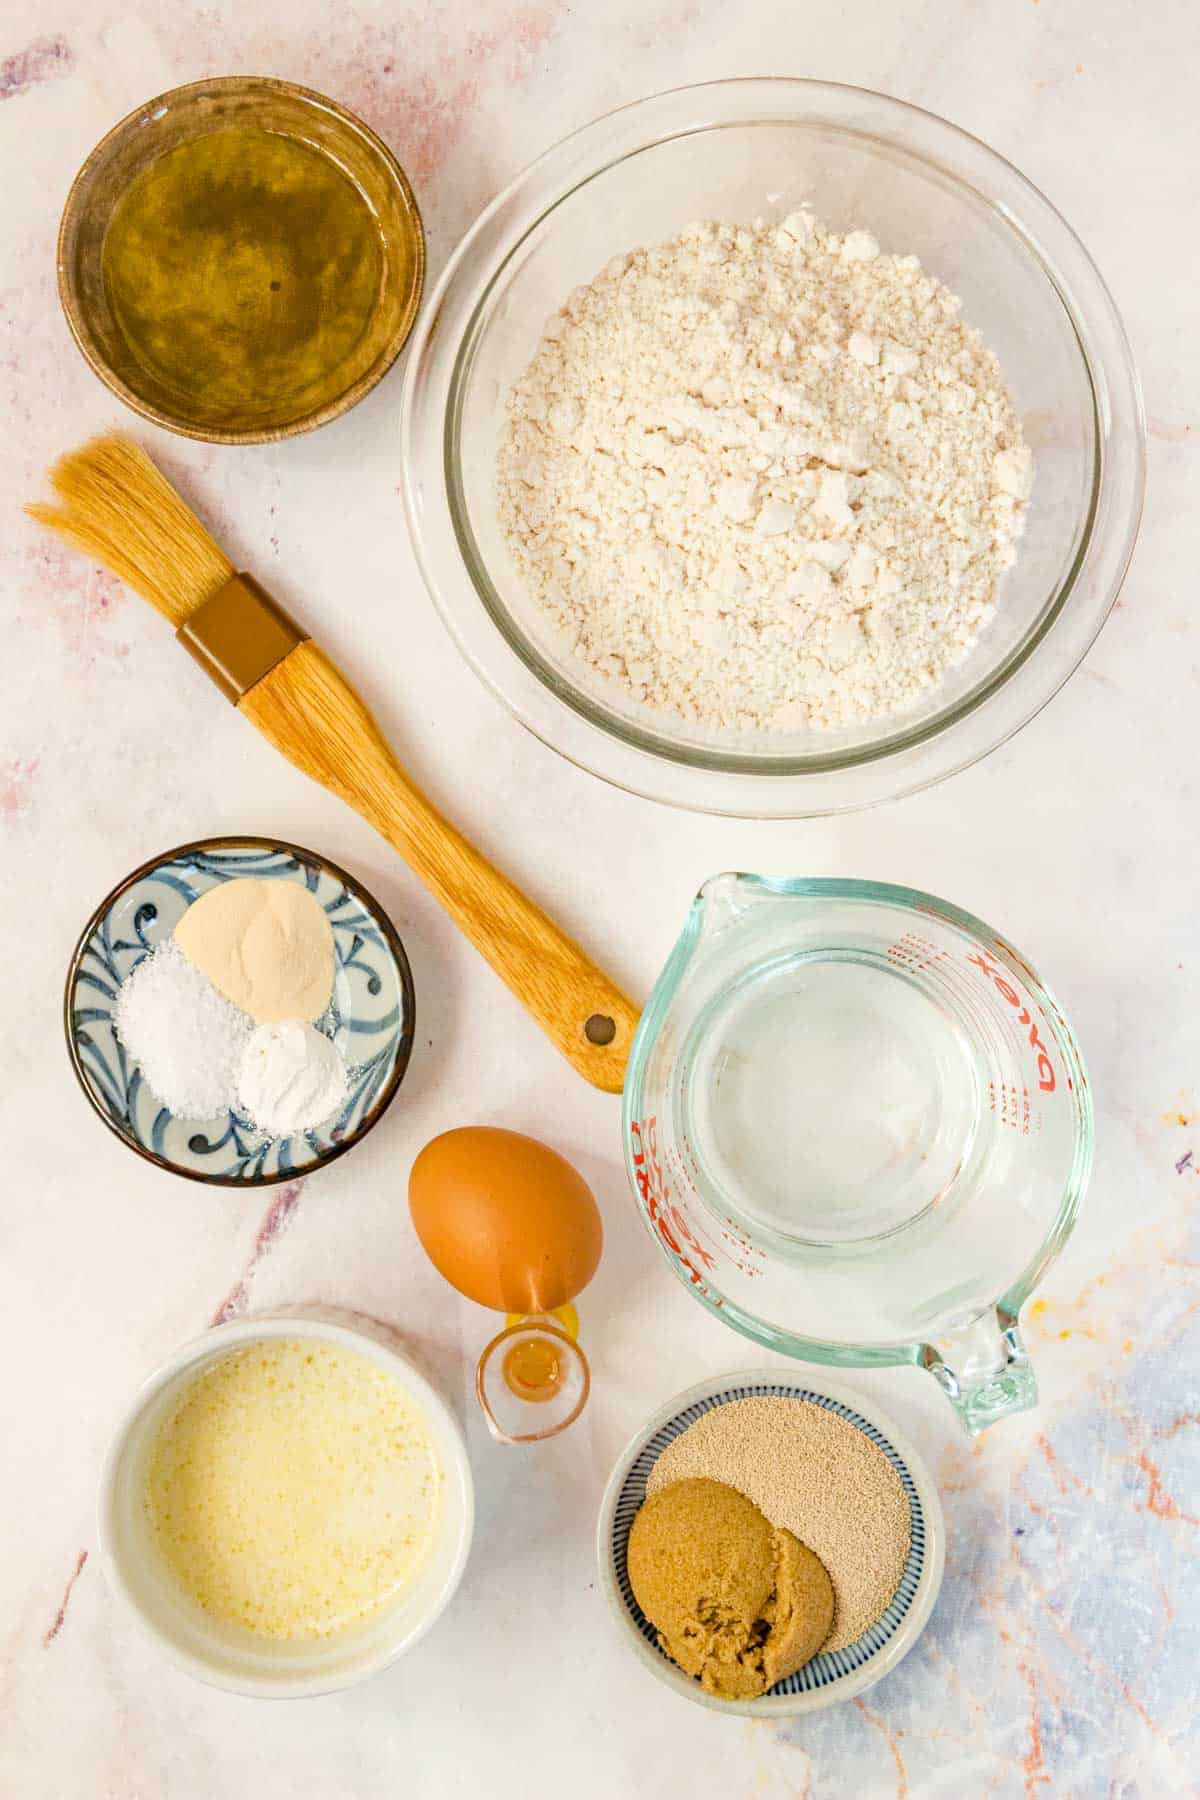
The ingredients for the gluten-free dough are pretty standard, and common in most baking aisles nowadays. Here’s what you’ll need to make these breadsticks:
- Gluten-Free Flour: You preferred brand of gluten-free all-purpose flour. I used King Arthur Measure for Measure.
- Active Dry Yeast: Alternatively, you can use instant yeast (note than in this case you won’t need to proof it first, and the rise time will be less. You can add the yeast in with the dry ingredients and then combine with the wet ingredients).
- Brown Sugar: For added depth of flavor as well as for proofing the yeast.
- White Vinegar: Lemon juice will also work.
- Xanthan Gum: Helps thicken the dough and gives these gluten-free breadsticks their perfectly chewy and moist texture.
- Baking Powder: If you’re avoiding gluten for celiac or other dietary reasons, be sure to check that the baking powder you use is actually gluten-free!
- Butter: Melted.
- Egg
- Salt
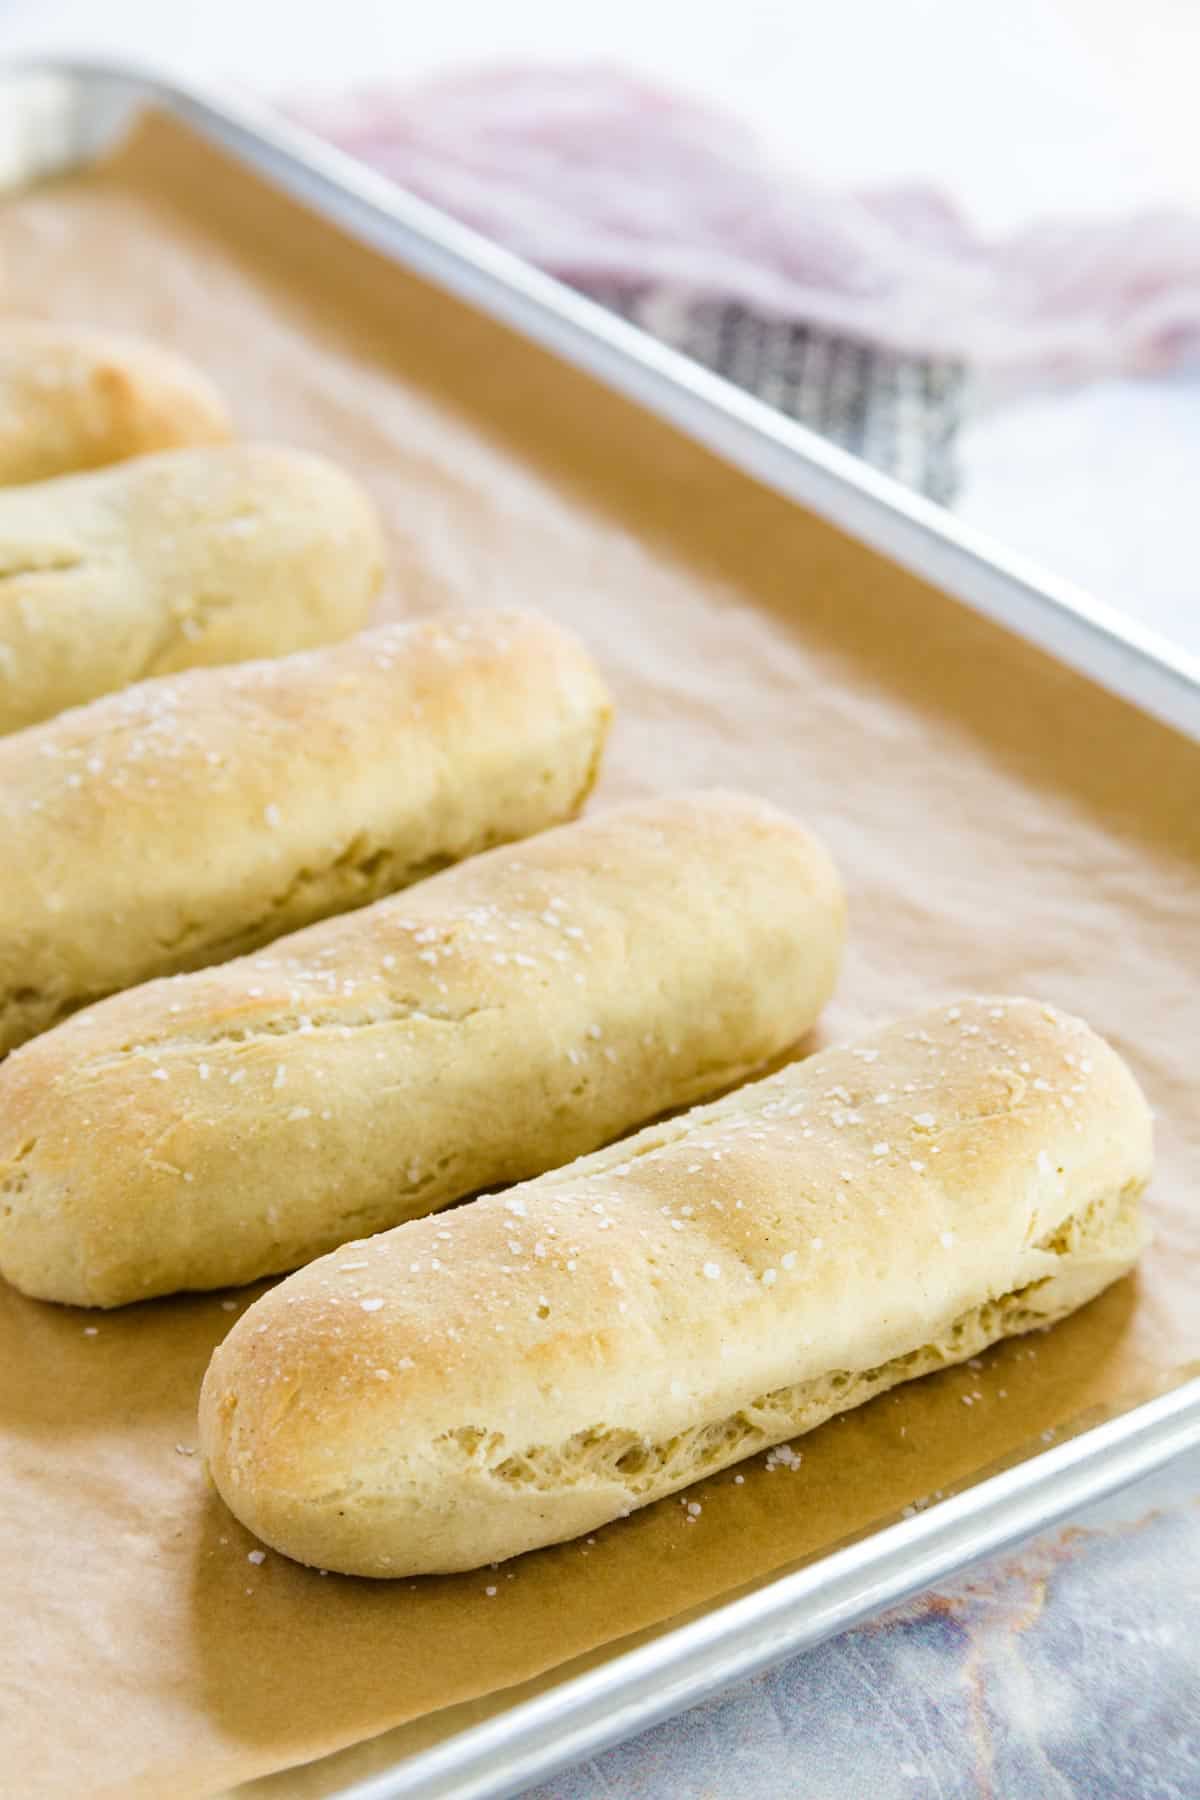
- Olive Oil & Flaky Salt: For brushing and topping. Optional but recommended!
How to Make Gluten-Free Breadsticks
This recipe for breadsticks earns bonus points for the fact that you can make them in only 3 steps. This is what’s involved:
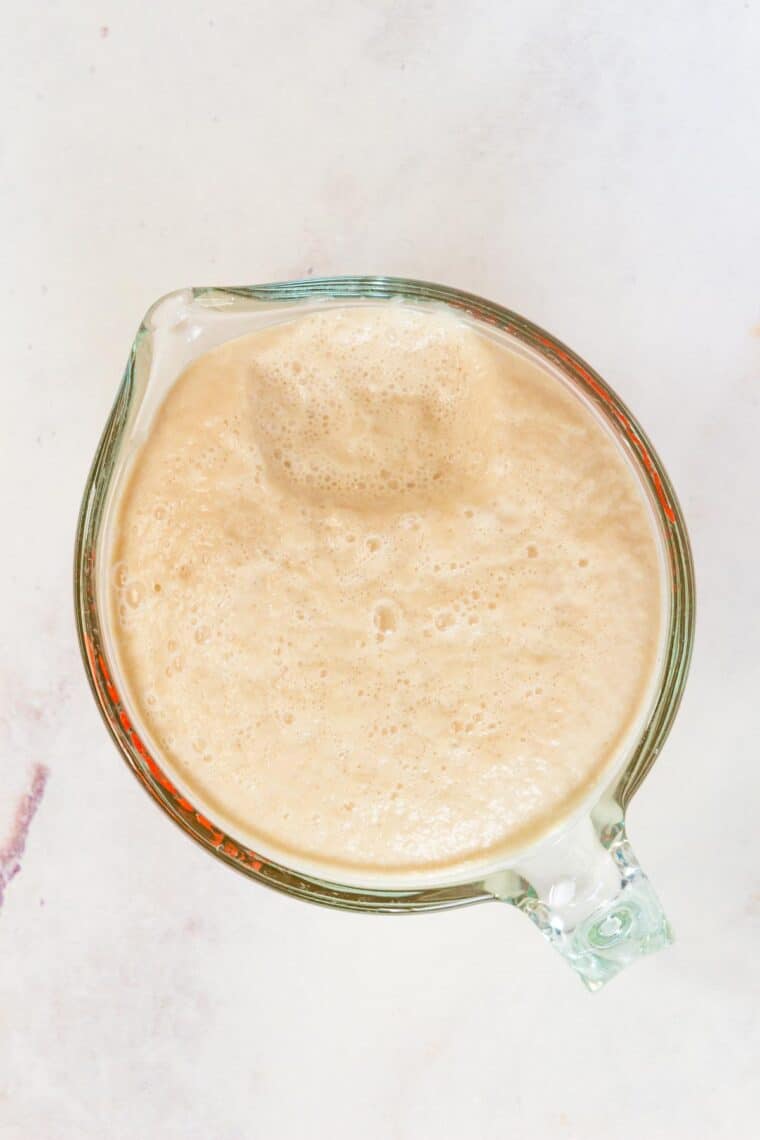
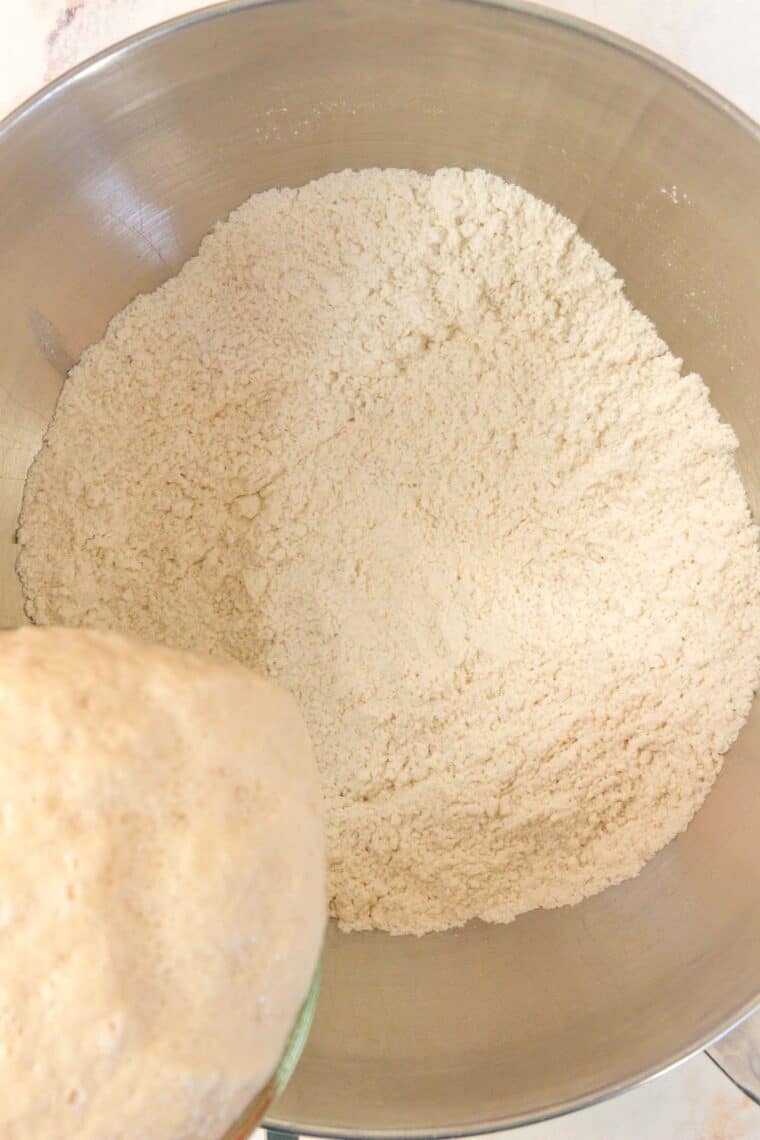
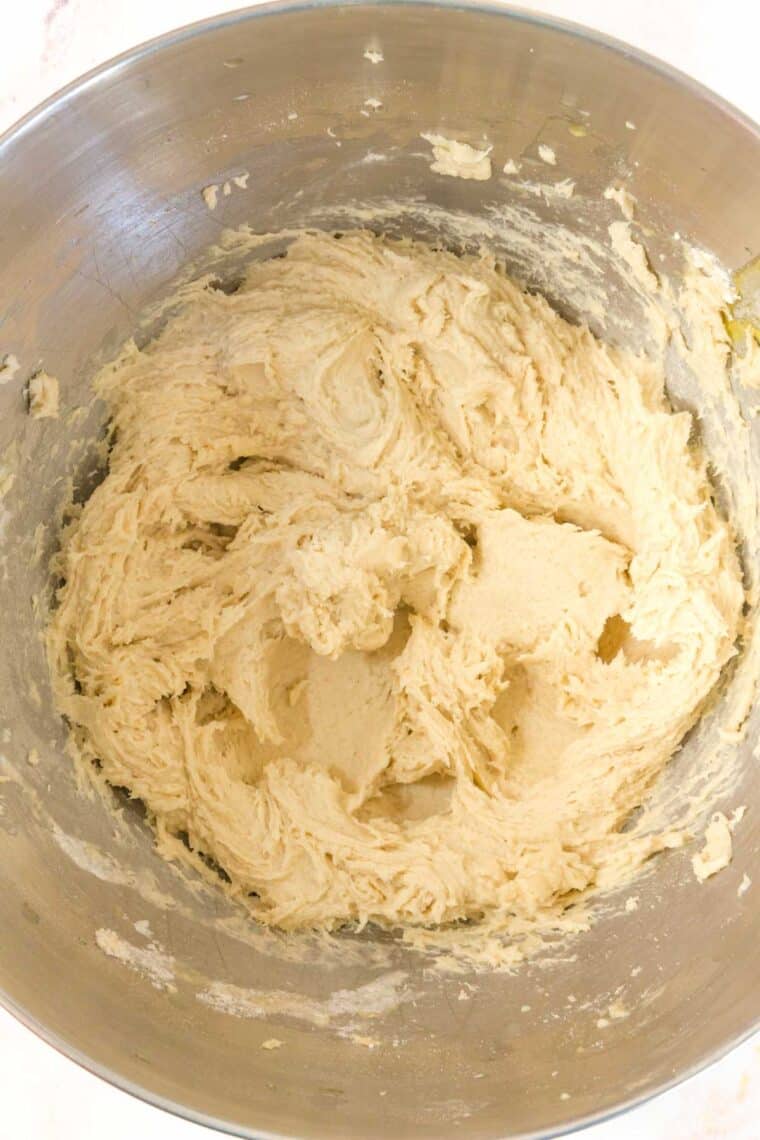
Make the Dough: First, proof the yeast mixture by combining the yeast and sugar with warm water, leaving it to sit until the mixture is frothy and bubbling. Combine the dry ingredients in a separate bowl, then add in the yeast mixture. Finally, mix in the egg, butter, and vinegar and beat until the dough just comes together.
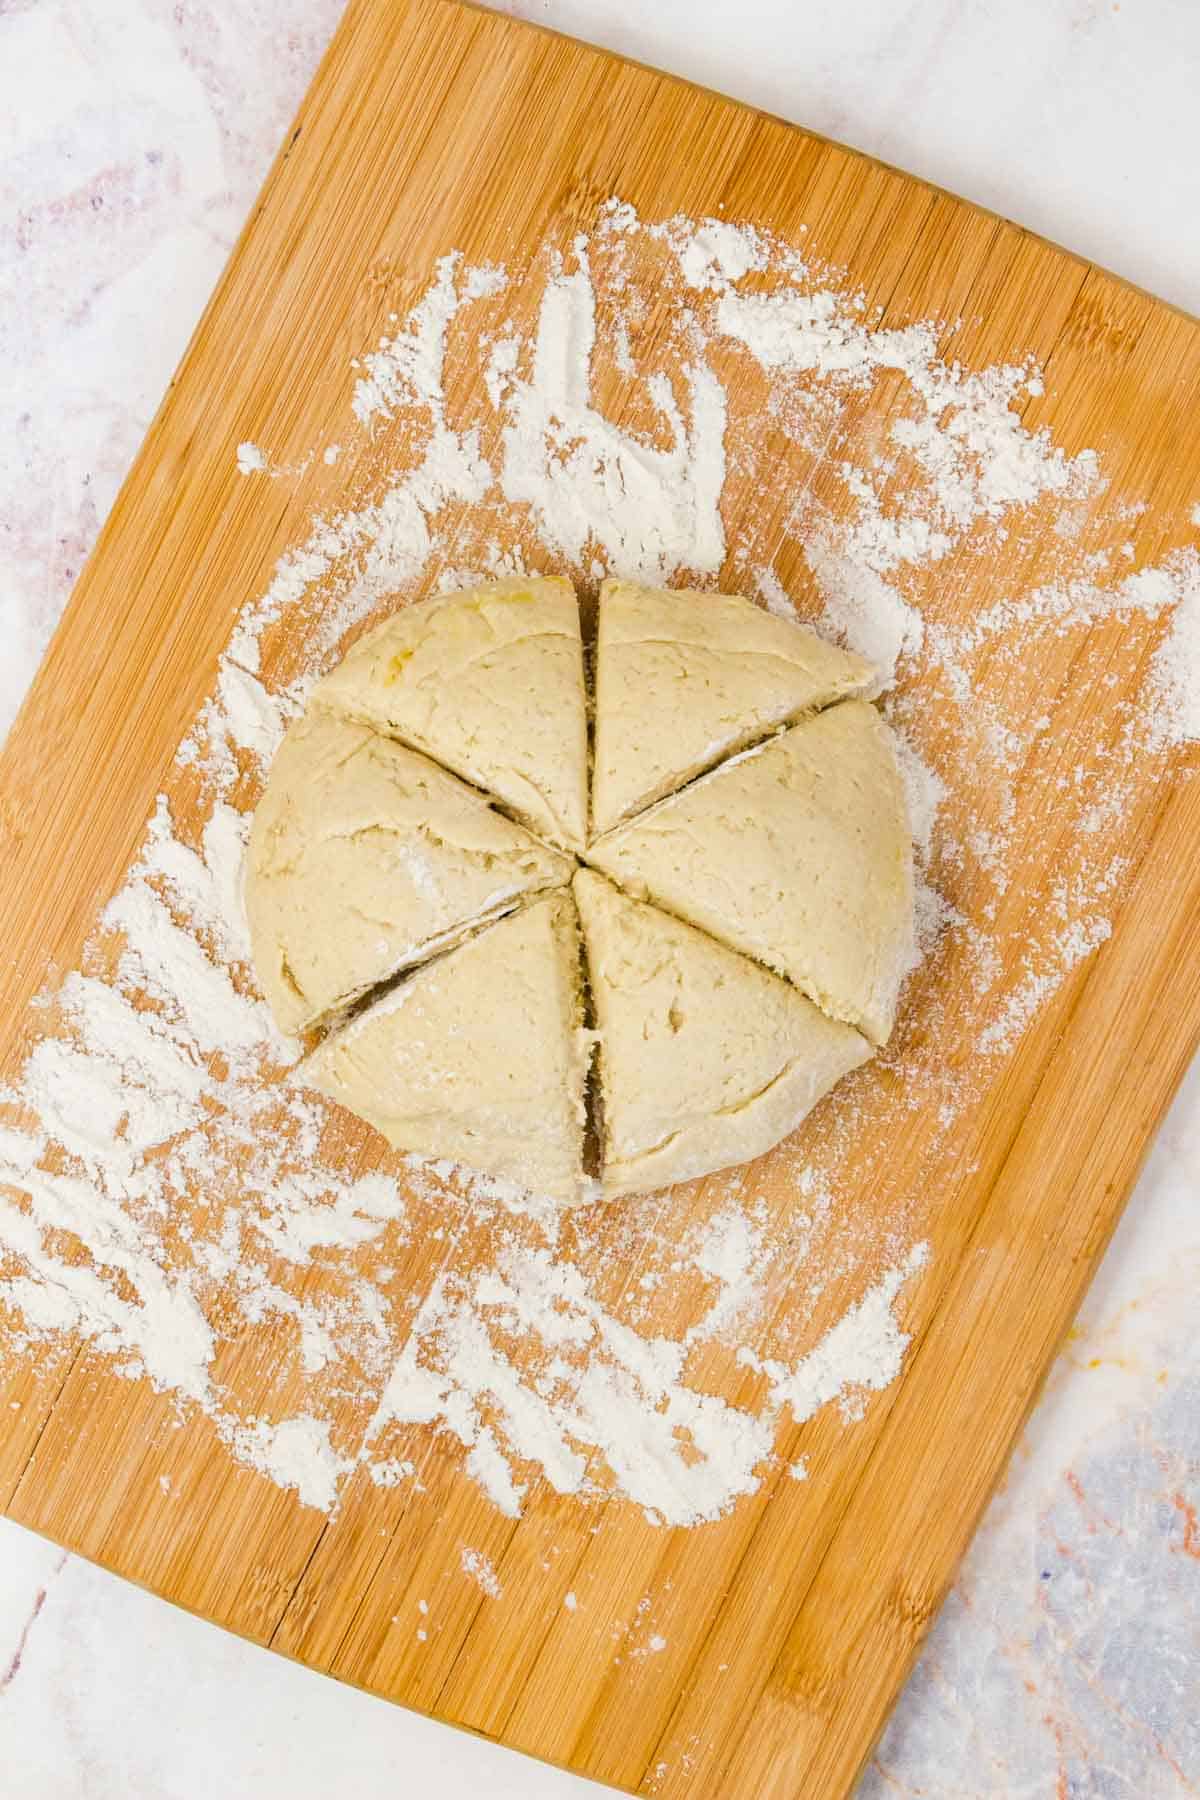
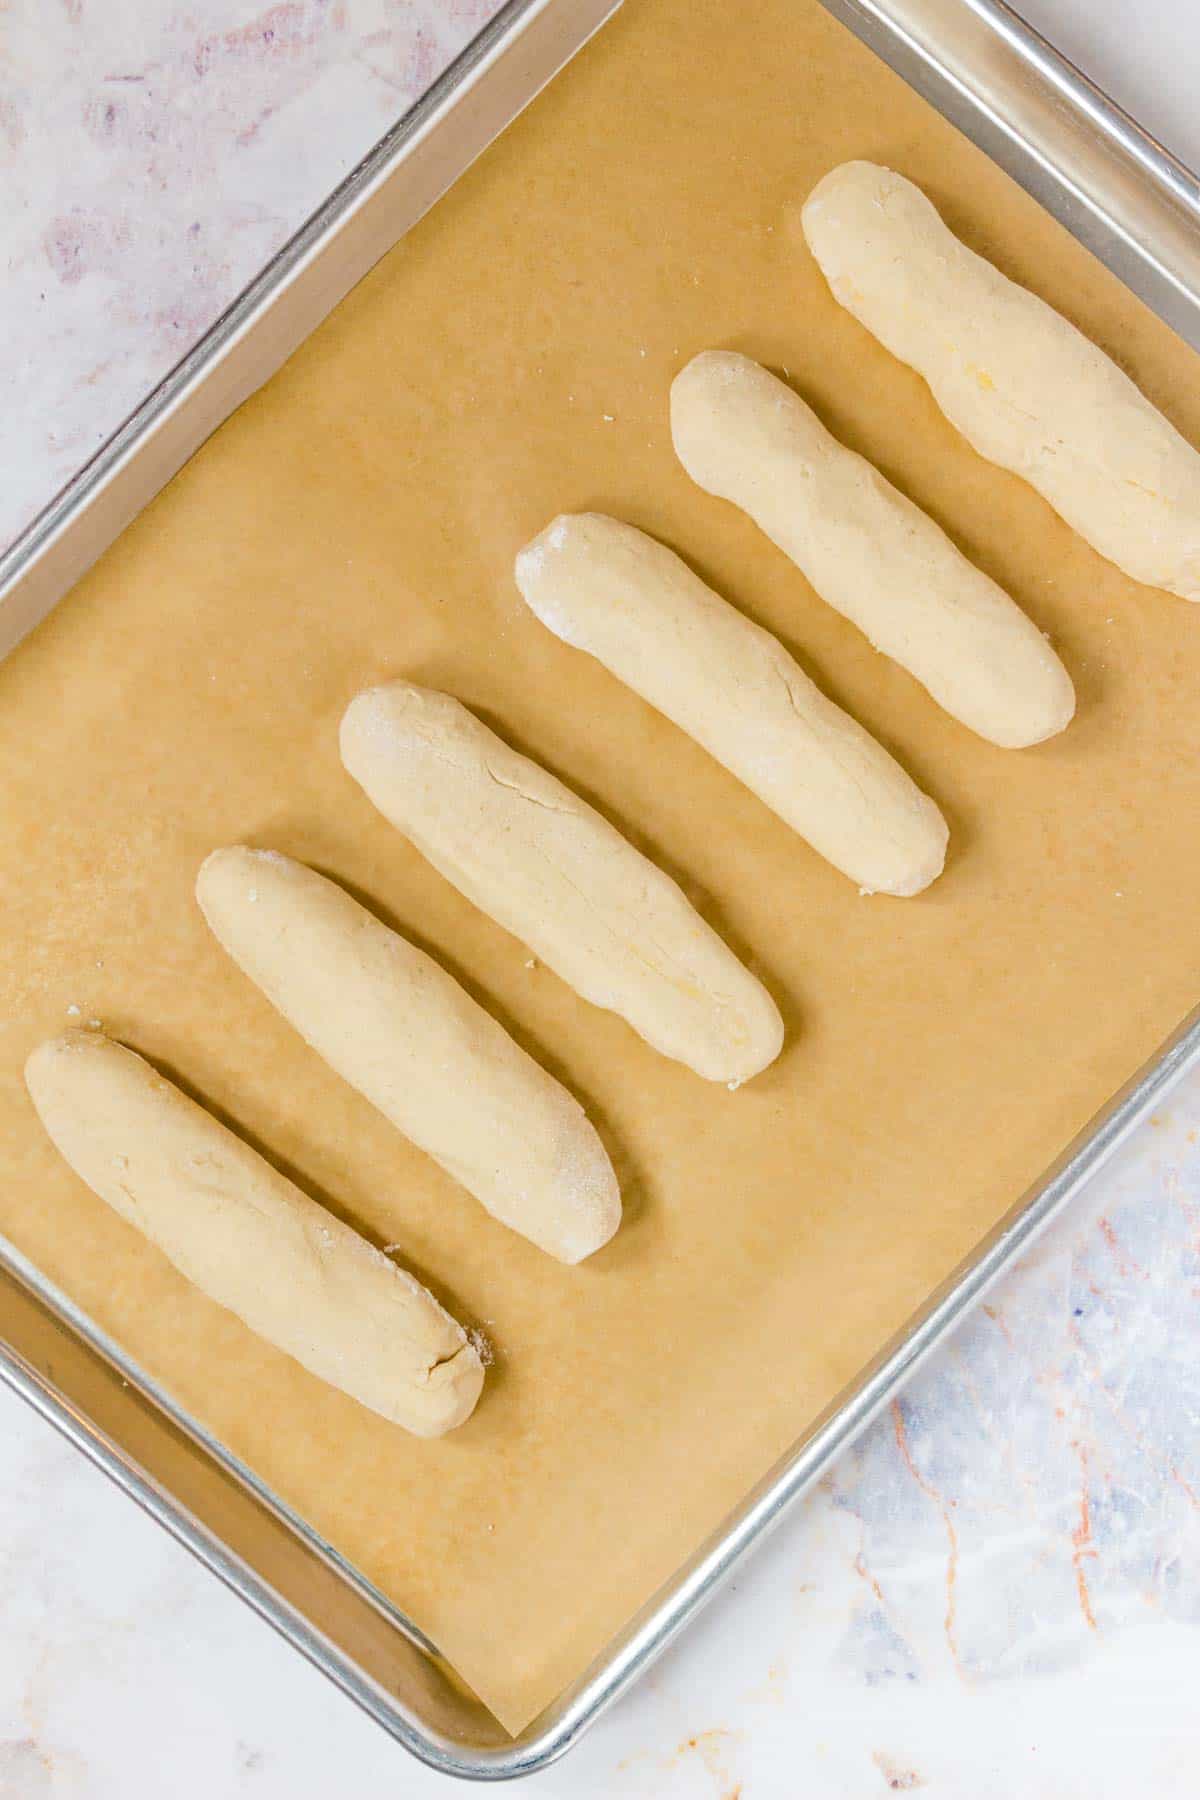
Roll Out the Dough: On a clean work surface, roll the dough out into equal-sized breadsticks. This recipe makes enough dough for six sticks, approximately one half-inch wide and about five inches long. Leave the dough sticks to rise in a warm location while you preheat the oven.
Bake: Place the breadsticks on a prepared baking pan. If you’d like, give each breadstick a light brushing with olive oil (or a similar vegetable oil), followed by a sprinkling of flaky sea salt. Bake the breadsticks in the preheated oven until they’re golden on the outsides and cooked on the insides. Enjoy warm or transfer them to a wire rack to cool before serving.
Tips for Success
- Check the Yeast’s Expiration Date: Yeast that doesn’t bubble within the proofing time likely has expired. You’ll need to chuck it out and restart with fresh yeast. Be sure to check the dates on the packages!
- Give the Dough Enough Time To Rise: This step is super important when it comes to achieving perfect light and fluffy breadsticks. But don’t overdo it or they will start to split. This isn’t the end of the world, but they don’t look quite as pretty.
- Warm Your Breadsticks Before Serving: These breadsticks are incredible to enjoy after they’ve cooled, but they’re also extra delicious when they’re slightly warmed up! Wrap them in foil and pop them into the oven for a few minutes or give them a few seconds in the microwave.
- Don’t Overbake the Breadsticks: These gluten-free breadsticks will quickly become dry if they’re in the oven too long. Keep an eye on them while baking!
Ways to Flavor Homemade Breadsticks
You can add flavor to these breadsticks in so many ways! Here are some suggestions:
- Garlic Breadsticks: Make your own homemade Olive Garden breadsticks! Prepare a quick garlic butter by mixing a ¼ teaspoon of garlic powder with a couple tablespoons of salted butter. Spread it over the breadsticks while they’re still warm from the oven.
- Cheesy Breadsticks: Once you’ve rolled out your breadsticks, brush the uncooked dough with melted butter and sprinkle the tops with shredded mozzarella cheese and parmesan. Let them rise and then bake as usual for easy homemade cheesy breadsticks!
- Cinnamon Sugar Breadsticks: Mix together a ¼ tablespoon of ground cinnamon with 1 tablespoon of granulated sugar. Once the breadsticks are out of the oven, brush the tops with melted butter, and sprinkle them with the cinnamon sugar.
- Seasoned Breadsticks: You can make this recipe into copy-cat Pizza Hut breadsticks, too! Prepare an herb butter by combining a couple tablespoons of butter with onion powder, garlic powder, dried basil and oregano, and salt. Bake the breadsticks as directed and then brush them with the herb butter, plus a sprinkle of parmesan cheese.
Make it a Meal
This breadsticks recipe is perfect as an easy appetizer paired with dipping sauces, or as an accompaniment to larger meals! There are tons of options when it comes to serving them.
If you’re serving these as a side dish or appetizer, you can dip them in your favorite sauces. Some easy dipping sauce ideas:
- Olive Oil, Salt, and Pepper
- Gluten Free Cheese Sauce
- Homemade Honey Mustard or Ranch Dressing
Which meals are made better with homemade breadsticks? The answer is: just about all of them! Whether you’re entertaining guests or planning a family meal, try serving your gluten free breadsticks the following ways:
- Make it an Italian-style dinner and serve your breadsticks alongside a chopped garden salad and Homemade Lasagna.
- Enjoy these breadsticks as a side to pasta dishes like Homemade Beefaroni.
- These are also great for dunking in soups and stews, like this Corn Chowder, Beef Stew and Butternut Squash Soup.
- Pair your breadsticks with Hearty Beef Chili. They’re perfect for soaking up all the flavors!
- With cozy meals like Lemon Herb Grilled Chicken, Filet Mignon, and Homemade Shepherd’s Pie.
Storage and Reheating Instructions
Leftover breadsticks can be stored in an airtight container at room temperature for up to 3 days. I like to warm the breadsticks in the microwave for a few seconds before serving them again.
Can I Freeze These?
You can freeze these breadsticks either before or after you bake them.
How To Freeze Breadstick Dough: Prepare the breadsticks and let them rise, then place them on a baking sheet in a single layer to pre-freeze. Once they’re solid, transfer them to a freezer bag and keep them frozen for up to 3 months. Thaw the dough in the fridge overnight and then bake as directed. You can also freeze the dough before shaping, and then thaw the dough, roll it out, let it rest and bake as usual.
How To Freeze Baked Breadsticks: Once the breadsticks have cooled completely, store them in a freezer-safe container or bag and keep frozen for up to 2 months. Thaw the breadsticks at room temperature, and then warm them in the oven or microwave before serving.
Things you’ll need
- This recipe uses a 1-to-1 baking flour, and I prefer King Arthur Flour Measure for Measure in this case.
- A stand mixer is best for mixing the dough.
- Nordicware baking sheets are workhorses in my kitchen for making evryhitng from roasted veggies to cookies.
- Lining the pans with parchment paper will keep the breadsticks from sticking.

Gluten Free Breadsticks
Ingredients
- 2/3 cup warm water, 90-110°F
- 1 1/2 tbsp active dry yeast
- 2 tbsp brown sugar
- 2 cups 1-to-1 gluten-free flour (I used King Arthur Measure for Measure)
- 1 tsp kosher salt
- 1/2 tsp gluten free baking powder
- 1 tsp xanthan gum
- 1 egg
- 1/3 cup melted butter
- 1 tsp white vinegar or lemon juice
- 2 tbsp olive oil for brushing, optional
- flaky salt optional
Instructions
- Line a baking sheet with parchment paper.
- In a small bowl, whisk together the yeast, sugar, and ⅔ cup warm water. Let this mixture stand for 5-10 minutes, until bubbly and frothy.
- Meanwhile, in a mixing bowl (preferably a stand mixer), combine the flour, salt, baking powder and xanthan gum.
- When the yeast mixture is proofed, pour it into the dry ingredients, mixing on low speed. Add the egg, butter, and vinegar. Mix for 1-2 minutes, until the ingredients are incorporated, then increase the speed to medium-high and beat for 4 minutes.
- Divide the dough into 6 equal portions and roll each portion into a bread stick on a clean work surface. The breadsticks should be about ½ inch thick and 5 inches long.
- Let the dough rest somewhere warm for 20 minutes.
- After 10 minutes, preheat the oven to 350°F.
- Optional: before baking, brush the breadsticks with olive oil and sprinkle with flaky salt.
- Bake for 15-20 minutes, until golden and cooked through.
- Remove the pan from the oven and serve warm or transfer the breadsticks to a wire rack to cool completely.
Notes
Did you make this?
Leave a star rating to help others know that they should make this recipe.
Share a photo and tag @cupcakesandkalechips on Instagram!
Can I substitute Xanthan Gum and use Cornstarch instead?
No, xanthan gum helps the stretchiness of the dough and, therefor, the fluffiness of the final product. Cornstarch is a thickener, and doesn’t do the same thing as xanthan gum.
My King Arthur gf flour has xanthum gum in it. Do I need to put in the extra 1 tsp? Thanks.
Yes, you need the extra.
The 1 tsp xathan gum is in addition to the xathan u that is included in the King Arthur 1 to 1 correct?
Yes, it is in addition.