
Gluten Free Honey Buns


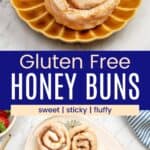
These fluffy Gluten Free Honey Buns with a simple vanilla glaze are the best breakfast treat! Wake up to a bite of honey-sweetened, ooey-gooey heaven with this easy-to-make variation of a homemade cinnamon rolls recipe.

The Best Homemade Gluten-Free Honey Buns!
By now you may know that any excuse I have to naturally sweeten something, I’ll take it. That’s why I’m officially declaring my undying love for these gluten-free honey buns. Irresistibly fluffy, filled with warm cinnamon, and sweetened with honey. Baked golden in the oven, then glazed. My kind of comfort food!
And comforting, it is. I love making a batch of these to enjoy with the family on a cozy fall day. They’re delicious as a light breakfast or snack, and sweet enough to have as a dessert. You’re going to love how the honeyed dough and buttery filling just melt in your mouth.

Are Sticky Buns and Honey Buns the Same Thing?
They’re both sticky pinwheels, but they’re not quite the same thing. A honey bun always calls for honey in the recipe. Meanwhile, a sticky bun is often made with a gooey, caramel glaze.
My homemade honey buns are actually more of a hybrid between a traditional honey bun and a Gluten-Free Cinnamon Roll. I cut mine from a roll of dough (like you would with cinnamon rolls), rather than shaping them by hand (as you normally would for a bun). Either way, these honeys are delicious!

What You’ll Need
Below is a short overview of everything you’ll need to make these easy homemade honey buns. Be sure to scroll further down to the recipe card for the full ingredient amounts:
- Gluten-Free Flour: You can use your preferred blend of gluten-free flour.
- Xanthan Gum: Xanthan gum takes the role of gluten in baking, thickening the dough and binding the ingredients.
- Salt
- Half-and-Half: I find that half-and-half brings just the right amount of richness to the dough, without the added fat of full cream. Feel free to use full cream if you prefer.
- Instant Yeast: Be sure to check the labels on your fast-rising yeast, to make sure it isn’t expired.
- Butter: Salted or unsalted butter, melted in the microwave before you start.
- Honey: The star ingredient of these gluten-free honey buns! Honey is what sets these buns apart from your average homemade cinnamon roll.
- Egg: A single egg adds structure to the dough.
- Vegetable Oil: For greasing your hands as well as the bowl, when handling the gluten-free dough. Things can get a bit sticky!
- Cinnamon, Brown Sugar, and Butter: Combined, this makes up the filling for the honey buns. Be sure to take your butter out of the fridge about a half hour before you begin. It’s much easier to mix with the cinnamon and sugar at room temperature.
- You’ll also need Powdered Sugar (confectioner’s sugar), additional Half-and-Half, as well as Vanilla Extract to make an easy vanilla glaze.

How to Make Gluten-Free Honey Buns
Get your stand mixer fitted with a dough hook. Now, let’s get started on the dough for your gluten-free honey buns:
Make the Dough: First, combine flour, salt, and xantham gum. In a separate bowl, warm the milk in the microwave and then whisk in the yeast, melted butter, honey, and egg. Add the wet ingredients into the mixer with the dry ingredients, and blend until you’re left with a sticky ball of dough.
Let It Rise: Grease up your hands and then transfer the dough ball to an equally greased bowl. Cover the bowl with plastic wrap, then leave it somewhere warm to rise. After about an hour, the dough should be doubled in size.


Preheat the Oven: Towards the end of the rising time, preheat the oven to 350ºF and line a baking sheet with parchment paper. Give it a spritz with cooking spray to help keep the buns from sticking too much.
Shape the Dough: Now, you’ll punch down the dough and turn it out onto a floured countertop. Shape it into a large, long rectangle. In a bowl, prepare a mixture of cinnamon sugar and butter.


Fill and Roll: Spread the sweet cinnamon butter in an even layer over the dough rectangle. Next, roll the dough up into a log. Finally, cut the log into 12 equal-sized slices about an inch or so thick. A dough scraper works great for this.


Bake: Get your pinwheels laid out on the prepared baking sheet, then spray them with a light coating of baking spray. Bake for 15-18 minutes, until the buns are golden brown at the edges.


Glaze: Prepare a quick glaze of powdered sugar and half-and-half mixed with a dash of vanilla. After the honey buns have been left to cool for 20 minutes, dip the top of each bun into the glaze. Place the dipped honey buns onto a wire rack. Don’t forget to place parchment paper beneath the rack, to catch any drips!
Serve these gluten-free honey buns while they’re still warm. So yummy!


Can I Make Fried Honey Buns?
I love that these bake up golden and crisp in the oven, minus the excess oils that come with deep frying. Of course, if you’d prefer fried honey buns, they’ll be just as delicious! Here’s how to quickly deep fry your gluten-free honey buns instead:
- Have your sliced buns ready on a lined, greased baking sheet.
- Heat about 3 cups of vegetable oil in a skillet. Use a thermometer to check that the oil has reached 320ºF.
- One or two at a time, carefully drop the honey buns into the hot oil. Fry until they’re golden on both sides. Make sure you take an abundance of caution when frying, and don’t leave your stove until you’re finished!
- Place the fried honey buns on a plate lined with a paper towel to drain. After they’ve cooled a bit, dip them in the glaze as directed.

Tips for Success
Some added words of wisdom for making perfect honey buns at home:
- No Stand Mixer?: No problem, it just might take a little longer to bring the dough together. But you can absolutely use a spatula to combine the ingredients, and then knead the dough to form it into a ball. You’ll want to grease your hands with oil beforehand, to keep the dough from sticking.
- Add Pecans: Before rolling up your dough, sprinkle chopped pecans over top of the cinnamon sugar filling for a bit of added crunch.
- Let the Honey Do the Sweetening: Trust me, there’s no added sugar in these buns for a reason! Trust the honey to do its thing, and be rewarded with beautifully sweet sticky honey buns.

Serving Suggestions
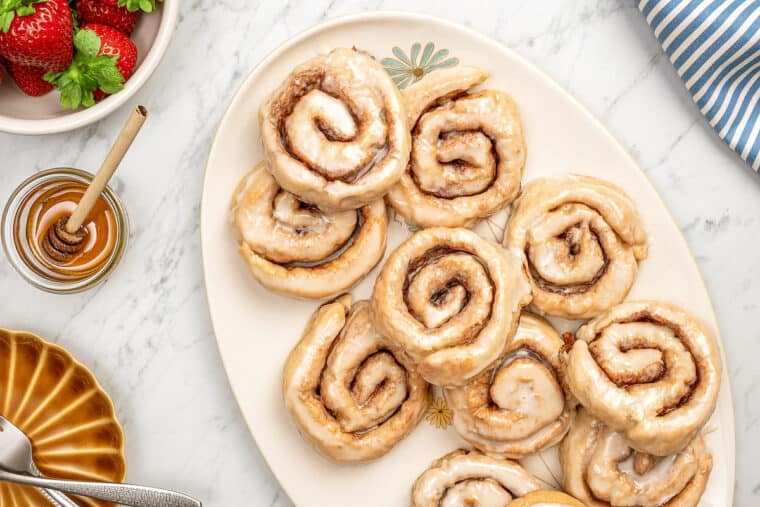
Like any cinnamon bun, I love serving homemade honey buns with a warm cup of coffee or tea for an instant dose of coziness. They’re an easy, sweet breakfast treat to enjoy next to fresh fruit like strawberries, or a Creamy Waldorf Fruit Salad.
Or, bring out a batch at brunch with other favorites like Gluten Free Eggs Benedict, Baked Eggs and bacon, or Gluten Free Ham and Cheese Strata.
These honey buns are also sweet enough to serve for dessert with a scoop of vanilla ice cream. I love to add an extra drizzle of honey and a sprinkling of chopped nuts (like pecans) for good measure!

Storing and Reheating Leftovers
Store any leftover gluten-free honey buns airtight on the counter for up to 3-4 days.
If you’re expecting lots of leftover honey buns, I recommend leaving off the glaze until you’re ready to serve them. When ready, place the buns back into the oven at 350ºF for a few minutes, until slightly warm. Then glaze as directed and serve!
Can I Freeze Homemade Honey Buns?
If you’re planning on freezing the buns, I actually recommend freezing the raw, sliced honey buns before they’re baked. They hold up much better this way, and you can easily thaw them and bake them whenever you’d like!
- To freeze the unbaked honey buns: After cutting the rolled dough, store the slices together or wrap them individually in plastic wrap to keep in the freezer. The dough can be stored frozen for up to one month.
- Or, freeze the baked honey buns: In a pinch, you can also freeze honey buns after they’re baked. I highly recommend freezing them before they’re glazed. Be sure to thaw them thoroughly before reheating.
Shop the Recipe
- Stand mixers make it easy! Gluten free doughs and batters often have to be mixed, beaten, or whipped for a while. Save your arm muscles and get a stand mixer to make gluten free baking a breeze.
- Don’t get stuck! These yeast doughs can also be sticky. Instead of covering your counter with flour, keep it contained to a pastry mat.
- You’ll use these every day! Besides cookies, roasting veggies, and more, here is another use for my favorite Nordicware baking pans.
- Maybe you love the dishes! You can find a very similar option that is also available in blue.
Gluten Free Honey Buns
Ingredients
Honey Buns
- 2 cups gluten free flour
- 2 tsp xanthan gum
- 1/2 tsp salt
- 1/2 cup half and half + 3 tbsp
- 2 1/4 tsp fast-rising instant yeast
- 5 1/3 tbsp butter , melted (1/3 cup)
- 1/3 cup honey
- 1 large egg
- 1/2 tbsp vegetable oil
- 1 1/2 tsp ground cinnamon
- 1/4 cup light brown sugar
- 4 tbsp butter , at room temperature
Glaze
- 2 cups powdered sugar
- 3-5 tbsp half and half
- 1 tsp pure vanilla extract
Instructions
- In a stand mixer with a dough hook attachment, add flour, salt, and xanthan gum. Mix until incorporated.
- In a medium microwave-safe bowl, add milk. Microwave for 30 seconds Add yeast, cooled melted butter, honey, and egg to the bowl and whisk until combined.
- Pour the wet mixture into the dry mixture and blend on medium speed for 10 minutes. The dough will be sticky, but will start to form a ball.
- Grease your hands and a large bowl with vegetable oil.
- Remove the dough from the stand mixer and press it into a round ball.
- Place the dough in the bottom of the greased bowl and cover it with plastic wrap. Let the dough rise until it has doubled in size (about an hour).
- Line a cookie sheet with parchment paper. Spray the parchment paper with nonstick spray.
- Preheat oven to 350°F.
- Once the dough has doubled in size, punch it down. Place the dough on a lightly floured work surface. Using your hands, press the dough out into a 6" by 14" rectangle.
- In a small mixing bowl, add cinnamon, brown sugar, and room-temperature butter. With a fork, mix together until smooth. Spread the mixture evenly onto the dough.
- Roll the dough to form a long log.
- Cut the dough into 1-inch thick slices using either a sharp knife or a dough scraper. You should have about 12 slices.
- Place the dough on your prepared baking sheet. Spray the slices with nonstick baking spray.
- Place the baking sheet in the oven and bake for 15-18 minutes until the edges become golden brown.
- Prepare the glaze: In a medium bowl whisk together powdered sugar, half and half, and vanilla extract until smooth.
- Remove honey buns from the oven and allow them to cool for 20 minutes. Dip the tops in the glaze and place the buns on a wire rack with parchment paper underneath to catch any glaze that drips off.
- Serve warm and enjoy!
Did you make this?
Leave a star rating to help others know that they should make this recipe.
Share a photo and tag @cupcakesandkalechips on Instagram!
Made the recipe exactly but didn’t add the extra xanthum gum as my Bobs 1-1 had xanthum gum.
It didn’t even rise, my yeast has been good to me so far and isn’t expired… the dough was never sticky, but crumbly. After baking it was extremely dense and even baking at the maximum time it was underbaked and raw in some places.
I’m going to try this again soon with some changes and see if can pull it off.
Thanks for your feedback. Can you tell me what flour you used? I can do some retesting too.
I will use Bob’s Red Mill 1-to-1 flour. Do I need the additional xanthan gum?
Also, can I prep them the day before and then bake them in the morning?
Thanks, I’m looking forward to making these.
Yes, extra xanthan gum helps make the dough more stretchy and easier to handle.
I just finished making these and am very disappointed. I used King Arthur All-Purpose Gluten Free flour and the dough was extremely sticky, never coming together into a ball in the mixer like the recipe said it would. I added an extra quarter cup of flour, mixed it more and it looked better for a moment before falling back into a wet puddle. I let it rest and rise, but when I turned it out to shape into a rectangle it was so sticky. I had to keep sprinkling flour over it and re-oiled my hands a few times while handling it. Finally, when rolling it, half came up somewhat nicely while the other half stuck. I noticed the half that rolled smoothly had a lump of flour stuck under it. Thankfully they cut nicely, but once in the oven the filling seeped out and covered the baking tray in a sticky layer, leaving little in each roll. They’re still cooling on the counter right now and they smell nice, but I was disappointed with the texture and stickiness. I was hoping to donate these to a bake sale, but not with the way they came out.
Thank you for your feedback, and I am so sorry it didn’t work out for you. Gluten free yeast baking can be tricky with varying results, and I try to be as descriptive as possible to make it easier. But I will do some retesting with other flours and try a weight measurement, as well.