


This post may contain affiliate links. Read my disclosure policy.
Craving that soft, creamy chocolate eclair you used to love? These Gluten Free Eclairs taste just like the ones from your favorite bakery! Light and airy choux pastry is filled with smooth pastry cream and topped with rich chocolate glaze. Don’t worry—they look fancy but are easier to make than you’d think. If you’ve been missing classic desserts since going gluten-free, this is one you’ve got to try!

Delicious Details
- Cuisine Inspiration: French
- Primary Cooking Method: Stovetop, Oven
- Dietary Info: Gluten-free
- Skill Level: Moderate
Classic Chocolate Eclairs Made Gluten Free
It’s funny what you find yourself missing once you have to go gluten free. All those indulgent treats in bakery windows are suddenly off-limits (which somehow makes me want them even more?!). Let’s just say, I was mourning the loss of eclairs for quite some time.
So the first step was to perfect my Gluten-Free Pate a Choux, the basic French pastry that is light and airy, and the dough is a pipable consistency that relies on steam to rise into beautiful, puffed-up pastries. Then I had to decide if I should start with Gluten-Free Cream Puffs, those golden balls of pastry filled with whipped cream or pastry cream. But it was the chocolate glaze on an eclair that made the decision for me, and now I’m in love.
If you’ve been craving a fluffy chocolate eclair, make these. You won’t be disappointed! Here’s why…
- Just like you remember. Soft and airy, filled with rich homemade vanilla pastry cream, and topped with creamy chocolate glaze. The first bite literally melted in my mouth, and by the second, I was in gluten-free pastry heaven.
- Easier than you think. To make them gluten free, you only need a few substitutes. And keeping a few tips in mind will ensure perfectly puffed pastry.
- So impressive. You’ll have everyone thinking you bought them and they aren’t gluten free at all, whether you serve them for a sweet breakfast treats or a delicious dessert!

What You’ll Need
Below is an overview of what you’ll need for each luscious component of these gluten free eclairs. Remember to refer to the recipe card and individual recipes for the full details:.
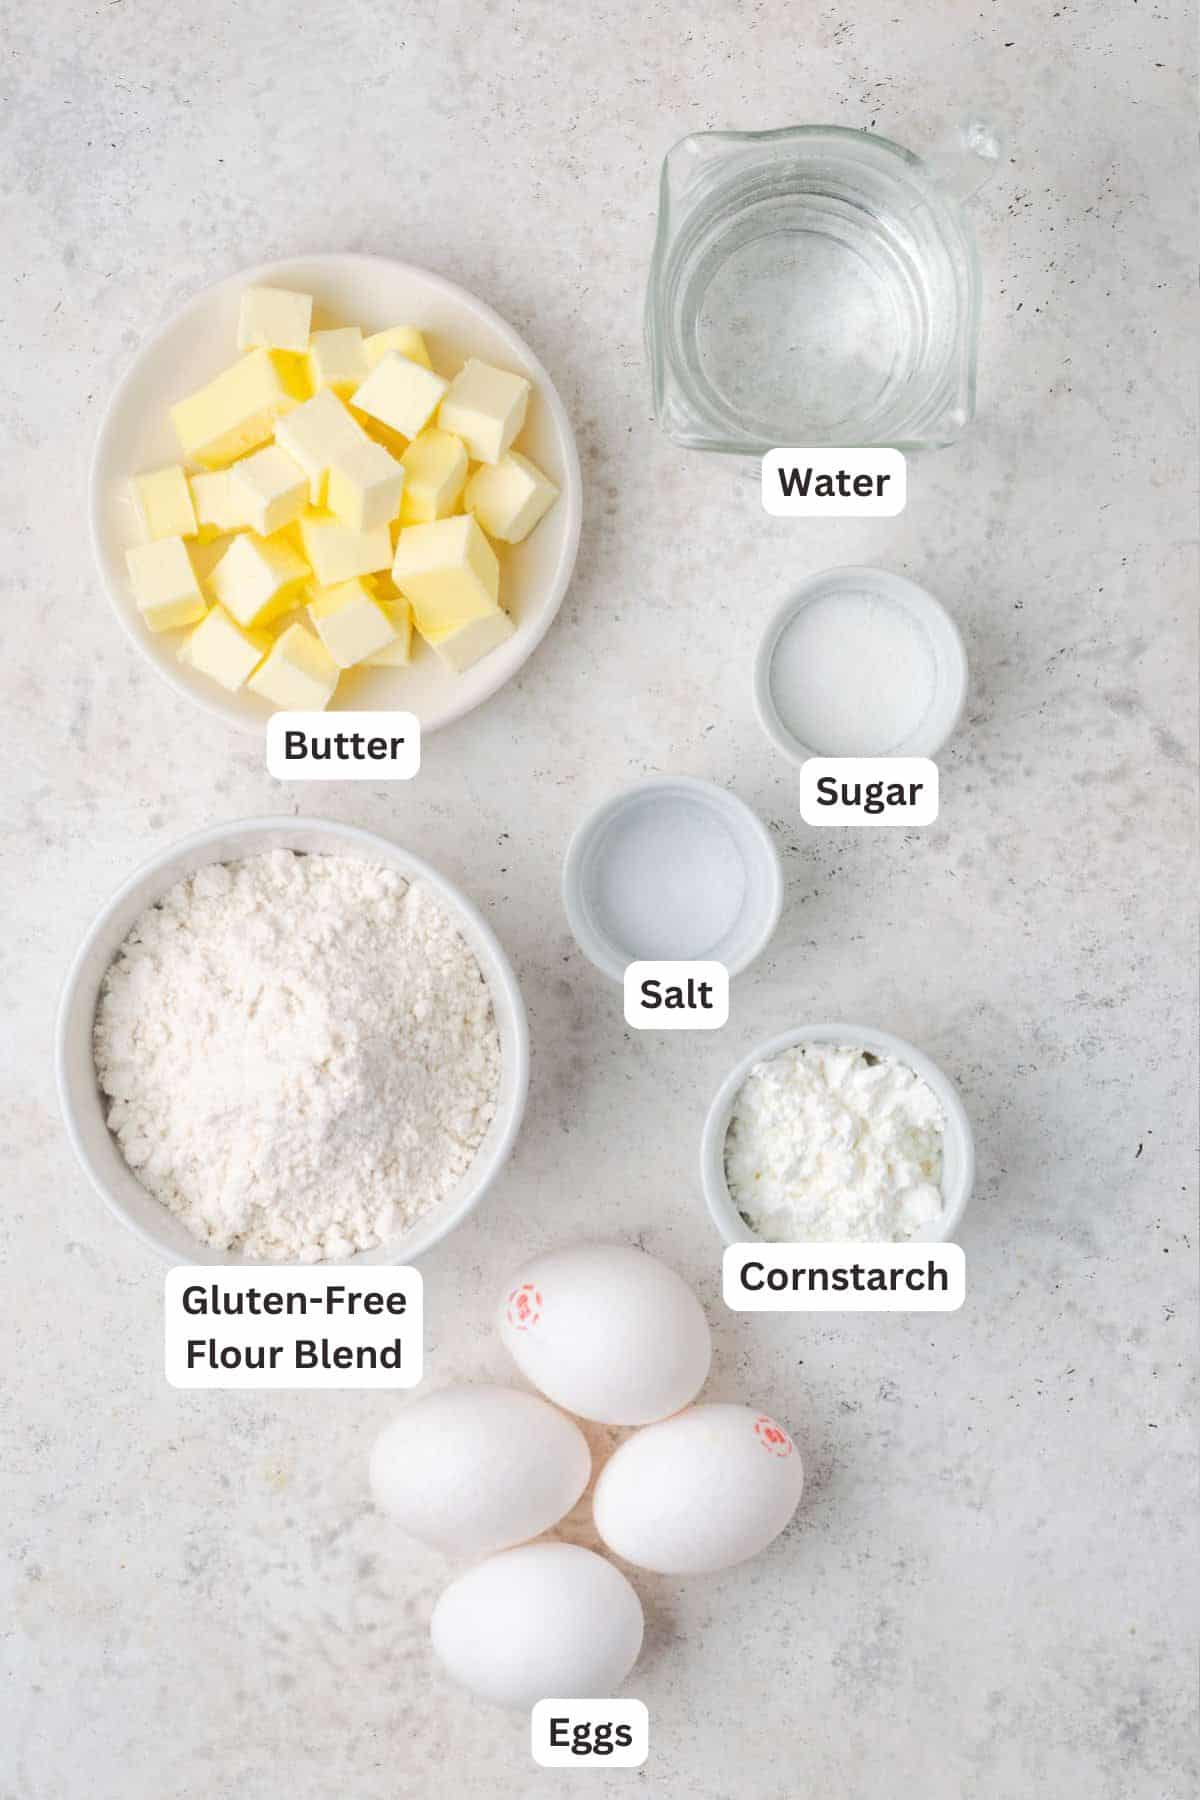
Pate a Choux Ingredients
- Gluten-Free Flour: You’ll need a 1-to-1 blend. I like to use King Arthur Flour Measure-for-Measure in this recipe.
- Cornstarch: This lightens up the flour mixture so you end up with an airy pastry.
- Eggs: The exact amount of eggs depending on how your pastry comes together and how long it cooks. So don’t add all 4 at once till you see what you need! You’ll also need an extra egg for an egg wash.
- Water.
- Unsalted Butter: Cut into cubes.
- Sugar.
- Salt.
Pastry Cream Ingredients
- Whole Milk: You want the high fat content when making pastry cream.
- Vanilla Bean Paste: You can substitute pure vanilla extract.
- Sugar: Regular granulated sugar sweetens the pastry cream, and also makes the egg yolks less likely to scramble.
- Salt.
- Egg Yolks: Save the whites to make white cake or angel food cake.
- Cornstarch: You’ll need it to thicken the custard.
- Unsalted Butter: Adds that luxurious richness.
Chocolate Glaze Ingredients
- Chocolate Chips: I recommend using semisweet chocolate chips or good quality chopped chocolate to make the chocolate glaze.
- Heavy Cream: Full-fat heavy whipping cream makes this glaze smooth and creamy.
- Butter: For richness.
- Corn Syrup: Corn syrup is the secret to an extra pourable, glossy glaze. You can use light or dark corn syrup, whichever you have on hand.


How to Make Gluten Free Eclairs
Gluten-free eclairs come together in three parts: the eclair shells made with Gluten Free Pate a Choux, the Vanilla Pastry Cream filling, and the Chocolate Glaze. I’m going to give you an overview of each of the components, but if you want more tips and details, check out each of those individual posts. The full step-by-step instructions are in the recipe card further down in the post.
- Preparation: Preheat the oven to 425ºF, and line your baking sheet with parchment paper marked with 4-inch lines as a guide for piping the eclairs.
- Prepare the Pate a Choux: Combine the flour and cornstarch. Heat water, butter, salt, and sugar, then stir in the flour mixture and cook until it forms a ball. Use a stand mixer to work the eggs into the dough.
- Pipe the eclairs. Use a piping bag with a 3/4-inch opening or an open-star piping tip to pipe logs of choux pastry, following the guides you marked.

- Bake: Brush with egg wash. Bake at 425ºF for 10 minutes, and then at 350ºF for another 25 minutes. Flip baked shells upside down and poke small holes in the bottoms. Return them to the oven, holes facing up, for another 5 minutes.
- Cool: When you take them out of the oven again, leave the pastries upside down and let them cool completely before you fill them.


- Prepare the Pastry Cream: While the milk and vanilla are heating, whisk eggs, sugar, and salt, then mix in cornstarch. Add hot milk to eggs a little at a time, then cook till thickened. Whisk in butter. Cool completely.
- Fill: Starting with the first eclair shell, use the holes you made to vent the steam. Place the tip of the piping bag into each hole, and squeeze. Repeat with the other eclairs until all the pastries are full.


- Prepare the Glaze: First, add the chocolate chips to a heat-proof bowl. Then, microwave the heavy cream for one minute, and pour it over the chocolate. Let it sit for a few minutes before whisking in corn syrup and butter.
- Dip: One at a time, dip the tops of the eclairs into the chocolate glaze. Place the glazed eclairs onto a wire rack to dry. There you have it, your very own homemade eclairs!


Tips for Success
The idea of making your own gluten-free eclairs may seem a little intimidating at first, especially if you’re new to gluten-free baking. But I promise, with a bit of practice, you’ll soon have gorgeous puffed-up homemade eclairs every time. Here are some final tips:
- Follow the recipes closely. Make sure to follow the dough recipe step-by-step, and measure out the ingredients correctly. If your pastry dough is too thick, your eclairs will come out dense, and if it’s too thin, they won’t rise properly. So follow the recipe as directed and pay close attention when measuring, and you’ll be smooth sailing!
- Pipe and fill perfectly. Disposable piping bags are essential for making eclairs. You’ll want to use a French star tip to pipe the pate a choux dough to form the eclairs. A small round tip fitted in place on the piping bag with a plastic coupler will help you fill the chocolate eclairs with the pastry cream.
- Don’t open the oven. Once your eclairs are baking in the oven, it’s important that you leave the oven door closed until the recipe says otherwise. Since eclairs rely on steam to rise, opening the oven too soon can cause the pastries to deflate.
- How to tell when eclairs are done baking: Your eclair shells are done when the tops are golden. If you pick one up and tap the underside, it should sound hollow.
Variation Ideas
Soft and fluffy chocolate eclairs are a real classic, but there are so many ways to turn this recipe into something new. Here are some variation ideas:
- Double Chocolate Eclairs: Fill your eclairs with chocolate pastry cream instead of vanilla.
- Whipped Cream: If vanilla custard isn’t your thing, fill these gluten-free eclairs with whipped cream instead. I have an easy recipe for homemade whipped cream from my Gluten Free Strawberries and Cream Cake that you can borrow.
- Sprinkles: While the chocolate tops are still a little wet, dip your eclairs into rainbow sprinkles for a colorful treat.

How to Store Gluten-Free Eclairs
These gluten-free eclairs are best served within 12 hours, however, they can be refrigerated airtight up to one day ahead. Just know that they will soften a bit once they’re filled.
Can I Freeze Eclairs?
I don’t recommend freezing eclairs once they’ve been filled, as the pastry cream will separate when it thaws. However, you can freeze the baked and cooled choux pastry shells for up to 1 month. Store the eclair shells airtight and defrost them at room temperature before filling them.

More Bakery-Worthy Gluten-Free Recipes

Gluten Free Eclairs
Ingredients
For the Gluten Free Pate a Choux
- 1 cup + 3 Tablespoons 1:1 Gluten Free Flour Blend (263 grams, recommended: King Arthur Measure for Measure)
- 1/4 cup cornstarch (28 grams)
- 4 large eggs , at room temperature
- 1 cup water
- 7 Tablespoons unsalted butter , cut into small pieces
- 1 Tablespoon granulated sugar
- 1/2 teaspoon salt
- 1 large lightly beaten egg for egg wash
For the Vanilla Pastry Cream
- 2 cups whole milk
- 2 teaspoons vanilla bean paste or vanilla extract
- 4 large egg yolks
- 1/2 cup granulated sugar
- 1/8 teaspoon salt
- 3 Tablespoons cornstarch (21 grams)
- 2 Tablespoons unsalted butter
For the Chocolate Glaze
- 1/2 cup semi-sweet chocolate chips
- 1/4 cup heavy cream
- 1 Tablespoon unsalted butter
- 1 Tablespoon corn syrup
Instructions
For the Gluten Free Pate a Choux
- Preheat the oven to 425°F. Line a large baking sheet with parchment paper. Mark the parchment paper with lines 4 inches long, spaced 2 inches apart. Turn the paper over so the ink doesn’t transfer to your pastry.
- Sift the 1 cup + 3 Tablespoons 1:1 Gluten Free Flour Blend and 1/4 cup cornstarch into a bowl. In a second bowl, lightly beat the 4 large eggs. Set both aside.
- Add 1 cup water, 7 Tablespoons unsalted butter, 1 Tablespoon granulated sugar, and 1/2 teaspoon salt to a saucepan set over medium heat. Allow to cook until just boiling. There should be small bubbles visible all the way to the edge of the pot.
- Remove from heat and add the flour mixture all at once. Stir the flour in gently and once incorporated, return the pot to low heat and stir vigorously to cook the flour, about 2 minutes. The dough will quickly form into a ball, but continue to cook the dough moving it around the pot, to evaporate some moisture. The panade will be done when it forms a ball of dough that is shiny and there is visible cooked flour on the surface of the pot.
- Transfer the panade to the bowl of a stand mixer fitted with the paddle attachment and allow it to cool for 10 minutes. After cooling, check the dough. If it’s still too hot, stir it on the lowest speed for 2-3 minutes.
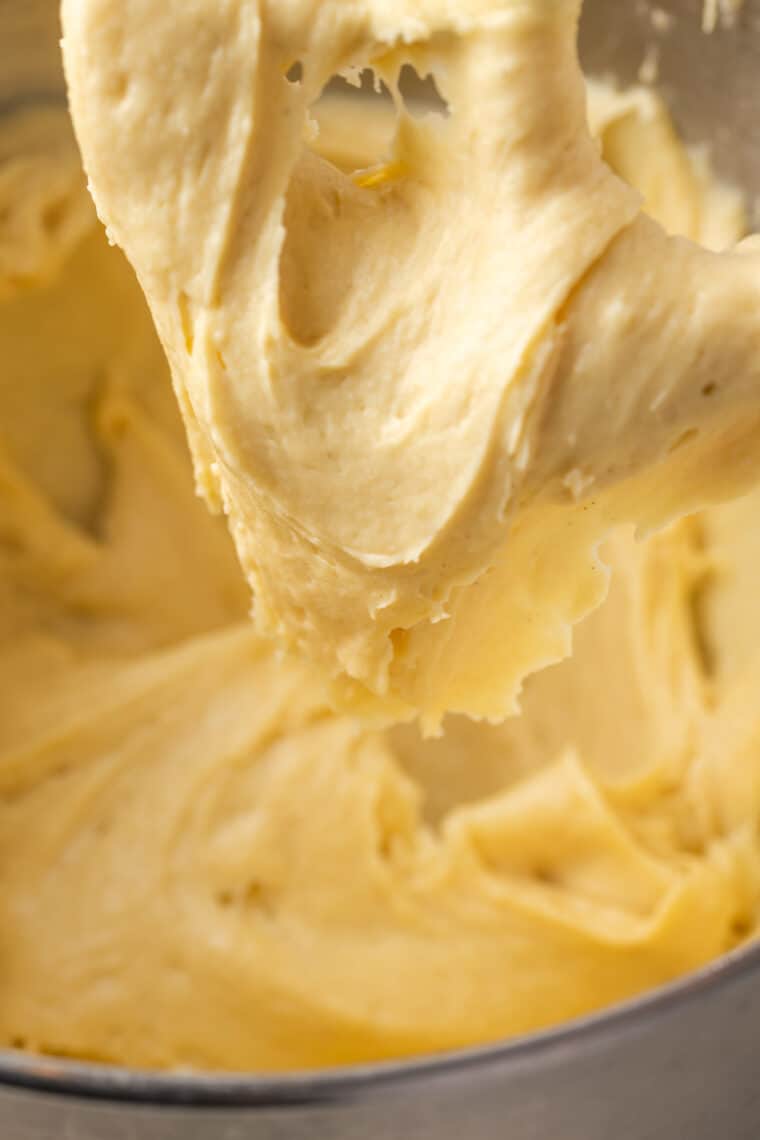
- Turn the mixer to medium speed and add 3 of the eggs one at a time by pouring in about a quarter of the beaten egg mixture, allowing each addition to fully mix in before adding the next. When you first add an egg the dough will look lumpy and separated, but as you continue to mix it will become smooth. Once it is smooth, that is when you will add the next egg.
- After you have added 3 eggs, check the consistency of the dough by lifting the mixer head. The dough needs to be stiff enough to hold its shape if it were scooped. The dough should be shiny and smooth and form a V when pulled up and should drop off of the paddle in a large mass. If it doesn’t, then go ahead and another half an egg and mix again. It is possible you may need 4 full eggs depending on the size of your eggs and how long the panade was cooked, so go by the appearance rather than the number of eggs listed in the recipe.
- Once all of the eggs have been added, continue to mix for 2 minutes. Until smooth and shiny.
- Transfer the choux dough to a 16” piping bag with a 3⁄4” opening to pipe 4-inch long logs of dough. For best results, use a french open star tip. If you don’t have a french star, then use a plain 3⁄4” opening and gently drag lines down the sides and top of each log to create the same design. The line helps guide the pastry to puff without cracking.
- Brush the tops gently with 1 large lightly beaten egg as an egg wash.
- Bake on the prepared baking sheet at 425°F for 10 minutes, then reduce the temperature to 350°F for 25 minutes. Bake until the tops are golden brown and the bottoms make a hollow sound when tapped.
- Remove the baked pastries from the oven and turn them over on the baking sheet. Poke two small holes in the bottom of each pastry to allow the steam to escape. Return to the oven, with the hole side facing up and bake for 5 minutes more to dry them out.
- Allow the pastries to cool completely with the hole side up before filling.
For the Vanilla Pastry Cream
- Combine 2 cups whole milk and 2 teaspoons vanilla bean paste in a saucepan over medium heat. Cook until just simmering, about 10 minutes.
- While the milk is cooking, add 4 large egg yolks, 1/2 cup granulated sugar, and 1/8 teaspoon salt to a large mixing bowl. Whisk together until smooth. Add 3 Tablespoons cornstarch to the egg mixture and whisk again until it is all incorporated. The mixture will be light yellow and thick like paste.
- Once the milk has reached a simmer, pour a small amount of hot milk into the egg mixture while whisking constantly to avoid cooking the eggs. Continue to add the milk a little at a time, mixing well between each addition, until all of the milk has been added.
- Return the egg and milk mixture to the saucepan. Cook over medium heat, whisking constantly, until the mixture thickens to a pudding like texture, about 3 minutes. Continue to cook the cream mixture for another 2 minutes to set the starch. Stir constantly to prevent burning.
- Remove from heat and stir in 2 Tablespoons unsalted butter until melted.
- Transfer the pastry cream to a clean bowl. Cover it with plastic wrap, taking care to place the plastic directly on the surface of the cream so no skin can form.
- Prepare a second, larger bowl with ice and cold water. Transfer the pastry cream bowl into the water bath to cool for 30 minutes prior to refrigerating. Refrigerate the pastry cream for 2-3 hours before using.
For the Chocolate Glaze
- Place 1/2 cup semi-sweet chocolate chips in a heat-proof bowl that is wide enough to dip the eclairs.
- Heat 1/4 cup heavy cream in the microwave on high for 1 minute.
- Pour the hot cream over the chocolate chips and allow to sit for 5 minutes.
- Add 1 Tablespoon unsalted butter and 1 Tablespoon corn syrup to the chocolate chips and whisk everything together until smooth. Let cool slightly before dipping the eclairs.
For assembling the Eclairs
- After refrigeration, remove the plastic wrap from the pastry cream and whisk until the consistency is smooth again. Transfer to a piping bag with a small tip.
- Insert the tip of the piping bag into each hole you created for venting steam. Squeeze the filling in until the pastry feels heavy and full.
- Dip the tops of the eclairs in chocolate and gently shake them to get off any excess. Place them on a cooling rack to allow the chocolate to dry.
- Serve within 12 hours or chill for up to 24 hours. The eclairs will soften a bit after they have been filled.
Notes

Did you make this?
Leave a rating below and tag @cupcakesandkalechips on Instagram and hashtag it #cupcakesandkalechips

What can you use in place of cornstarch? Arrowroot? Tapioca?
I have not tested a substitute in this recipe, and the starches in baking recipes can vary the results significantly.
So delicious and were a hit, even with the gluten eaters! Thank you!
So happy to hear this!