
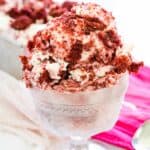
Gluten Free Red Velvet Cake Ice Cream


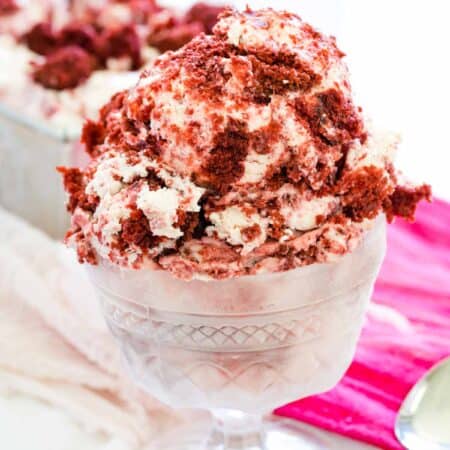
This decadent No-Churn Red Velvet Ice Cream takes your favorite creamy frozen dessert and adds soft chunks of classic red velvet cake. When they are folded into a rich cream cheese ice cream, every bite has the perfect hint of chocolate balanced with tangy sweetness. Best of all, it’s easy to make without an ice cream maker, and it’s simple to make gluten free too.

Delicious Details
- Cuisine Inspiration: American
- Primary Cooking Method: No-Bake
- Dietary Info: Gluten-free option
- Skill Level: Easy
Red velvet cake has always been a favorite in my house. It’s my husband’s favorite dessert, and lately my boys have been requesting it for birthdays too. Since I’m the ice cream lover in the family, it was only a matter of time before I combined the two.
This recipe starts with a creamy no-churn cream cheese ice cream base, so it tastes just like the frosting you’d spread on red velvet cake. Then it’s packed with cubes of moist cake, so every scoop has that classic red velvet flavor that’s lightly chocolaty and tangy. The little bites of soft red velvet cake stay tender in the freezer, giving every scoop the perfect mix of creamy ice cream and moist cake. It’s rich, creamy, colorful, and surprisingly easy to make at home.
Why You’ll Love Homemade Red Velvet Ice Cream
Here’s why you’ll be making it over and over again:
- No ice cream maker. This is a no-churn ice cream recipe, so you’ll just whip, fold, freeze, and, the hardest part, wait for it to freeze!
- Rich flavor with minimal effort. Just 10 minutes of hands-on work gives you creamy homemade ice cream worthy of your favorite ice cream shop.
- Easy to make gluten-free. Simply use your favorite gluten free red velvet cake, and the rest of the ingredients are already naturally gluten free.

Recipe Ingredients
Below you’ll find an overview of what you need to make this homemade red velvet ice cream recipe, plus some notes and tips. Check the recipe card at the end of this post for the full ingredient amounts.
- Cream Cheese: You can use light or regular block cream cheese. This gives the ice cream base the flavor of cream cheese frosting that pairs so well with red velvet.
- Sweetened Condensed Milk: Regular or fat-free milk is fine to use. Make sure it is sweetened condensed milk, NOT evaporated milk, because there is no sugar added to the ice cream base.
- Salt
- Heavy Cream
- Vanilla Extract: Pure vanilla extract will give the best flavor.
- Red Velvet Cake: You can use store-bought or homemade, regular or gluten free red velvet cake or regular as needed. It’s also a great way to use up extra red velvet cupcakes. In a pinch, even a gluten free cake mix works well.

How to Make Red Velvet Ice Cream
Here’s a quick overview of how to make this creamy homemade red velvet ice cream. You’ll find the full instructions in the recipe card below.
- Mix. Using an electric mixer, beat together the cream cheese, sweetened condensed milk, vanilla, and salt.
- Whip the cream. Beat the heavy cream to soft peaks.

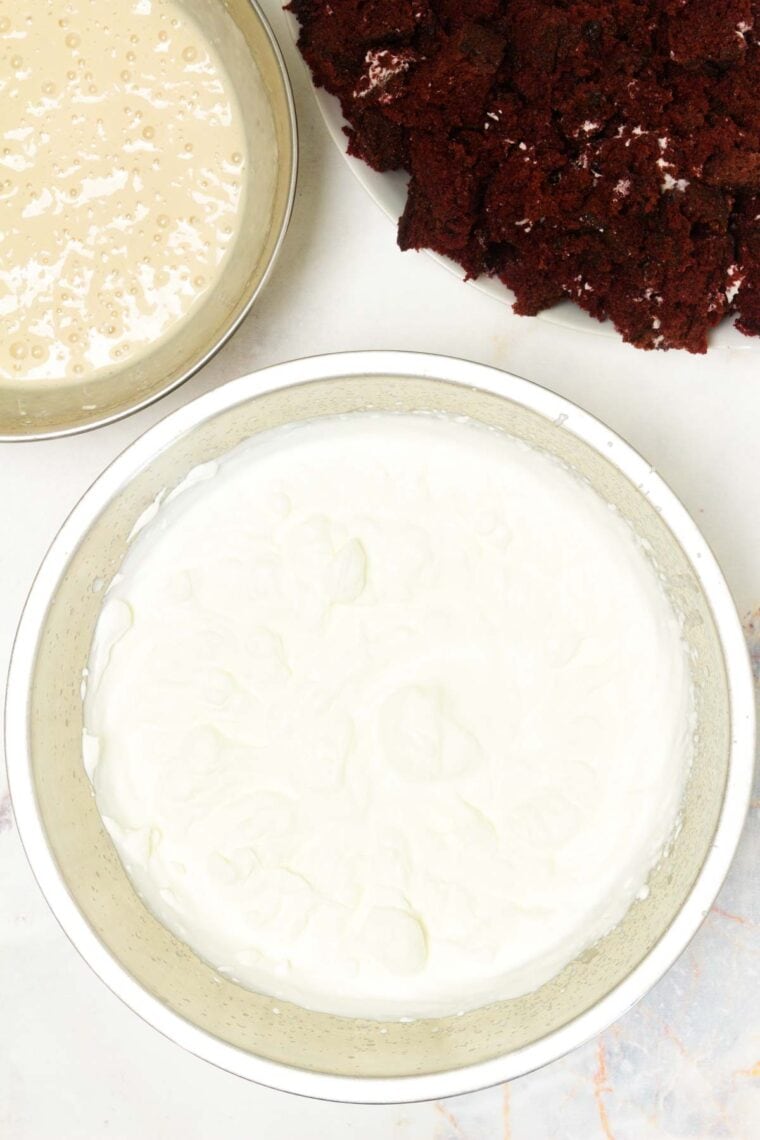
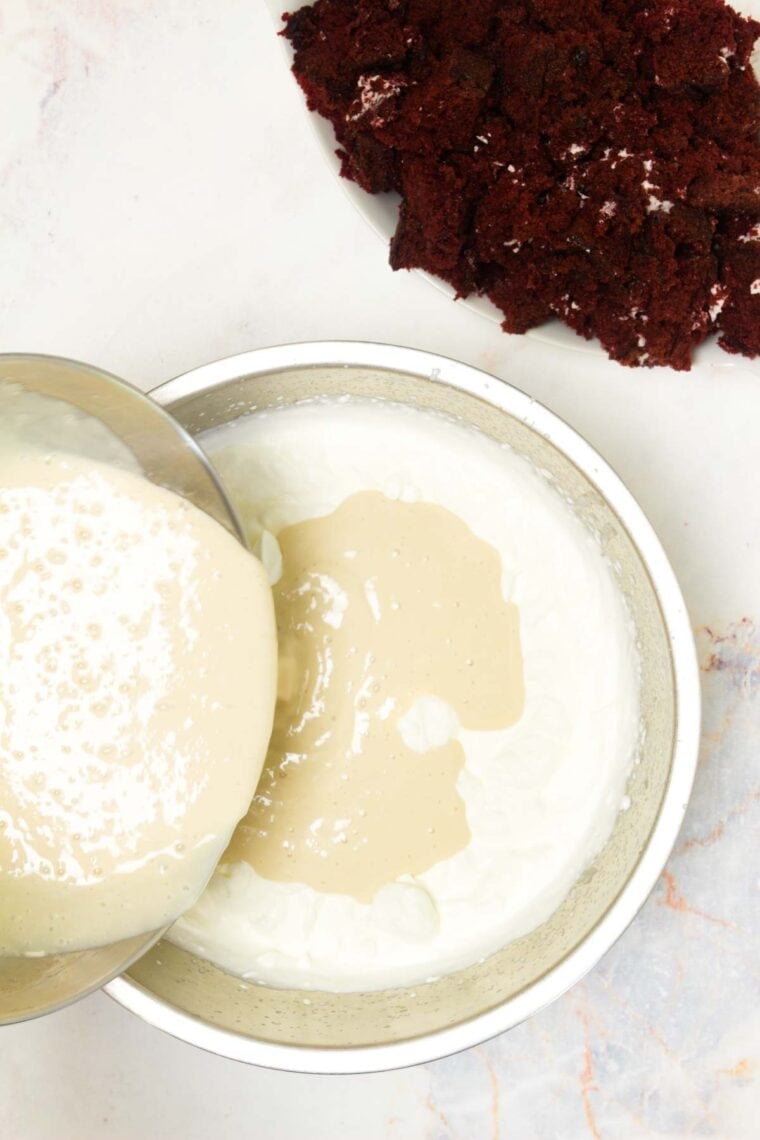
- Combine. Gently fold the cream cheese mixture into the whipped cream, then mix the cake cubes into the ice cream base.

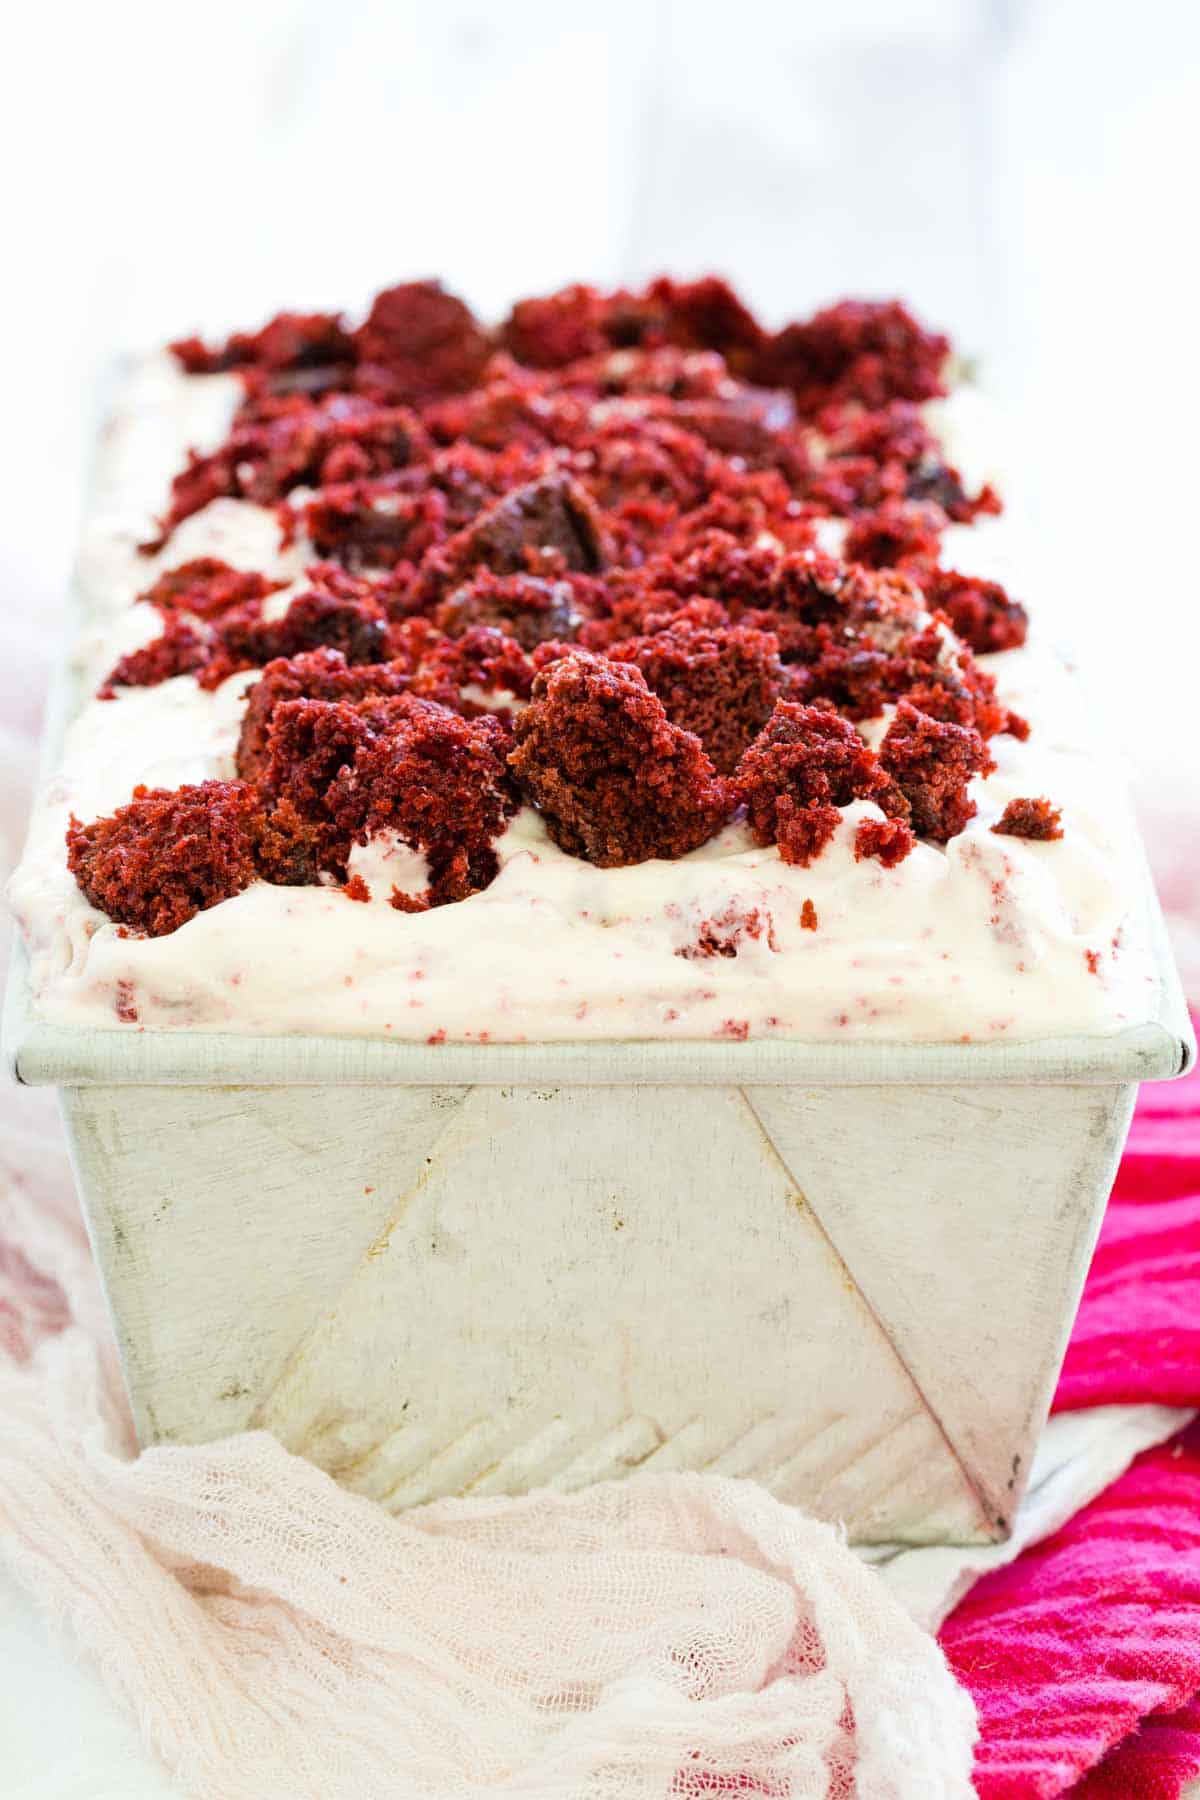
- Assemble. Place the ice cream in a container and top it with more cake cubes.
- Freeze. Cover the ice cream and freeze for 4-6 hours.


Tips and Variations
Here are a few things to keep in mind to end up with the best creamy homemade ice cream:
- Use room-temperature cream cheese. Cream cheese is one of those ingredients that need to be at room temperature before you use it in recipes because it can get clumpy. Make sure to use softened cream cheese for the smoothest ice cream base.
- Chill the cream. On the other hand, you’ll want to use cold cream in a cold bowl so that it gets nice and fluffy without overwhipping!
- Add gluten free cake. See my red velvet cake recipe linked below so you can make a wonderful homemade gluten free red velvet cake to use in this ice cream and make it into an entirely gluten free dessert.
- Change it iup. Instead of cake, you can fold in pieces of Red Velvet Cookies or fudgy cubes of Red Velvet Brownies
- Don’t store the ice cream too long. See my tips below for how to keep this red velvet ice cream fresh-tasting for as long as possible. Remember that store-bought ice cream lasts longer, so you’ll want to eat homemade ice cream within a month or less.
Proper Storage
Homemade ice cream doesn’t last quite as long as store-bought ice cream, so you’ll want to keep track of how long you’ve had it in the freezer. To keep this red velvet ice cream as fresh as possible, transfer it to a freezer-safe container, cover the ice cream with plastic wrap to help keep ice crystals from forming, and keep it sealed in the freezer for no more than 30 days.

Make it a Dessert
I love serving bowls of red velvet ice cream just as it is, but sometimes I like to add a little more. Here are a few of my serving suggestions:
- Top with sauce. My Homemade Hot Fudge Sauce would be lovely drizzled over scoops of red velvet ice cream to add an extra chocolate touch. For more sweetness, you can spoon homemade Caramel Sauce on top. Turn it into a red velvet sundae with lots of whipped cream and some toasted nuts.
- Or do a brownie sundae. Go for it and make a gluten free brownie sundae! Make my Easy Gluten-Free Brownies or Gluten-Free Mug Brownies to use as a base for a red velvet ice cream sundae. Or double your red velvet pleasure with Gluten Free Red Velvet Mug Brownies.
- Serve in ice cream cones. Pick up a package of (gluten-free) ice cream cones and make everyone happy with a hand-held dessert.
More Homemade Ice Cream Recipes
- Nutella Ice Cream
- Dulce de Leche Ice Cream
- Brownie Batter Ice Cream (gluten free option)
- Mint Chocolate Chip Ice Cream
No-Churn Red Velvet Cake Ice Cream (Gluten Free Option)
Ingredients
- 4 ounces cream cheese , light or regular, softened to room temperature
- one 14.5 ounce can sweetened condensed milk , regular or fat free
- pinch of salt
- 1 pint heavy cream , well chilled
- 2 teaspoons vanilla extract
- 2-3 cups red velvet cake cubes (about half of an 8-9-inch round layer or about 4-6 cupcakes), with or without frosting
Instructions
- Place a large glass or metal bowl in the refrigerator or freezer for whipping the cream.
- Using an electric mixer or whisk attachment, beat together 4 ounces cream cheese, one 14.5 ounce can sweetened condensed milk, and a pinch of salt until smooth. Set aside.
- Add 1 pint heavy cream and 2 teaspoons vanilla extract to the chilled bowl. Using an electric mixer or whisk, beat the heavy cream to soft peaks. Then add the cream cheese mixture into the whipped cream and gently fold in until you only see a few small streaks.
- Set aside about a cup of the 2-3 cups red velvet cake cubes, and fold the remaining 1-2 cups into the ice cream mixture.
- Transfer to a container that you can freeze, such as a 9-inch loaf pan. Top the ice cream mixture with the additional 1 cup of cake cubes, if desired.
- Cover with a lid or plastic wrap and place in the freezer for 4-6 hours or until frozen completely.
Did you make this?
Leave a star rating to help others know that they should make this recipe.
Share a photo and tag @cupcakesandkalechips on Instagram!