
Gluten Free Banana Cream Pie


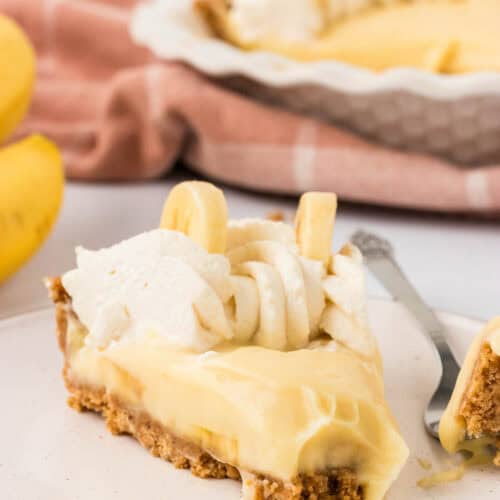
There’s nothing quite like homemade banana cream pie, and this recipe does it right. From the creamy custard filling to the subtly crunchy banana-lined graham cracker crust to the cloud-like whipped cream on top, it’s pure bliss. And so easy to make gluten free with one simple swap!

Delicious Details
- Cuisine Inspiration: American
- Primary Cooking Method: Stovetop
- Dietary Info: Gluten-free option
- Skill Level: Easy
Banana cream pie is a classic dessert, but making it from scratch takes it to a whole new level. Reminiscent of my Homemade Banana Pudding, this pie’s perfectly balanced combination of flavors and textures makes it an automatic no-fail favorite. A buttery graham cracker crust with just the right hint of cinnamon pairs beautifully with sweet banana slices and a rich, silky smooth custard filling. Topped with fresh whipped cream (and more banana slices), it’s a total dream dessert.
Plus, this pie is so easy to make gluten-free – all you have to do is swap the graham crackers in the crust. From the custard filling to the whipped cream topping, everything else is naturally gluten free! Whether you’re preparing it for a special occasion or a casual family dinner, your loved ones will be raving about this dessert for months to come.
Why This Banana Cream Pie Is a No-Fail Favorite
Stop what you’re doing right now. This banana cream pie needs making. Here’s why:
- An unforgettable flavor experience. This pie features a rich vanilla pudding that beautifully absorbs the fresh banana flavor. It’s perfectly complemented by the warming hints of cinnamon in the graham cracker crust. So good!
- Dreamy, creamy texture. This recipe teaches you to create a perfectly smooth, thick custard…from scratch! It sets beautifully and, combined with a crunchy crust and fluffy whipped cream, you couldn’t ask for anything better.
- Easily gluten-free. Using gluten-free graham crackers makes this recipe easy to enjoy for those with dietary restrictions. And, don’t worry. Unlike too many gluten-free desserts, this one doesn’t compromise on flavor or texture.

What You’ll Need
Below is a list of the ingredients you’ll need to gather to make this recipe, why you need them, and possible substitutions. Scroll all the way down for the full recipe card with measurements.
Graham cracker crust:
- Gluten-free graham cracker crumbs – You can purchase gluten-free graham crackers or make your own. If gluten isn’t a problem for you, go ahead and use traditional graham crackers.
- Salt – To break up the sweetness of the dessert.
- Brown sugar – You can use light or dark brown sugar, depending on your taste preferences. Dark brown sugar will have a deeper, more molasses-y flavor.
- Cinnamon – The cinnamon is optional, but it adds a lovely depth to the flavor profile.
- Unsalted butter (melted) – Salted butter is fine, too. Just don’t leave the salt out of the crust.
For the filling:
- Large egg yolks – Just the yolks for a richer, thicker filling.
- Whole milk – I do not suggest using anything lower in fat content than whole milk. Your filling will turn out runny. You can use half-and-half, however, for a richer filling.
- Heavy whipping cream – Again, don’t try to use anything lower in fat content unless you want a runny filling.
- Cornstarch – To help thicken things up.
- Salt – The salt breaks up the sweetness of the custard a bit.
- Granulated sugar – I suppose brown sugar would be ok, but it doesn’t dissolve as well, so your filling might turn out gritty.
- Vanilla extract – I love the depth and nuance the vanilla delivers.
- Unsalted butter – You can use salted butter. Just leave out any extra salt.
- Yellow bananas – I mean it when I say “yellow”. No brown spots allowed. Brown bananas will release too much liquid and may cause your pudding to turn watery.
Whipped cream topping:
- Heavy whipping cream – Make sure it’s nice and cold before you make the whipped cream. Otherwise, it won’t whip up and hold volume properly.
- Powdered sugar – The powdered sugar not only sweetens the whipped cream, but also adds structure. Don’t try to use a different kind of sugar. It won’t yield the same result.
- Vanilla extract – For extra depth of flavor.

How to Make Banana Cream Pie
Time to get to cookin’! Here’s a quick look at how to make this no-bake pie. For more detailed instructions, see the recipe card below.
- Prep. Coat a 9-inch pie pan with nonstick cooking spray.
- Make the crust. Mix together the graham cracker crumbs, sugar, salt, and cinnamon with the melted butter, and then press it into the bottom and up the sides of the prepared pie pan.
- Chill. Chill the crust in the freezer while you make the filling.


- Whisk. Whisk together the egg yolks in a heat-safe bowl.
- Heat things up. Whisk together the sugar, cornstarch, and salt in a medium saucepan. Slowly whisk in the milk and cream. Cook over medium-low heat until steaming profusely, stirring occasionally.


- Temper the eggs. Gradually stream ~1/3 of the milk mixture into the yolks, whisking all the while. Stir the yolk mixture into the milk mixture in the pot.
- Thicken. Cook over medium-low heat until the mixture turns into a thick pudding, stirring with a silicone spatula all the while.


- Strain. Pass the mixture through a fine mesh strainer into a bowl to ensure your pudding is as smooth as possible.
- Finishing touches. Stir the butter and vanilla into the filling.


- Cool. Press some plastic wrap over the filling, letting it sit tightly across the top. Let it cool on the counter for 10-15 minutes.
- Assemble. Slice 1-2 bananas into coins and arrange in a single layer in the bottom of the pie crust. Pour the filling over the top.


- Chill. Smooth out the filling and press plastic wrap over the top. Refrigerate for 4 hours.


- Make the whipped cream. Whip together the heavy cream, powdered sugar, and vanilla until stiff peaks form.
- Top it off. Pipe the whipped cream around the edges of the filling and decorate with fresh banana slices.


Tips for Success
Before you get started, have a look at the following tips and tricks. They’ll help you avoid some common pitfalls and achieve banana cream pie perfection.
- Easy on the heat. Throughout the whole process of cooking/thickening the filling, keep the heat to medium-low. Don’t try to rush the process by turning up the heat, as this can burn the custard and/or cause it to curdle.
- Keep things moving. When warming up the milk mixture for the filling, stir here and there to prevent scalding and to promote even heating. Then, when tempering the eggs and thickening the filling, stir the entire time. Otherwise, the filling will cook unevenly, burn, and/or curdle.
- Temper the eggs. Don’t just stir the egg yolks directly into the hot filling. Instead, temper them by slowly whisking some of the hot milk mixture into the yolks. This will bring them up to temperature before you add them to the filling, so they don’t scramble.
- Cook the filling all the way. Cook the filling until it’s nice and thick. This takes some patience, but if you try to take it off the stove too soon, you’ll wind up with a runny custard.
- Let it cool. The filling will be hot when it comes off the stove. Let it cool for a bit before you assemble the pie. Otherwise, it’ll turn the crust soggy.
- Don’t skip the chill. This pie needs at least 4 hours in the fridge before you serve it in order for the custard to set properly. Skimping on this time will result in a runny dessert.
- Chill your bowl. Before making the whipped cream, chill the bowl in the fridge or freezer. This will help the cream whip up more quickly without curdling or turning to butter.
Variation Ideas
Want to mix things up? Here are a few unique spins you can put on this pie to make it your own:
- Easy shortcut. In a hurry? Swap the homemade custard for two packages (3.4 oz. each) of instant vanilla pudding mix prepared according to the package’s instructions. Spread the pudding into the banana-lined pie crust and top with Cool Whip.
- Crust swap. Some people prefer their banana cream pie in a pastry crust. Grab one from the store or make my gluten-free pie crust (you’ll want to bake it fully before adding the filling). My gluten-free Oreo crust would be another fun one.
- Individual desserts. For an elegant twist, skip the crust and layer the bananas, filling, and whipped cream together with gluten-free graham crackers in mason jars or tumblers. One mason jar for each of your dinner guests.
- Dulce de leche twist. If banana cream isn’t quite enough for you, consider my dulce de leche banana cream pie. With a layer of thick dulce de leche on the bottom, it’s an extra-sweet take on this classic dessert.

How to Store
- Refrigerator. Store any leftover banana cream pie in an airtight cake carrier or cover it with a double layer of plastic wrap (use toothpicks to prop the plastic away from the whipped cream). It’ll keep in the fridge for up to 3 days.
- Freezer. I would only freeze this pie before you top it with whipped cream (whipped cream doesn’t thaw well). Wrap the whole thing tightly in a double layer of plastic wrap and store it in the freezer for up to 3 months. When the time comes, let it thaw in the fridge and top it with freshly-made whipped cream and banana slices.
Can I Make Banana Cream Pie Ahead of Time?
You can! Make the pie crust up to 3 months in advance, wrap it in plastic wrap, and store it in the freezer. You can also make the filling a couple of days ahead of time and store it in the fridge. Whether you store it in a mixing bowl or layer it into your banana-lined crust, press a sheet of plastic wrap over the top to prevent a film from forming.
I would refrain from topping the filling with the whipped cream and bananas until you’re ready to eat it. The bananas will turn brown after a little while, and the whipped cream will lose volume.

More GF Pie Recipes to Try
Good gluten-free pies often fall short on flavor and texture, but I’ve got a few more excellent recipes that break that mold. Here they come:
Gluten Free Banana Cream Pie
Ingredients
For the crust:
- 1 ½ cups gluten free graham cracker crumbs
- ¼ teaspoon salt
- 3 Tablespoons brown sugar , light or dark
- ¼ teaspoon cinnamon , optional
- 6 Tablespoons unsalted butter , melted
For the filling:
- 4 large egg yolks
- 2 cups whole milk
- ½ cup heavy whipping cream
- 4 Tablespoons cornstarch (40 grams)
- ½ teaspoon salt
- ⅔ cup granulated sugar (140 grams)
- 1 Tablespoon vanilla extract
- 2 Tablespoons unsalted butter
- 3-4 yellow bananas
For the topping:
- 1 cup heavy whipping cream , well chilled
- 2 Tablespoons powdered sugar
- 1 teaspoon vanilla extract
Instructions
- Coat a 9-inch pie pan with nonstick cooking spray.
- For the crust, combine 1 ½ cups gluten free graham cracker crumbs, ¼ teaspoon salt, 3 Tablespoons brown sugar, and ¼ teaspoon cinnamon in a bowl, then pour in the melted 6 Tablespoons unsalted butter and mix with a fork until all the crumbs are thoroughly moistened.
- Transfer the crumb mixture to the prepared pan. Use the flat side of a measuring cup to flatten out and spread your crust evenly around the bottom and up the sides of the pan.
- Place the crust in the freezer to firm up while you prepare your filling.
- In a heat-safe bowl, add 4 large egg yolks, which slightly to break up the yolks, and set aside.
- In a medium saucepan, whisk together the ⅔ cup granulated sugar, 4 Tablespoons cornstarch, and ½ teaspoon salt. Then slowly whisk in 2 cups whole milk and ½ cup heavy whipping cream.
- Place the saucepan over medium to medium-low heat and heat the mixture until very hot and steaming, stirring occasionally. This usually takes 10-20 minutes, depending on your stove.
- Once very hot and steaming profusely, begin whisking your egg yolks and very slowly stream in a small portion of the milk mixture to the yolks. This tempers the eggs without scrambling them. Make sure you keep whisking and pour slowly.
- Once about one-third of your mixture has been poured and mixed into the egg yolks, stir the egg yolk mixture back into the milk mixture in the pot. Return the pot to medium-low heat, stirring with a silicone spatula continually.
- Cook the mixture until it turns into a thick pudding. Just loose enough to easily pour into your pie crust, but thick enough to loosely hold its shape in the pot. This will take approximately 20 minutes, but it may take less or more time, depending on your stove.
- Once done, pass the mixture through a fine mesh strainer into a bowl to ensure your pudding is as smooth as possible. Then add 2 Tablespoons unsalted butter and 1 Tablespoon vanilla extract and mix until the butter is melted and combined.
- Cover the pudding mixture with plastic wrap, letting it sit tightly across the top of the pudding to prevent it from forming a skin. Let it cool off on the counter for about 10-15 minutes before assembling your pie.
- To assemble your pie, slice 3-4 yellow bananas into coins and layer them in the bottom of your pie crust in a single layer (save the rest for the topping). Top the banana slices with the filling, spreading it out evenly and smoothly.
- Cover tightly with plastic wrap, letting the plastic touch the surface of the pudding so as to prevent it from forming a skin, and refrigerate for 4 hours (or overnight) to set up.
- When ready to serve, prepare the whipped cream by adding 1 cup heavy whipping cream, 2 Tablespoons powdered sugar, and 1 teaspoon vanilla extract to a bowl, and whipping with a hand mixer or stand mixer until you reach stiff peaks.
- Top your pie with whipped cream and fresh banana slices and enjoy!

Did you make this?
Leave a star rating to help others know that they should make this recipe.
Share a photo and tag @cupcakesandkalechips on Instagram!