
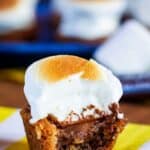
Gluten Free S’Mores Cookie Cups


Serving up the familiar gooey, sticky goodness with no campfire needed, S’Mores Cookie Cups put an easy and fun spin on a timeless summer treat. Combine melty chocolate and toasty marshmallows with a classic chocolate chip cookie in one bite-sized dessert, and you have a match made in heaven. You can even make them gluten free!

Delicious Details
- Cuisine Inspiration: American
- Primary Cooking Method: Oven
- Dietary Info: Gluten-free option
- Skill Level: Easy
It’s true that part of the s’more’s charm is the perfectly toasted marshmallow and melty chocolate square oozing out from between two graham crackers. But that sticky mess should stay outside along with the sticks, dirt, and open flames. If you want to take the s’mores into the house with you, you’re going to need a way to minimize the mess.
These s’mores cookie cups combine the joy of sinking your teeth into a hot, fresh s’more with the comforting taste of a fresh-baked chocolate chip cookie. You can still enjoy the ooey-gooey toasted marshmallow and softened chocolate. It’s just a little more contained. And it doesn’t hurt that the container is just as moist and sweet as what’s inside it.
Crave-Worthy S’mores Cookie Cups
Here’s why you’ll love them…
- Adapt as needed. You can make a batch of chocolate chip cookie dough from scratch, even using a gluten free recipe like my chocolate chip cookie cups, or use a mix or pre-made cookie dough.
- Easy to make. Once your cookies are baked, all you have to do is top them with chocolate and a marshmallow, then get them toasty under the broiler. No campfire needed!
- Have them now or later. Eating them right away will give you the nostalgic melted chocolate and toasty marshmallow experience of a classic s’more, but these cookie cups can also be made in advance. Just follow the storage instructions below and enjoy them whenever! You can even pop them in the microwave to freshen them up.
Recipe Ingredients
Once you’ve baked your cookie cups from a recipe or a premade dough, you only need two additional ingredients to make these s’mores cookie cups. You can find exact amounts for everything by scrolling down to the recipe card.
- Chocolate Chip Cookie Dough: You can use store-bought or half a batch of Gluten-Free Chocolate Chip Cookie Cups.
- Hershey’s Chocolate Bars: You can use the individually wrapped squares or break up the larger bars.
- Marshmallows: Full-sized marshmallows work best. However, you can also pop 3 or 4 mini marshmallows on top, or use the rainbow ones for a pop of color. If you are gluten free, check out my article about gluten free marshmallows so that you pick up a safe option.

🍴 In the Cupcakes & Kale Chips Kitchen…
- Silicone Mini Muffin Pan – when making cookie cups, especially gluten free ones, I prefer to bake them in silicone pans. They are so much easier to pop out rather than trying to remove them from your usual metal pans.
How to Make S’mores Cookie Cups
These cookie cups are as easy to make as they are to fall in love with. Preheat your oven to 350°F and spray one 24-cup mini muffin pan or two 12-cup mini muffin pans with nonstick cooking spray. As you can see above, I like using silicone pans. Then follow these instructions for perfectly melty s’mores in a moist and chocolatey cookie cup.
- Bake: Prepare your cookie dough if you are starting from a recipe or a mix. Divide the dough evenly between the 24 cups. Bake the cookie cups for 12-14 minutes until the edges turn golden brown. Remoce the cookie cups from the mold and place on a sheet pan.
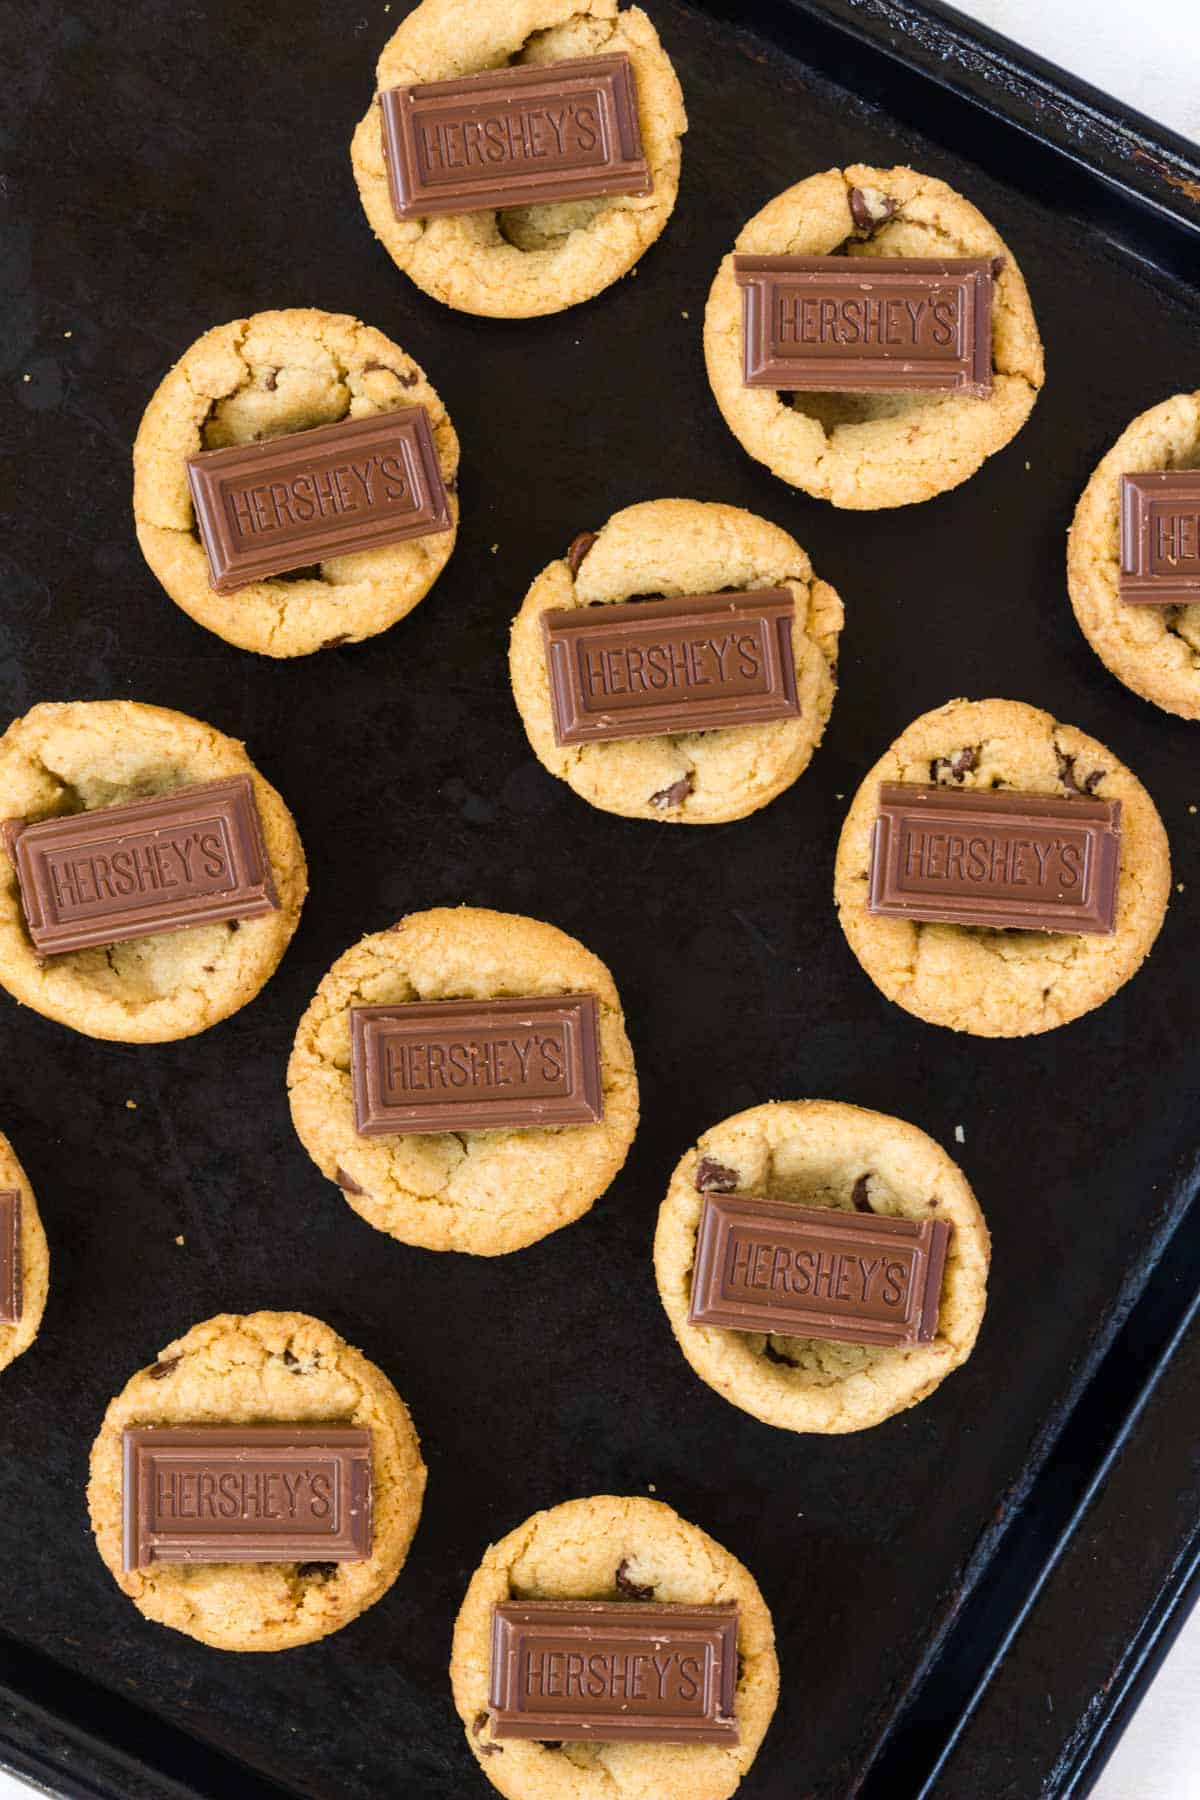
- Add the Chocolate: Top each cookie with one piece of chocolate. If your cookie cups are still warm, the chocolate will melt slightly. If it doesn’t, put the pan in the oven for a few seconds, just to get the chocolate slightly melted.

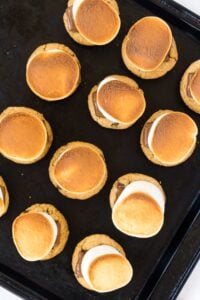
- Add the Marshmallows: Top each cookie cup with a marshmallow and press down slightly so that the marshmallow sticks to the chocolate. Make sure not to press too hard, or the melty chocolate might ooze out.
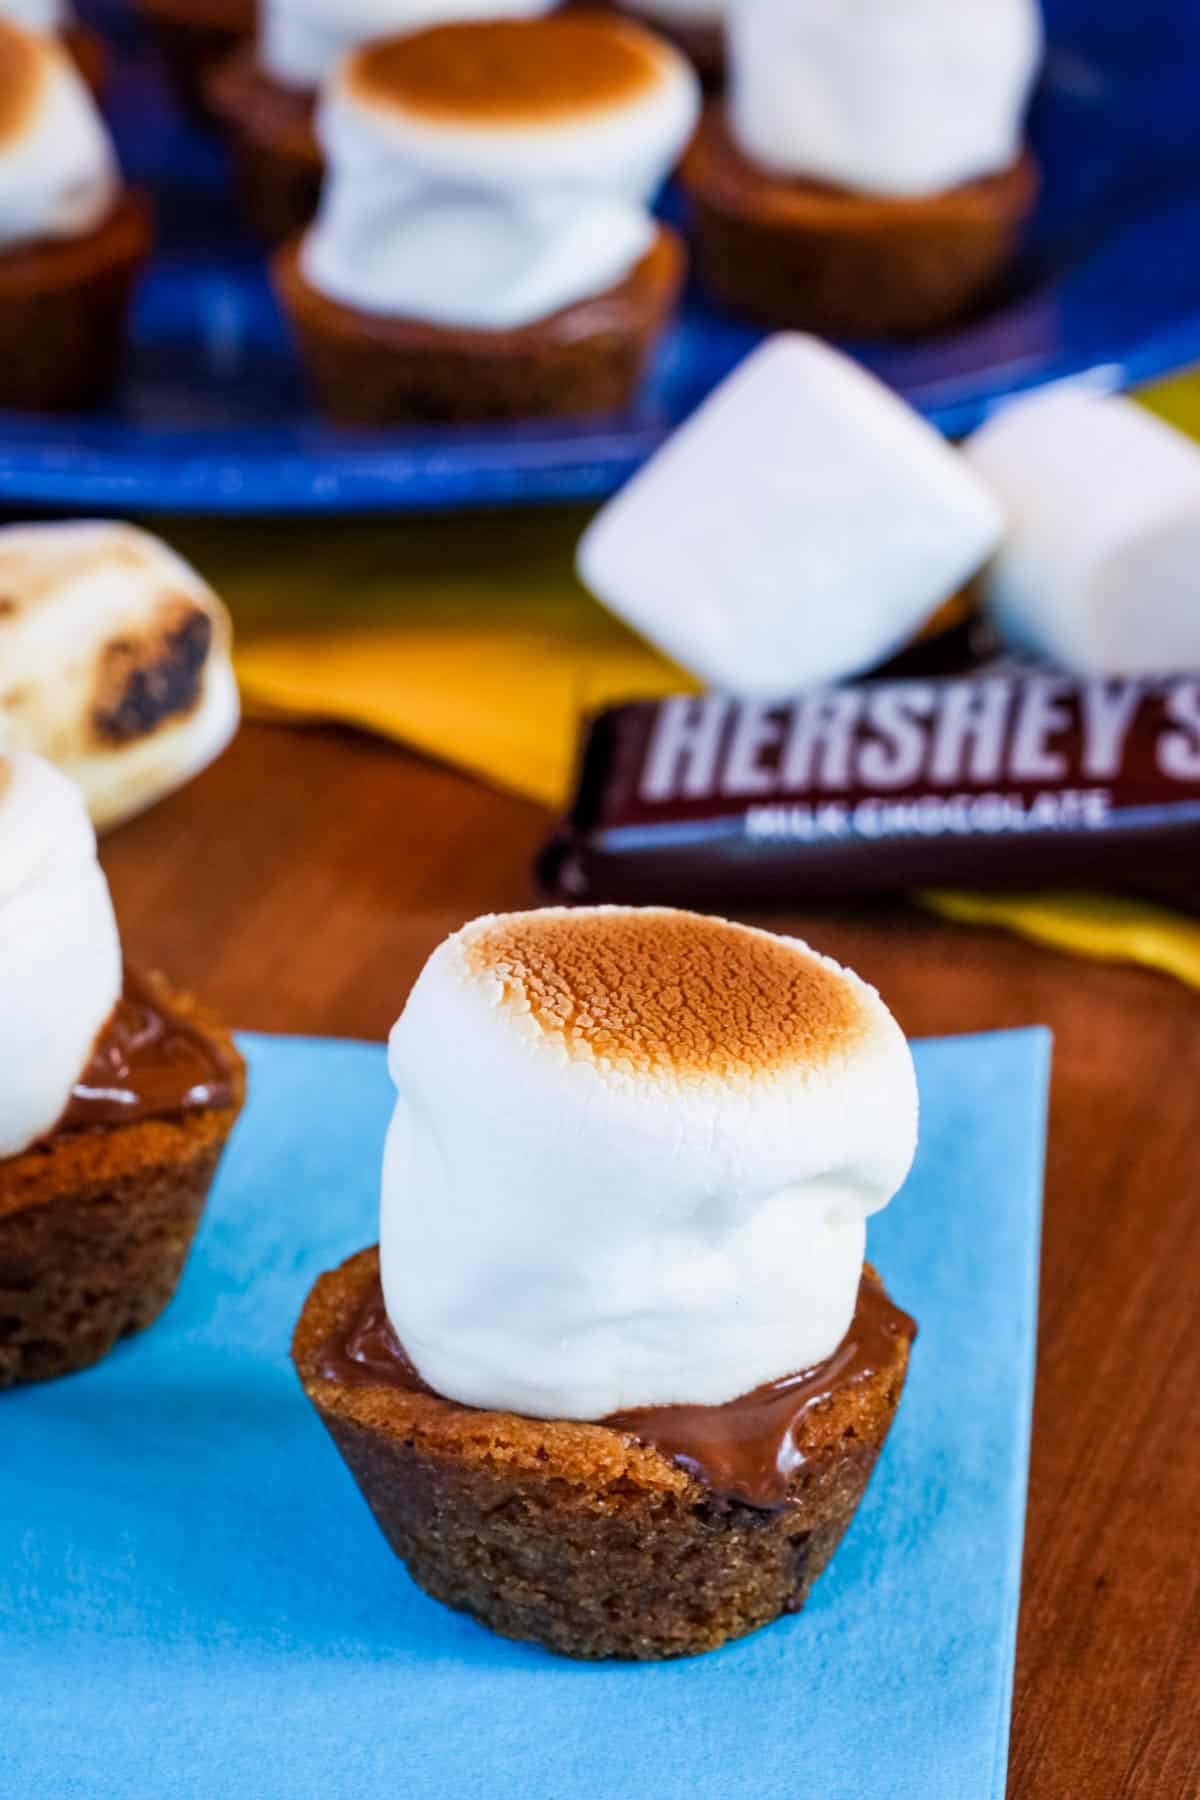
- Broil: Place the pan under the broiler for about 1-2 minutes or until the marshmallows reach a toasty golden brown.
- Serve: Enjoy your cookie cups immediately for the classic campfire s’mores experience, or allow them to cool so that the chocolate sets the marshmallow in place.

Tips and Variations
These s’mores cookie cups are the perfect way to bring some campfire fun into your kitchen. Here are a few things to keep in mind so that they come out moist and melty every time.
- Melt the Chocolate Squares: Make sure the chocolate squares are melty enough to hold the marshmallows in place. If the cookie cups aren’t hot enough to melt them, pop the pan in the oven for a few seconds until they soften enough to lose their straight edges before putting the marshmallows on top.
- Reheat Before Serving: If you’re planning to make these cookie cups in advance, you might want to heat them up a little before you serve them. That way, you’ll still get the gooey, melty richness of a fresh s’more. Just pop them in the microwave and heat them 10 seconds at a time until the chocolate softens.
- Toast Them Your Way: You can experiment with broiling times so that the marshmallows are toasted exactly how you like them. Go for 1 minute if you like them lighter, and 2 if you want a dark gold and crispy outer shell.
- Replace the Chocolate: There are so many options! If you want to stick with Hershey’s, you can go for the decadence of dark chocolate or the crunch of milk chocolate with almonds. If you want to get really creative, try mini peanut butter cups, Rolos, or your favorite bite-sized candy bar.
- Try a Different Dough: Be creative with the cookie cups. You can use peanut butter cookie dough for the nutty, buttery texture, or try my gluten free sugar cookie cups for a sweet, vanilla-flavored alternative.
Proper Storage
- Room temperature – Keep them in an airtight container in the pantry, or right on the counter or table, for up to 4 days.
- Freeze – Wrap them well in plastic wrap or stick them in an airtight, freezer-safe container after they’ve cooled completely. Marshmallows don’t freeze fully since there’s no water in them, so just make sure to let the cookies thaw instead of defrosting them in the microwave, since they won’t defrost evenly, and the marshmallow will overcook.
- Microwave (optional) – If you like, heat room temperature cookies in the microwave for 10 seconds at a time until they’re back to being wonderfully warm and gooey.

More Decadent Marshmallow Treats to Try
- S’Mores Pudding Pie
- Gluten Free Rocky Road Brownies
- Flourless Fluffernutter Cookies
- Gluten-Free S’Mores Magic Bars
- Toasted Marshmallow Brownie Batter Ice Cream

S’Mores Chocolate Chip Cookie Cups (Gluten Free Option)
Ingredients
- half a batch of Gluten Free Chocolate Chip Cookie Cups or 1 package of regular or gluten-free chocolate chip cookie dough (You will need about 1½ cups or enough for about 24 cookies)
- two 1.55 oz. Hershey's milk chocolate candy bars split into the 24 individual rectangles or miniature Hershey's milk chocolate bars
- 24 large marshmallows
Instructions
- Prepare half a batch of Gluten Free Chocolate Chip Cookie Cups according to the reicpe. Or preheat oven to 350°F and spray a mini muffin tin (with 24 cups) with nonstick cooking spray. Divide cookie dough between the 24 cups, about 1 Tablespoon in each. Bake for 12-14 minutes, or until golden brown and crisp.
- Cool cookie cups in pan for several minutes before removing and transferring to a baking sheet.
- Preheat your broiler. Break two 1.55 oz. Hershey's milk chocolate candy bars along the scored lines into 24 pieces.
- Top each cookie with one miniature chocolate or one of the rectangular pieces broken up from the whole candy bar. If your cookie cups are still warm, the chocolate will melt slightly. If it doesn't, put the pan in the oven for a few seconds, just to get the chocolate slightly melted.
- Top the cookie cups with 24 large marshmallows, one on each, and press down slightly so that the marshmallow sticks to the chocolate.
- Place the pan under the broiler for about 1-2 minutes or until the marshmallows are browned.
- Enjoy immediately (they will be messy) or allow to cool so that the chocolate sets the marshmallow in place.
Notes
- To Store: Keep in an airtight container at room temperature up to 4 days.
- To Freeze: Wrap well in plastic wrap or stick them in an airtight, freezer-safe container after they’ve cooled completely. Freeze for up to 3 months. Let fully thaw instead of defrosting.
Did you make this?
Leave a star rating to help others know that they should make this recipe.
Share a photo and tag @cupcakesandkalechips on Instagram!
These look so cute and so tasty. I bet I could make them with daughter.
Oh definitetly a fun recipe to make with kids!
Clever idea! And cute as a button!
Thanks, aren’t they adorable?!
Adorbz, adorbz, adorbz!
I must make these with my nephews … they will think they’re just the perfect size for them!
They totally are!
Love your sing along story! These would go great anytime or place. Can’t wait to see more as #smoreweek continues!
It was a fun time, though a bit crazy!
This is like…just…my favorite! I LOOOVE s’mores aaaand cookies so it’s just an ooey gooey combo of HAPPY right here!
Right, best combo. Well maybe second best after chocolate and peanut butter!
OMG! I need one of these!!!!!
Or a dozen 😉
SO great to see you again, Brianne! Now you’ve made me even more excited to get my cookie cup pan! Your s’mores cups look irresistible!!!
I love making cookie cups and mini muffins! I bet you can make some cute stuff in yours!
These are beautiful! and who doesn’t love s’mores? Looking forward to giving these a try! Thanks!
Tanks so much!
Hello decadence! I’ll take one… or three!
Go for it!!
I love s’mores in any form – these look delicious!
Is there ever a wrong way to eat S’Mores 🙂