
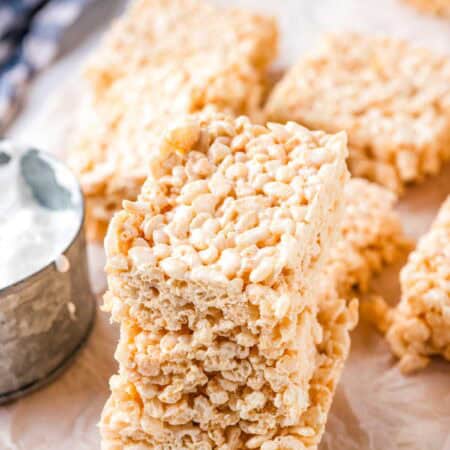
Rice Krispie Treats with Marshmallow Fluff

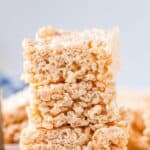

Get ready to indulge in the ultimate rice krispie treats with marshmallow fluff! Soft, gooey, creamy, and crunchy, these easy no-bake bars come together in just 10 minutes and are sure to bring back sweet childhood memories. Easily made gluten free too!

Delicious Details
- Cuisine Inspiration: American
- Primary Cooking Method: Stovetop
- Dietary Info: Gluten-free option, Dairy-free option
- Skill Level: Easy
There’s nothing quite like the nostalgic joy of biting into a gooey, sticky rice krispie treat. With their sweet, marshmallowy goodness and irresistible texture, this classic dessert has been bringing smiles to both kids and adults for generations. There are lots of recipes out there, but this one is extra special. Why? Because, unlike my Gluten Free Rice Krispie Treats Recipe, which uses melted-down mini marshmallows, this one uses marshmallow fluff! The result? Supremely soft, creamy, melt-in-your-mouth treats that’re simply irresistible.
Delicious nostalgia aside, I love that these goodies are incredibly easy to make. With just a handful of ingredients and zero baking required, they come together in under 10 minutes (plus a quick 30 no baking required, they come together in under 10 minutes (plus a quick 30-minuteminutes of cooling time). They are simple, delicious, and timeless. What’s not to love?
The Secret to Perfectly Gooey Rice Krispie Treats? Marshmallow Fluff
You’ve never had rice krispie treats quite like these. I swear. Here’s what makes them stand out:
- Fabulous texture. The marshmallow fluff takes these dessert bars to the next level, coating every piece of cereal for unbelievably gooey, soft, almost creamy results that perfectly contrast with the crispiness of the cereal.
- Quick and easy. With only four ingredients, 10 minutes of active kitchen time, and no baking required, this is the ultimate hassle-free dessert.
- Highly customizable. These treats are a blank slate, ready for experimentation! So don’t be afraid to play with different cereals, add fun mix-ins, or drizzle chocolate over the top! The possibilities are endless. Have a look at the section below titled “Variation Ideas” for inspiration.

What You’ll Need
A 4-ingredient recipe!? Sign me up! Here’s what you’ll need (you’ll find precise measurements in the recipe card below):
- Salted butter – No salted butter? You can use unsalted butter OR coconut oil (or a plant-based butter) if you’d like to keep things dairy-free. Just be sure to add a pinch of salt to balance the sweetness of the marshmallow fluff.
- Marshmallow fluff – I opted for marshmallow fluff instead of regular marshmallows for a softer, creamier, melt-in-your-mouth experience. Just a little different from the usual way of making it with marshmallows.
- Vanilla extract – The vanilla adds depth to the flavor profile. Feel free to play with other extracts as well. A little coconut or almond extract could be fun.
- Crispy rice cereal – Keep in mind that Kellogg’s Rice Krispies are NOT gluten-free. Check out my article on Gluten-Free Rice Krispies to learn more and to find the gluten-free crispy rice cereal that’s right for you. Believe it or not, it’s usually the generic store brands that are safe!

How to Make Rice Krispie Treats with Marshmallow Fluff
These rice krispie treats only require 10 minutes of active time in the kitchen. Here’s a quick look at how to make ’em. Scroll to the recipe card below for more thorough instructions.
- Prep. Line a 9×13-inch baking pan with parchment paper and grease with cooking spray.
- Melt. Melt the butter over medium heat in a large, heavy-bottomed saucepan. Reduce the heat to low, add the marshmallow fluff, and cook (stirring constantly) until melted into the butter. Remove the pan from the heat.
- Add flavor. Stir in the vanilla extract (and the salt if you used unsalted butter).


- Add the cereal. Gently fold the cereal into the marshmallow mixture.


- Cool. Gently press the mixture into the baking pan with a greased spatula. Cool at room temperature for at least 30 minutes.
- Slice ‘n serve. Cut into squares and enjoy!


Tips For Success
Want to ace this recipe the first time around? Pay attention to these tips and tricks, and you’ll be on your way:
- Grease everything. From the pan to the spatula used to press the treats into the pan, grease it all. This will make pressing the mixture into the pan (and removing the treats from the pan) so much easier.
- Keep on stirring. When melting the butter, stir here and there and, once you add the marshmallow fluff, stir CONSTANTLY. This will help ensure the mixture doesn’t burn.
- Be gentle. When folding the cereal into the marshmallow mixture, and then again when pressing the mixture into the pan, be very gentle so as not to crush the cereal.
- Avoid hard treats. Don’t pack the cereal mixture too tightly into the pan, as this can result in hard rice krispie treats.
- Let ’em cool. These rice krispie treats need some time to cool after being pressed into the pan. Otherwise, they will be too gooey and won’t hold together well. So try to resist the temptation to dive in for at least 30 minutes.

Variation Ideas
This recipe is super fun to play around with. Here are a few ideas for you:
- Flavored cereal treats. Want to mix things up? Use Fruity Pebbles or Cocoa Pebbles for a fun twist on this classic.
- Peanut butter fluff Krispies. You can add ½ cup of creamy peanut butter to the marshmallow mixture if you’d like! I especially love doing this if I am going to drizzle chocolate over the top.
- Chocolate drizzle. Pop some chocolate (or white chocolate) chips in a microwave-safe bowl and heat in 30-second intervals, stirring between each, until smooth. Drizzle the melted chocolate over the treats.
- Experiment with mix-ins. Whether it’s colorful sprinkles, chocolate chips, mini marshmallows, or pretzels, feel free to doll these treats up with your favorite mix-in. Or use the amounts and methods in my Oreo Rice Krispie Treats and use gluten free Oreos! Just fold it into the marshmallow-cereal mix right before pressing everything into the pan.
How to Store
- Countertop. Once cool, seal any leftover rice krispies treats in an airtight container (I like to separate layers with a sheet of parchment paper to avoid sticking). They will keep at room temperature for up to 3 days.
- Freezing. Wrap each square in wax paper and store it in a freezer-safe container. You can freeze them for up to 6 weeks. Allow the leftovers to thaw at room temperature for 10-15 minutes before serving.

More Gluten Free Desserts to Try
Being gluten free doesn’t mean you have to sacrifice deliciousness! These rice krispie treats with marshmallow fluff are a great example of that, but here are a few more recipes to keep you inspired:
Marshmallow Fluff Rice Krispie Treats
Ingredients
- 4 tablespoons salted butter OR 4 tablespoons unsalted butter plus 1/8 teaspoon salt
- 8 oz. Marshmallow Fluff
- 1 teaspoon pure vanilla extract
- 6 cups crispy rice cereal (Use a gluten-free brand. Kellogg’s Rice Krispies are NOT gluten-free.)
Instructions
- Line a 9×13-inch baking pan with parchment paper or aluminum foil and grease it generously with cooking spray or butter.
- In a large, heavy-bottomed saucepan or Dutch oven, melt the 4 tablespoons salted butter over medium heat. Stir occasionally to prevent burning.
- Once the butter has melted, reduce the heat to low and add 8 oz. Marshmallow Fluff. Stir constantly until fully melted and combined with the butter.
- Remove from heat and stir in 1 teaspoon pure vanilla extract (and the salt if you used unsalted butter).
- Add the 6 cups crispy rice cereal and gently stir with a spatula until evenly coated.
- Transfer the mixture to the prepared baking pan. Using a greased spatula or lightly greased hands, gently press the mixture into the pan without packing it too tightly.
- Let cool at room temperature for at least 30 minutes. Cut into squares and enjoy!

Did you make this?
Leave a star rating to help others know that they should make this recipe.
Share a photo and tag @cupcakesandkalechips on Instagram!