
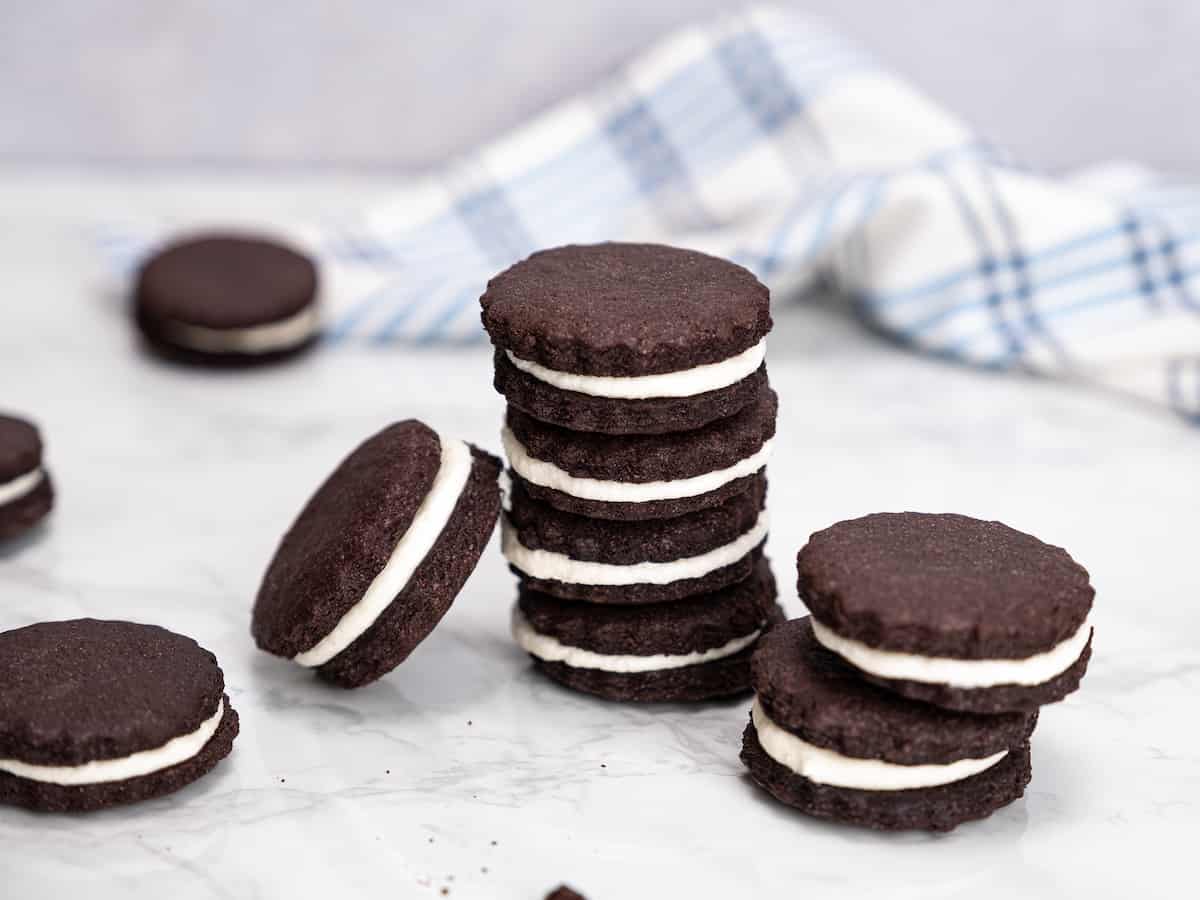
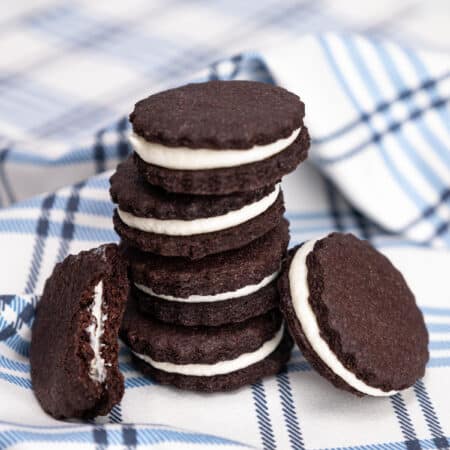
Gluten Free Oreos


Trust me, these homemade Gluten Free Oreos are so much better than what you’ll find in a store! This is an easy gluten free cookie recipe made with smooth and creamy vanilla icing sandwiched between crispy chocolate cookies.

The Best Gluten-Free Oreo Cookie Recipe
When you go gluten-free, it becomes a bit of an ongoing adventure finding which brands and foods do and do not fall into the “safe to eat” category. Over the years, it’s become second nature to check and give different products a green light or red light.
That being said, I’m sure you can understand my heartbreak the day I learned that classic Oreos are strictly on the “no-go” list.
While there are gluten free brands that make variations of chocolate sandwich cookies, I can confidently say that these homemade cookies are the best version ever! These crispy and creamy gluten free Oreos are pretty simple to make at home, and they taste – dare I say it – even better than the real deal.
Do Gluten-Free Oreos Taste the Same?
Nabisco (the makers of traditional Oreos) do have a gluten-free version on the market, however, it’s not available everywhere. Their gluten free Oreos are actually very similar to the original, with the classic creaminess of the filling and crispiness of the chocolate wafer cookies.
It can be tricky to get homemade versions of big-name brands to taste exactly the same. And it’s been a while since I’ve been privy to gluten-containing Oreo cookies! But I will say that from friends’ and family feedback, my homemade cookies taste pretty darn close, too.

What You’ll Need
You don’t need any fancy ingredients to make these delicious gluten free sandwich cookies! Just a few things here and there, that are likely in your pantry already:
For the Chocolate Cookie
- Gluten Free Flour: You’ll need a gluten free 1-to-1 flour blend. I used the one from King Arthur.
- Xanthan Gum: If the flour blend you’re using already contains xanthan gum, you can skip adding extra.
- Cocoa Powder: I use Dutch process cocoa powder for the especially fudgy flavor.
- Cornstarch: For thickening the chocolate cookie dough.
- Baking Soda
- Salt
- Sugar
- Unsalted Butter: Remember to take your butter out of the fridge beforehand, so it can come to room temperature.
- Egg: Also at room temperature, and beaten.
- Vanilla Extract: Emphasis on vanilla extract, and not imitation vanilla, for the best flavor!
For the Icing
- Butter: Unsalted butter, at room temperature.
- Confectioner’s Sugar: Also known as powdered sugar or icing sugar.
- Vanilla Extract
- Gluten Free Oat Milk: For a filling that’s creamy and gluten free (just read this guide about Gluten Free Oat Milk to be sure you choose the right brand)!


How to Make Gluten-Free Oreos
This recipe makes about 40 chocolate cookies (or 20 finished gluten free Oreos). There is a bit of prep involved, but the payoff is the most delicious homemade Oreos! Here’s how to make them, from cookies to cream:
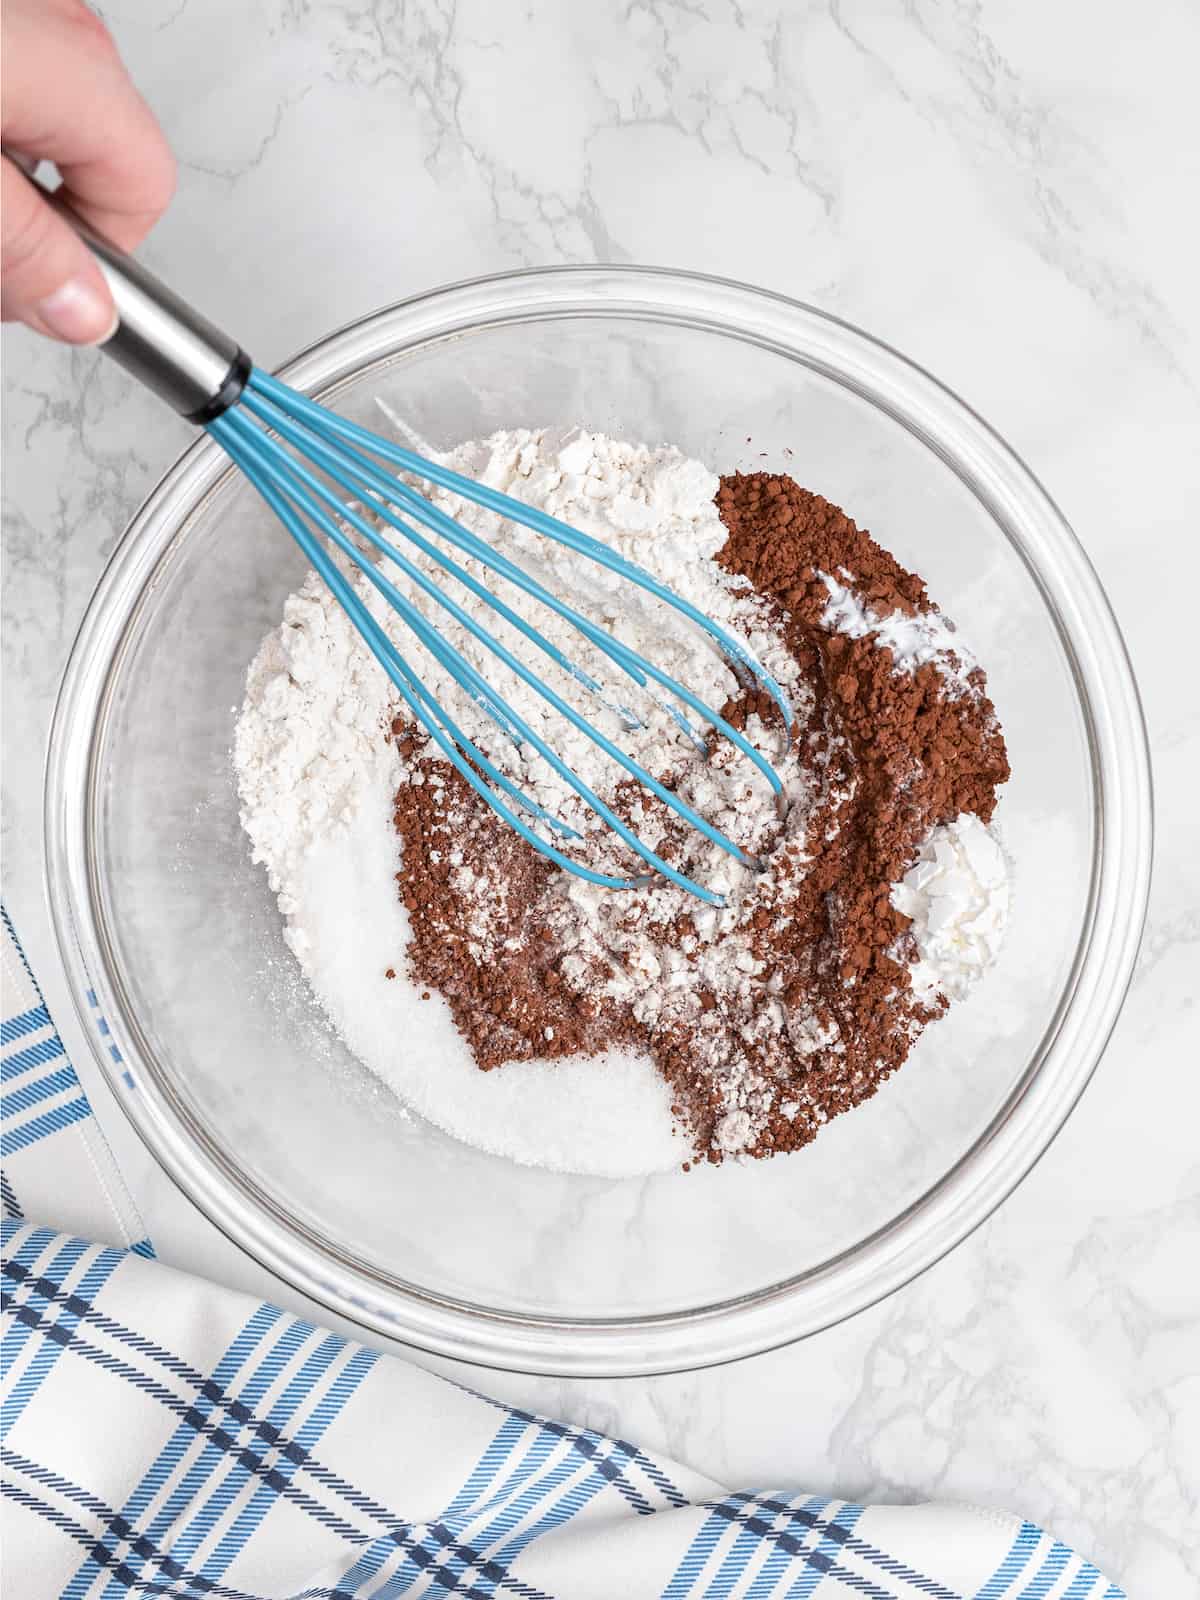
Combine the Dry Ingredients: In a large bowl or stand mixer, combine the flour, xanthan gum (only if the flour blend doesn’t already contain it), and other dry ingredients.
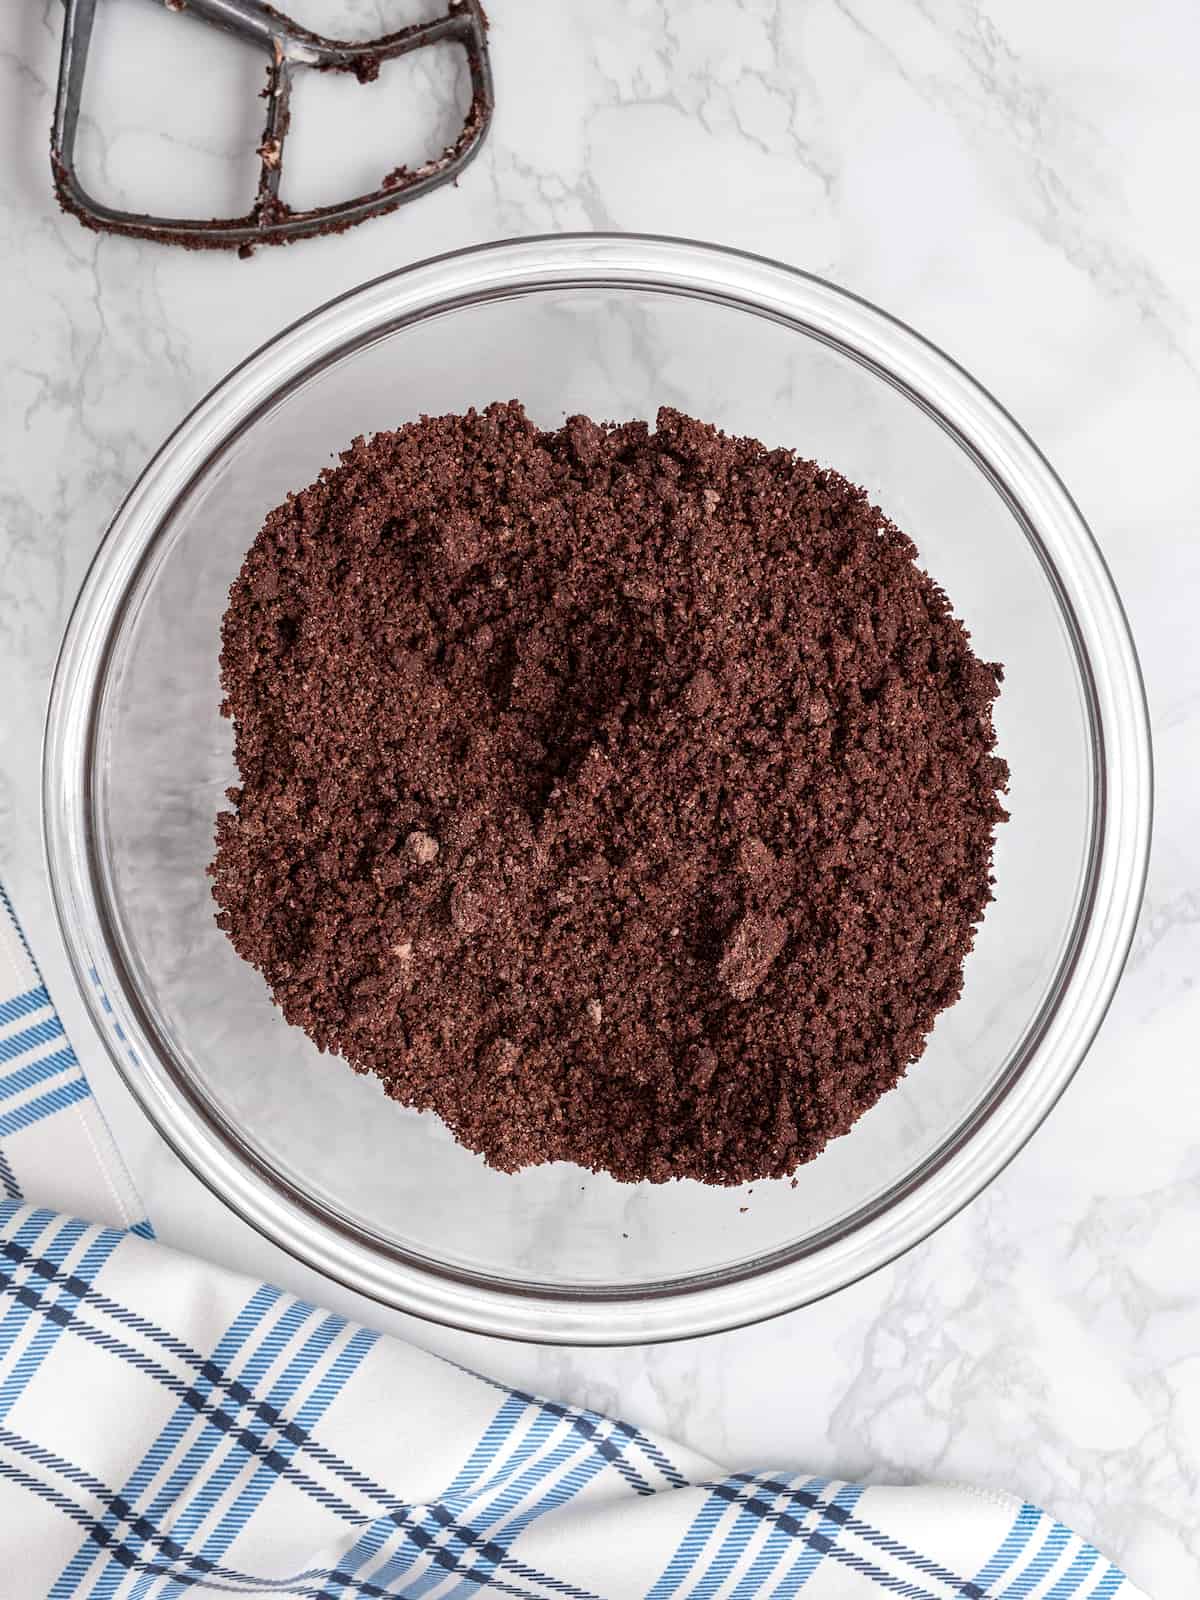
Add the Wet Ingredients: Mix in the butter, beaten egg, and vanilla. You should have a dry and crumbly mixture once everything is combined.
Knead and Chill: Gently knead the cookie dough using your hands, until a smooth ball forms. Next, wrap the dough ball in plastic wrap to chill in the fridge for an hour. Once chilled, divide the dough into two balls. Leave one in the fridge to keep cool while you roll the second ball out flat on a floured surface.
Cut Out the Dough: Cut the dough into cookie-sized rounds (mine were about 1½ inches wide), and place them onto a baking sheet lined with parchment paper. You can roll the scraps back into a ball and repeat until you’re onto your second ball of dough. You may need to work in batches depending on the size of your baking sheets and your oven!


Bake: Bake the chocolate cookies until they’re firm but not browned or burnt. Let them cool on the baking sheet for a few minutes before transferring them to a wire rack while you get started on the icing.

Make the Icing: Beat the butter until it’s smooth and fluffy, then gradually beat in the confectioner’s sugar, about a half cup at a time. Once the texture is smooth and blended, add the vanilla and oat milk. Continue to beat the icing until stiff peaks form. Transfer the icing to a piping bag or plastic storage bag.


Assemble the Oreos: Let your chocolate cookies cool completely before going ahead with the icing. Once ready, pipe the icing onto the backside of a cookie, then gently press a second cookie over the icing to make a sandwich. Repeat with the rest of the cookies and icing!

Tips for Success
Make the best homemade Oreos with these helpful tips:
- Let the Cookies Cool: Make sure to give your chocolate cookies enough time to cool completely before frosting them. Warm cookies = melted icing!
- Get the Right Texture: The icing in this recipe will come out thicker than regular, store bought frosting. That’s how it should be – so the icing doesn’t squish out the sides of your cookies when you take a bite!
- If You Don’t Have a Piping Bag: No problem! Just use a large ziplock bag with a corner snipped off when piping the frosting onto the cookies.
- When Cutting Out the Cookies: To make it easier to lift the cookies from your work surface, peel the excess dough away from the cookie circles, versus lifting the circles from the dough.

Variation Ideas
Whether you’re making these gluten free Oreos just for fun, or serving them as part of a Christmas cookie plate, there are many ways you can change up the flavors to suit. Here are some ideas:
- Mint Oreos: Add peppermint extract into the icing for easy homemade minty Oreos! These are especially great around the holidays. Start by adding a little and proceed with caution, though, to avoid a toothpaste-like situation.
- Double Chocolate Oreos: Fill your chocolate wafer cookie sandwiches with chocolate icing instead of vanilla for homemade double chocolate Oreos.
- Cream Cheese Filling: Swapping the vanilla icing for cream cheese icing will impact the overall flavor of your Oreos. It takes them more into whoopie pie territory, and if you love cream cheese frosting, go ahead and live your dream.
- Matcha Oreos: A tablespoon of matcha in the Oreo filling gives it a super unique, green tea flavor. And it turns it green! Perfect for occasions like St. Patrick’s Day.
- Cookies and Cream Treats. Use your gluten free Oreos to make Gluten Free Oreo Cupcakes or No-Churn Cookies and Cream Ice Cream! You can even crush them into a crust for Grasshopper Pie.
Storage Instructions
These gluten free cookies keep fresh for 3-5 days when stored airtight on the counter. You can also store them in the fridge if you prefer, though I recommend taking them out ahead of serving to let them come to room temperature.
Do Homemade Oreos Freeze Well?
While you can freeze the gluten free wafer cookies, the vanilla filling isn’t suitable for freezing. If you’d like to make the cookies ahead, let them cool completely and then store them in a freezer safe container or freezer bag.
Thaw the cookies at room temperature, whip up a batch of icing, fill and serve!
More Gluten-Free Goodies to Try
- Gluten Free Rocky Road Squares
- Gluten Free Chocolate Chip Cookie Cups
- Flourless Reese’s Cake Roll
- Gluten-Free Chocolate Cake Donuts
- Gluten Free Sugar Cookies
Gluten Free Oreos
Ingredients
Cookies:
- 1 cup gluten free 1-to-1 flour (I used King Arthur)
- 1/2 tsp xanthan gum *omit if your flour blend already contains it
- 1/2 cup dutch-processed cocoa powder
- 3 tbsp cornstarch
- 1/3 tsp baking soda
- 1/8 tsp kosher salt
- 2/3 cup sugar
- 1/2 cup unsalted butter at room temperature
- 1 egg at room temperature, beaten
- 1 tsp pure vanilla extract
Icing:
- 1/4 cup unsalted butter at room temperature
- 1 cup confectioner’s sugar
- 1 tsp vanilla extract
- 1-2 tbsp gluten free oat milk
Instructions
- Preheat oven to 325°F. Line two 13in X 9in rimmed baking sheet with parchment paper and set it aside.
- In a large bowl or mixer, add the flour, *xanthan gum, cocoa powder, cornstarch, baking soda, salt and sugar. Whisk to combine.
- If using a stand mixer, attach the flat beater to combine the dry and wet ingredients. If you do not have a stand mixer, you can use a wooden spoon to mix in the butter, egg and vanilla. The mixture will be dry and crumbly.
- Using your hands, kneed the mixture against the side of the bowl until you form a smooth dough. Wrap dough in plastic wrap and place in the refrigerator for 1 hour.
- Separate cookie dough into two balls, place one back in the fridge to stay cool. With your first ball, roll onto a flour dusted surface until it is 1/8 of an inch thick. If the dough sticks to your rolling pin, dust with a little bit of gluten free flour.
- Cut the dough into 1 1/2 inch cookie rounds. Place cookies onto a cool baking sheet about a half and inch apart. Roll the remaining scraps of dough into another ball and repeat the process.
- Using your second ball of cookie dough, roll onto a flour dusted surface until it is 1/8 of an inch thick and repeat step 6. Depending on the size of your baking sheets, you may have to bake the cookies in batches.
- Bake cookies for 17-19 minutes. The cookies should be firm but not burnt. If your oven does not cook at a constant temperature throughout, you may need to rotate your cookies half way through the baking time to prevent uneven cooking. Allow cookies too cool for about 5 minutes. Transfer to a cooling rack. You will have about 40 cookies.
- While your cookies are baking and cooling, in a medium mixing bowl, beat room temperature butter until smooth and fluffy. In batches of 1/2 cup each, beat in confectioners’ sugar until completely blended. Add vanilla and 1 tablespoon of oat milk and continue to beat for an additional 3-4 minutes. Check the consistency of your icing. It should be stiff and creamy with no lumps. If it is too stiff, you can add a little more milk.
- Add icing to a piping bag or a medium plastic storage bag and set aside.
- Once the cookies have completely cooled, it is time to add the icing. On the back side of the cookie, pipe about 1 to 1/2 teaspoons of icing. Using a second cookie, gently press down to form a sandwich. Repeat until all of the cookies have become delicious little sandwiches. This recipe makes about 20 Gluten Free Oreos.
Notes
- Cookies keep fresh in an airtight container, at room temperature, for 3-5 days.
- Make sure cookies have completely cooled before adding icing. Otherwise the icing will melt.
- Icing should be stiffer than icing you buy at the store. This keeps it from squishing out the sides when you bite into the cookie.
- If you do not have a piping bag, you can use a large ziplock bag and cut the corner to pipe the icing onto your cookie.
- It is easier to pull up the scraps from your dough, then the cookies. This allows your cookies to come free from your working surface easier.
- These are great dipped in milk!

Did you make this?
Leave a star rating to help others know that they should make this recipe.
Share a photo and tag @cupcakesandkalechips on Instagram!
Wow! I am speechless!!! This is the 1st GF cookie that I have made in my 7 year journey that has actually tasted better than the Gluten version I remember!!! My husband, that still has regular Oreo’s is even in love and says it tastes better. We are both, past impressed! And the cherry on the cake…. We didn’t even put icing on it, we just made it for your Nutella cheese cake, and we are in love!!
Thank you so so much!!