
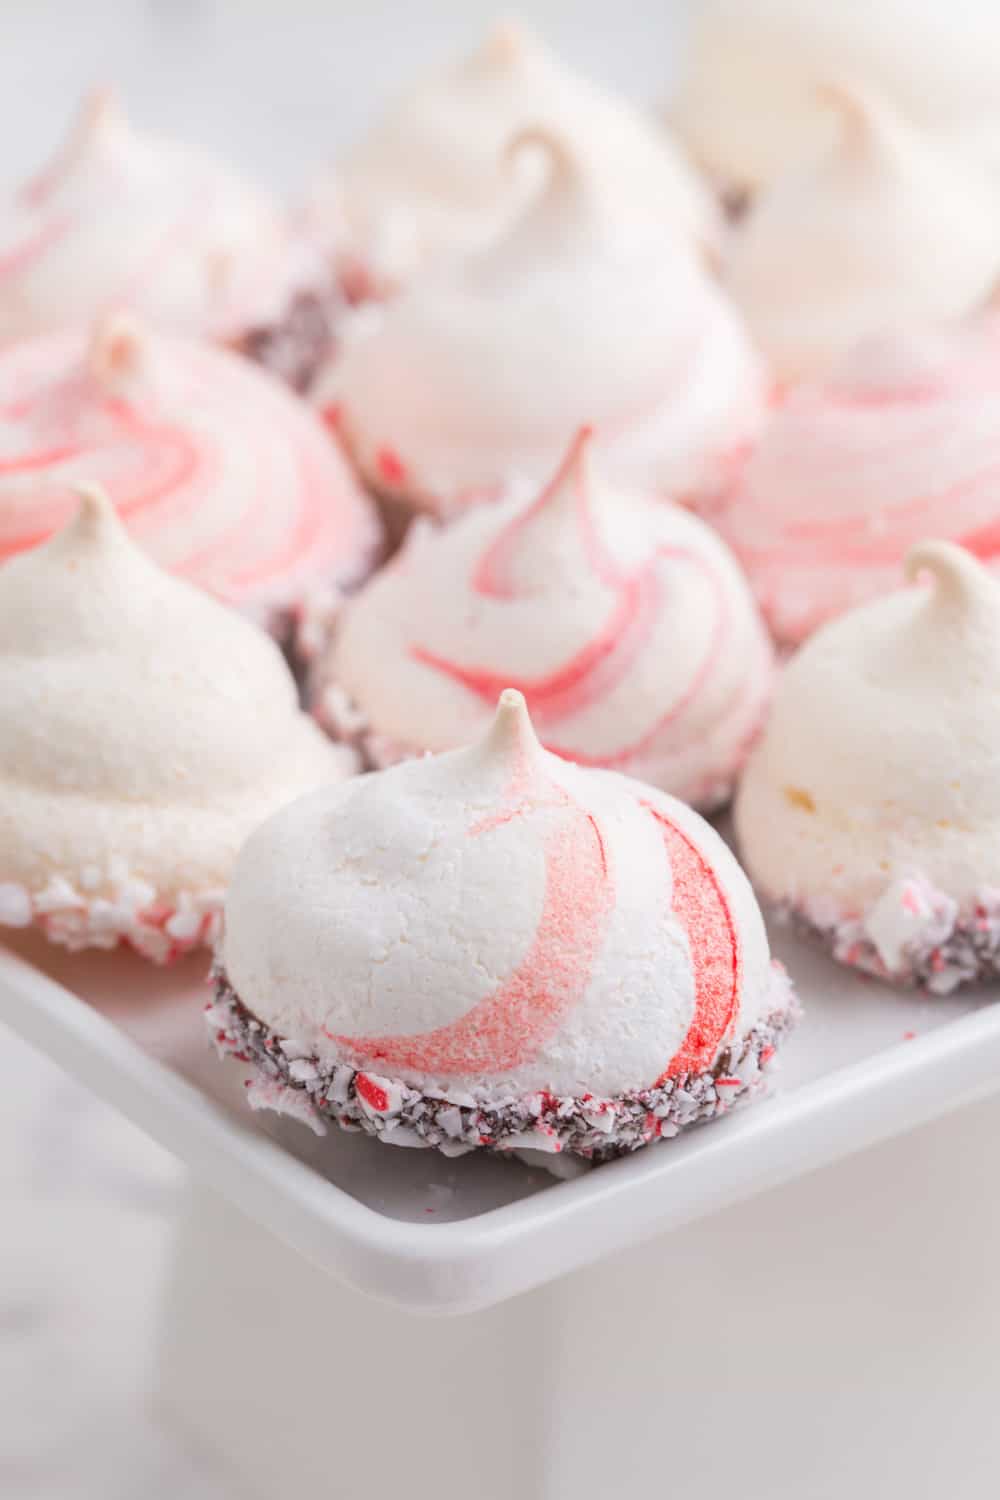
Peppermint Meringues


Light and airy with a burst of fresh flavor, Peppermint Meringue Cookies are extra festive after a dip in chocolate and crushed candy canes. These peppermint kisses are naturally gluten free and just so pretty! This recipe is made without cream of tartar or raw egg whites by instead using meringue powder.
Love candy canes? Try Peppermint Cheesecake Dip or Mocha Peppermint Bark!
Peppermint Meringue Cookies
Most people think of meringue as the pillowy topping on Lemon Meringue Pie. It is made from beating egg whites and sugar, usually with an acid like lemon juice or cream of tartar to help them form stiff peaks.
But you can also turn the meringue mixture into meringue cookies. Just pipe it out of a piping bag into small rounds, rosettes, or stars. Then bake them in a low oven to form a tender cookie with a crisp exterior and a chewy middle.
Why You’ll Love This Recipe
- Extra festive. A basic meringue cookie is flavored with vanilla. But you can add any type of extract to flavor them as you like, such as these peppermint meringues. To enhance the flavors and add a special touch for the holidays, these are dipped in chocolate and crushed candy canes.
- No raw egg whites. For various reasons, some people prefer not to work with raw egg whites. These cookies are baked, albeit at a low temperature, so the risk isn’t the same as the salmonella risk of consuming the raw egg whites in something like royal icing. But you can make meringues with meringue powder as an alternative.
- No cream or tartar either. Because meringue powder already contains starches and stabilizers that allow it to whip to stiff peaks, you do not need to add an acid such as cream of tartar.
- Naturally gluten free. These cookies are completely flourless. This means they are an easy gluten free option.

Ingredients to Make Peppermint Meringue Cookies
Here is a quick overview of what you’ll need to make these cookies. Be sure to scroll to the recipe card for the full amounts and detailed instructions.
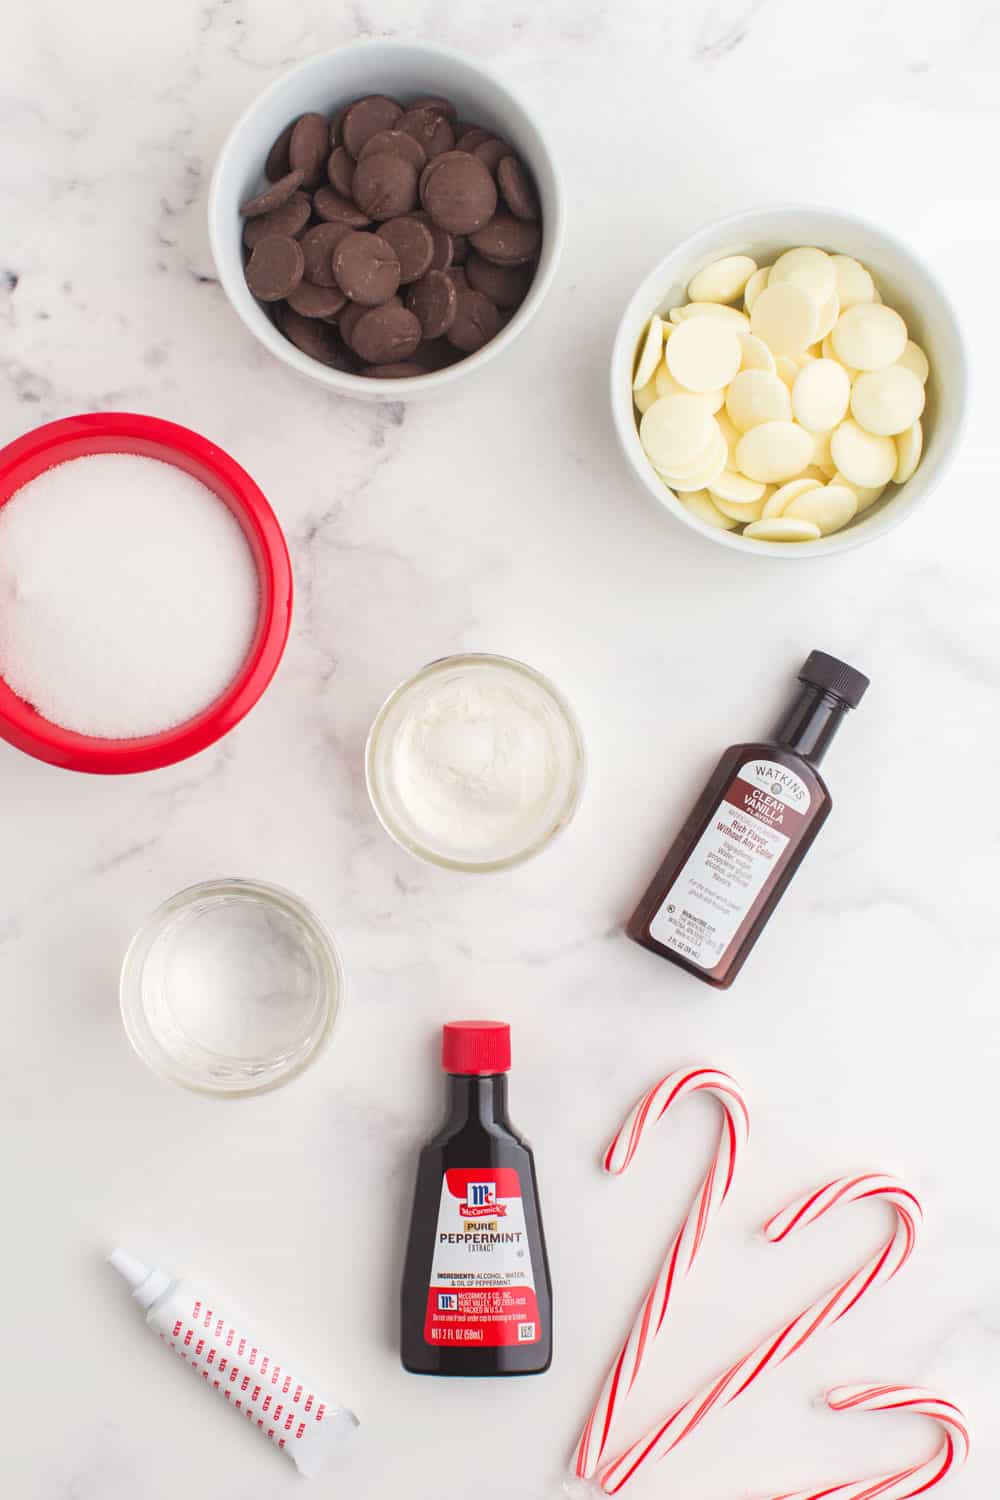
- Meringue powder – if you prefer, you can use raw or powdered egg whites. Just omit the water if using raw egg whites, and add cream of tartar and a pinch of salt for either of the substitutions.
- Water
- Sugar
- Peppermint extract – be sure it says “peppermint” or it will not have that same candy cane flavor. Mint extract is more like your classic mint chocolate chip ice cream, and spearmint is more like minty chewing gum.
- Clear vanilla extract – using clear ensures you get pure white cookies. You can use regular vanilla, but the brown color will make the peppermint meringues a bit off-white.
- Gel food coloring – this is optional, but you can use it to add a candy can stripe or swirl to your peppermint meringue cookies.
- Melting chocolate – you can use any type of melting wafers or candy coating that you like, whether it is white, dark, or milk chocolate. Chocolate chips work too, but because they aren’t tempered the same way, you will not have the same shiny finish.
- Candy canes – buy them pre-chopped into bits or just crush any candy canes you have on hand.
How to Make Peppermint Meringue Cookies
Line your baking sheets with silicone baking mats or parchment paper to prevent sticking and preheat your oven to 250°F. Now let’s get ready to bake.
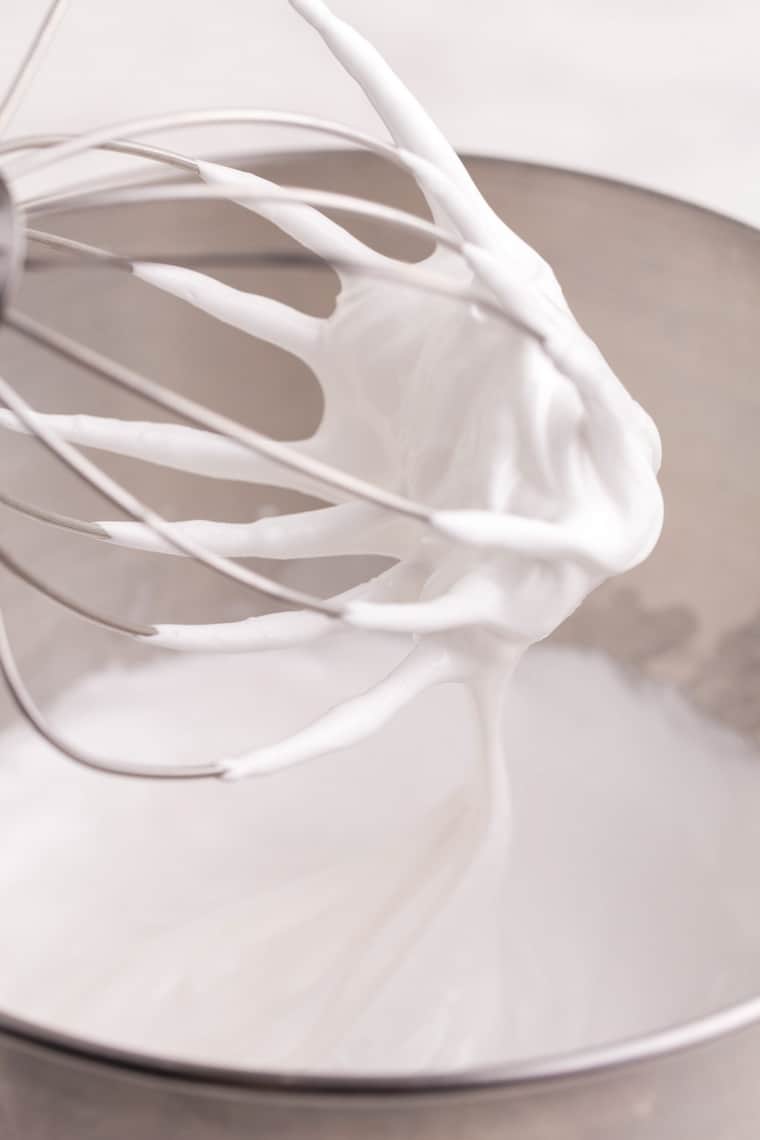
Make the meringue. Beat the meringue powder and water. While continuing to beat, gradually add the sugar, then add the extracts and beat until it forms stiff peaks.
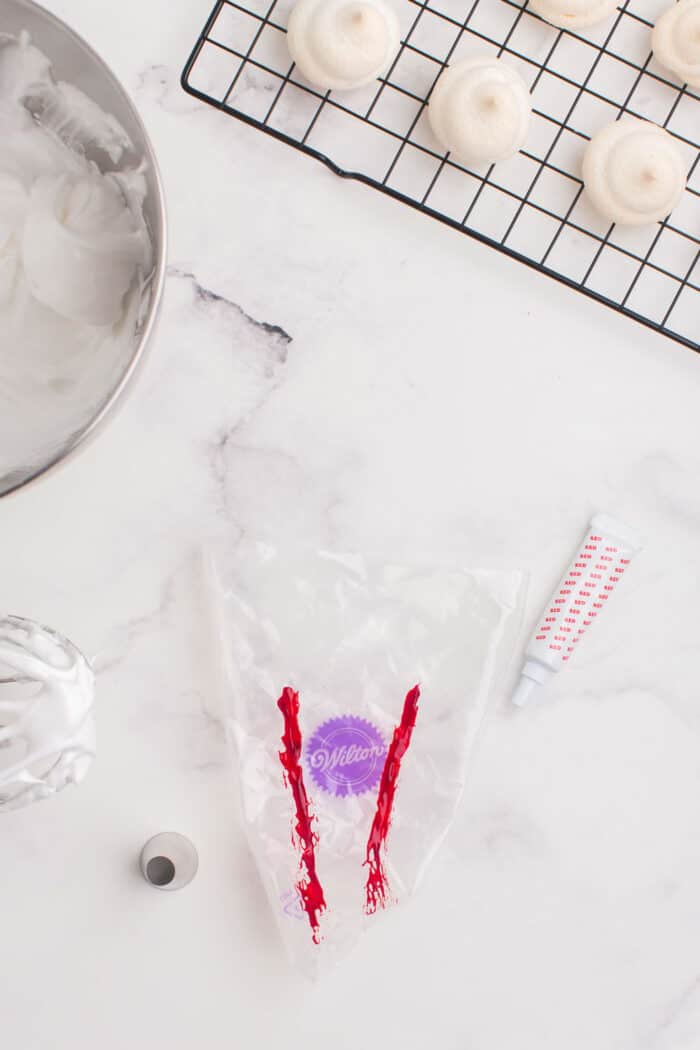
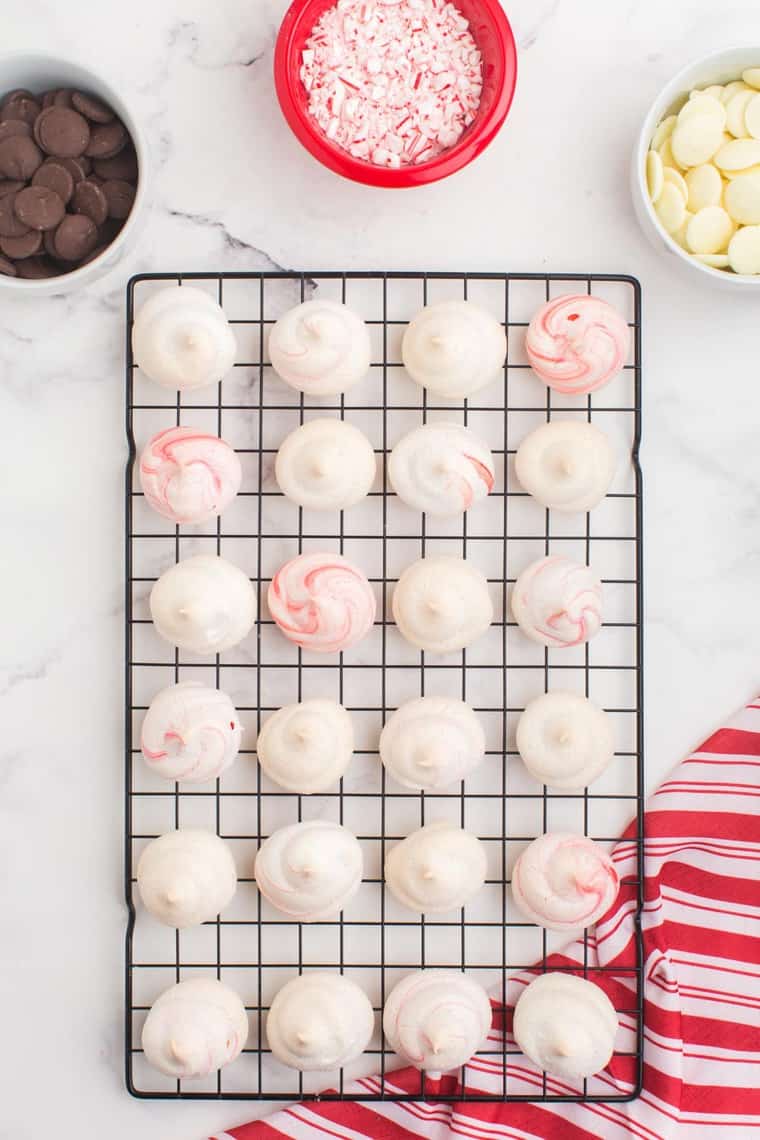
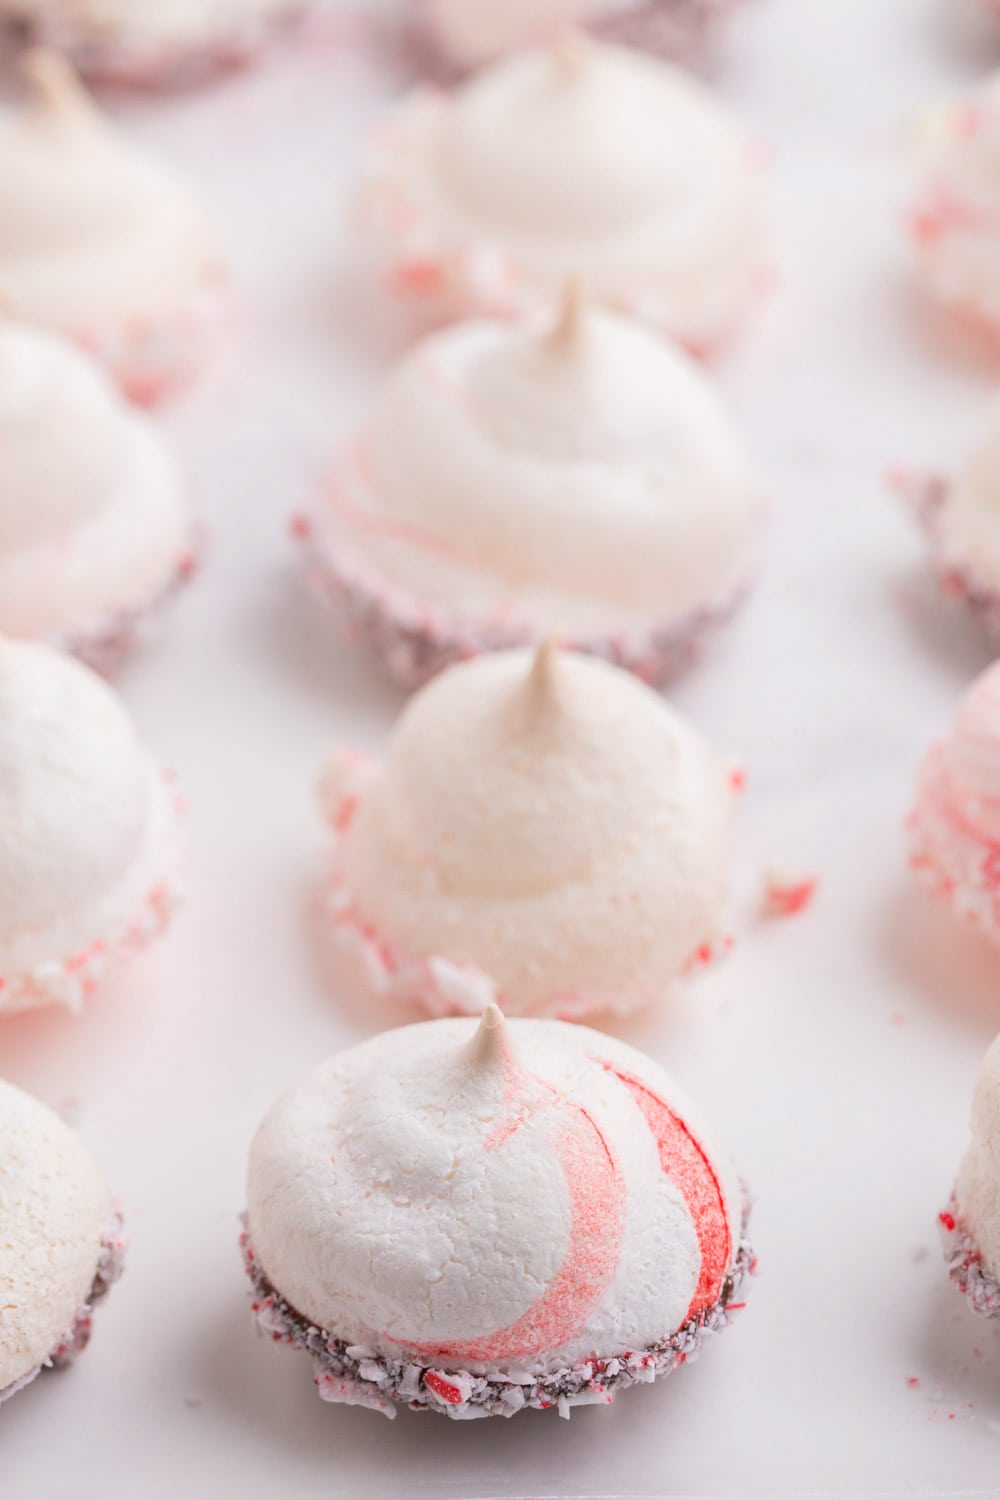
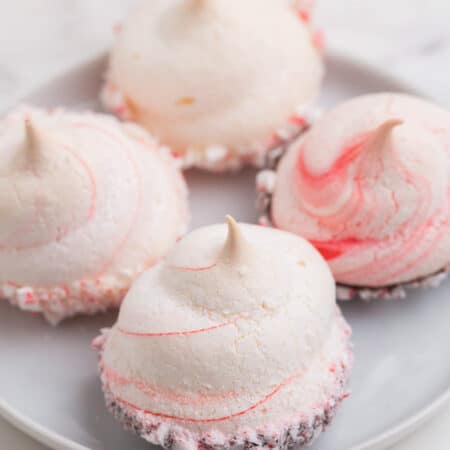
Pipe the cookies. If you want to add swirls to the peppermint meringue cookies, use red gel food coloring to make two lines on the inside of your piping bag and a small brush to spread it out a bit. Repeat on the opposite side. Then fill the bag and pipe small rounds or rosettes onto the prepared baking sheet about an inch apart.
Bake and cool. Bake at 250°F for 35-40 minutes or until firm and crisp on the outside. Turn off the oven, close it, and allow the meringues to cool inside the oven.

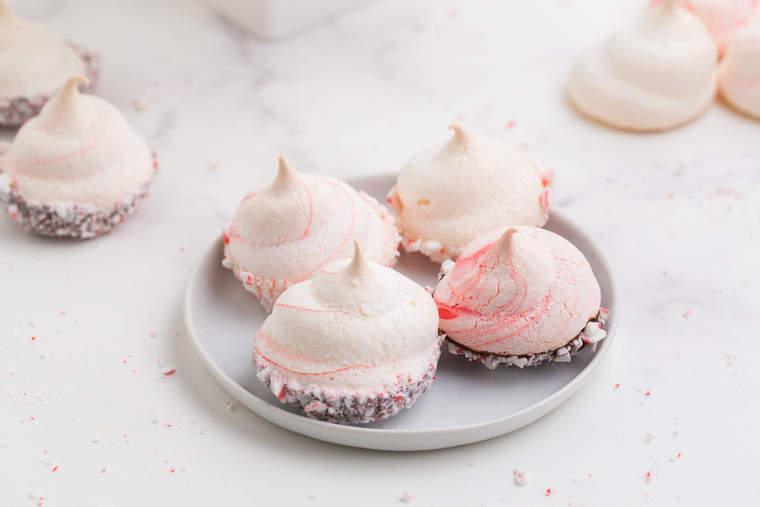
Decorate the meringues. While the peppermint meringue cookies cool, chop the candy canes and melt the chocolate as per the package instructions. Dip the bottom of each cookie in the melted chocolate and crushed candy canes. Place back on the silicone baking mat or some wax or parchment paper and allow to harden.
Tips for the Best Peppermint Meringues
- Check your ingredients. While the ingredients in meringue powder are typically gluten free, not all brands are manufactured in dedicated gluten free facilities. So beware if cross-contamination is a risk for you. Brands such as Judee’s and LorAnn are gluten free as of the time of writing this post. Things can always change, so always verify this for yourself.
- Bake at the proper temperature. If you have an oven thermometer, verify that your oven is heating to the correct temperature. If it is too hot, they will not bake properly.
- Clean your bowl. In order to ensure that the meringue whips properly, you want to use a very clean bowl with no traces of residual fats. You can dampen a paper towel with white vinegar and wipe your bowl and beaters or whisk attachment with it to remove any residue.
- A stand mixer helps. You can use a hand mixer, but because you have to beat it for a while and slowly add the sugar as you continue to beat, it’s easiest to use a stand mixer.
- Use silicone mats. Silicone baking sheets will ensure your cookies don’t stick. You can even place them on the mats after dipping them in chocolate to allow it to harden without sticking and making a mess.
- Size matters. You’ll need to use a piping bag and decorating tips to pipe the meringues. A 1M tip was used for the photos shown here, though you can make them any size you like. Smaller ones will be more crisp, larger ones more chewy.
Storing the Cookies
Once they are completely cooled and hardened, they can be stored in an airtight container for up to 2 days. After that, they will still be safe to eat, but they will lose some of their crisp exterior and get chewier.
I do not recommend freezing this cookie. Peppermint Meringue Kisses are an easy cookie recipe, but one you will want to make shortly before you plan to enjoy them.
More Gluten Free Christmas Cookies
- Gluten Free Italian Rainbow Cookies
- Flourless Mexican Chocolate Cookies
- Gluten Free Snowball Cookies
- Gluten Free Sugar Cookies
Peppermint Meringue Cookies
Ingredients
- 6 teaspoons meringue powder (see Note*)
- 6 Tablespoons water
- 3/4 cup granulated sugar
- 1/4 teaspoon peppermint extract
- 1 teaspoon clear vanilla extract
- gel food coloring in the color of your choice, optional
- about 4-6 oz. melting chocolate wafers (milk, dark, white, or a combination)
- 2 or 3 crushed candy canes
Instructions
- Preheat the oven to 250°F and line the baking sheet with a silicone mat or parchment paper.
- Combine the meringue powder and water in a large bowl. Using a hand mixer or stand mixer with a whisk attachment, whisk them together at a high speed for 4-5 minutes.
- As it begins to thicken while continuing to beat the mixture, slowly add the sugar..
- Once all the sugar is added, incorporate the peppermint extract and the vanilla extract. Continue whisking until stiff peaks form.
- If you would like to add a swirl of color to your cookies, flip a piping bag inside out and using gel food coloring in the color of your choice, draw two lines, then use a brush to spread them out a little. Turn your bag to the other side and draw two more lines.
- Using the piping bag and the tip of your choice (these photos show using a 1M tip), fill it with the meringue batter. If you added the color, as you squeeze your bag the color will swirl and become brighter. Pipe your circles onto the prepared baking sheet 1 inch apart from each other. Smaller cookies will be crispier and larger will be chewier.
- Bake 35-40 minutes until the meringues feel firm and crisp. Do not open the door while the cookies are baking. Once baked, turn off the oven and let them cool completely inside the closed oven.
- While the cookies cool, prepare your melting chocolate per the package directions. Chop your candy canes, if you could not find the pre-chopped ones.
- Once they are cooled, carefully dip the bottom of your meringue in chocolate and then sprinkle the bottoms with crushed peppermint. Set back on the silicone mat or parchment paper. Let them sit till the chocolate is firm, about 10 minutes.
Notes

Did you make this?
Leave a star rating to help others know that they should make this recipe.
Share a photo and tag @cupcakesandkalechips on Instagram!