
Gluten-Free Pumpkin Roll


This Gluten-Free Pumpkin Roll is a classic autumn treat, perfected for all to enjoy! It starts with a tender cake full of real pumpkin and warm pumpkin pie spice. Then it’s stuffed with tangy-sweet cream cheese filling and rolled up into a gorgeous fall dessert. It satisfies those cool-weather cravings and is sure to impress!

Delicious Details
- Cuisine Inspiration: American
- Primary Cooking Method: Oven
- Dietary Info: Gluten-free, Dairy-free option
- Skill Level: Moderate
Pumpkin roll is a beautiful, classic dessert that’s welcome all through the season. And now it’s gluten free! Yes, this gluten-free pumpkin roll features a moist, lightly spiced cake rolled up with a sweet and tangy cream cheese filling for the ultimate fall treat! It’s perfect for those sweater weather, chilly day cravings.
In this version of a pumpkin roll, I’ve substituted gluten-free cake flour for the standard all-purpose flour needed in traditional recipes. I also added a pinch of xanthan gum to help create a sturdy, bouncy crumb. If you’ve made a roll cake before, you’ll be familiar with the double rolling technique (the first roll of the cake gives it structure, and the second roll is done around whatever you’re filling it with). When you do a gluten-free roll, the method is slightly different, and I’ve outlined it all below to take away any of the guesswork.
Why You’ll Love This Gluten Free Pumpkin Roll Recipe
A perfect fall dessert, a gluten-free pumpkin roll is a true treat. It’s wonderful to place on the Thanksgiving dessert table or you can serve slices at a Halloween gathering. And, it’s gluten-free, meaning that everyone can enjoy it. Here’s why you’ll love it:
- Full of fall flavor. There are so many wonderful spices in this cake! You’ll pair pumpkin pie spice, which is a blend of familiar fall baking spices like cloves and nutmeg, and add a little more ground cinnamon to give it oomph. And of course, pumpkin is the ultimate fall flavor and ingredient!
- A gluten-free version of a classic. A classic pumpkin roll is a familiar dessert during autumn. I’ve adapted this recipe to be gluten-free because I wanted to have a reliable gluten-free version of this beloved staple.
- Special and festive. You don’t make a roll cake every day because they take a bit more effort than a single-layer cake might. So by default, a pumpkin roll cake feels quite special! I love to serve a pumpkin roll after a fall dinner or at Thanksgiving for a slightly different dessert.

What You’ll Need
Here’s a quick overview of what you’ll need to make this beautiful cake. Don’t forget to scroll down to the recipe card at the end of this post for the full ingredient amounts.
For the Cake
- Gluten-free Cake Flour: Cake flour, like Steve’s Gluten Free Cake Flour, produces a lovely and tender crumb in baked goods. If you can’t find gluten-free cake flour, you can use your favorite 1:1 gluten-free all-purpose flour.
- Pumpkin Pie Spice: You can use store-bought pumpkin pie spice or use my recipe to make your own homemade pumpkin pie spice!
- Xanthan Gum: Xanthan gum helps bind gluten-free baked goods together, and adds the flexibility so you can roll your cake. If you are using a 1-to-1 flour blend, you can omit this.
- Ground Cinnamon: For warming spice.
- Baking Powder: A little baking powder helps the cake to rise.
- Salt
- Eggs: You’ll use eggs and whip the whites separately to help the cake rise.
- Granulated sugar
- Pumpkin Puree: Choose a can of pure pumpkin puree for this recipe rather than pumpkin pie filling.
- Vanilla Extract: A hint of vanilla adds so much to baked goods.
For the Filling
- Cream Cheese: Cream cheese makes a wonderfully tangy filling for the pumpkin roll. To make it dairy-free, swap in vegan cream cheese.
- Powdered Sugar: To balance the cream cheese.
- Butter: Butter helps to create a smooth and rich filling. You can also use a plant-based butter.
- Vanilla Extract: For an extra note of flavor.

How To Make Gluten Free Pumpkin Roll
Use the photos below to guide you through making this pumpkin roll recipe. I’ve included some tips for how to roll the cake lower down in this post, too.
For the Cake
- Prep. Preheat the oven to 350℉. Line a 10” x 15” jelly roll pan with parchment paper. Make sure to leave a bit of parchment hanging over the edge of the pan to use as a handle later.
- Sift the dry ingredients. Sift the gluten-free flour, pumpkin pie spice, xanthan gum, cinnamon, baking powder, and salt into a bowl. Set aside.
- Whip the egg whites. Divide the egg whites and yolks into two separate bowls. Add ¼ cup of sugar to the egg whites. Beat on medium-high speed until stiff peaks form. Set aside.


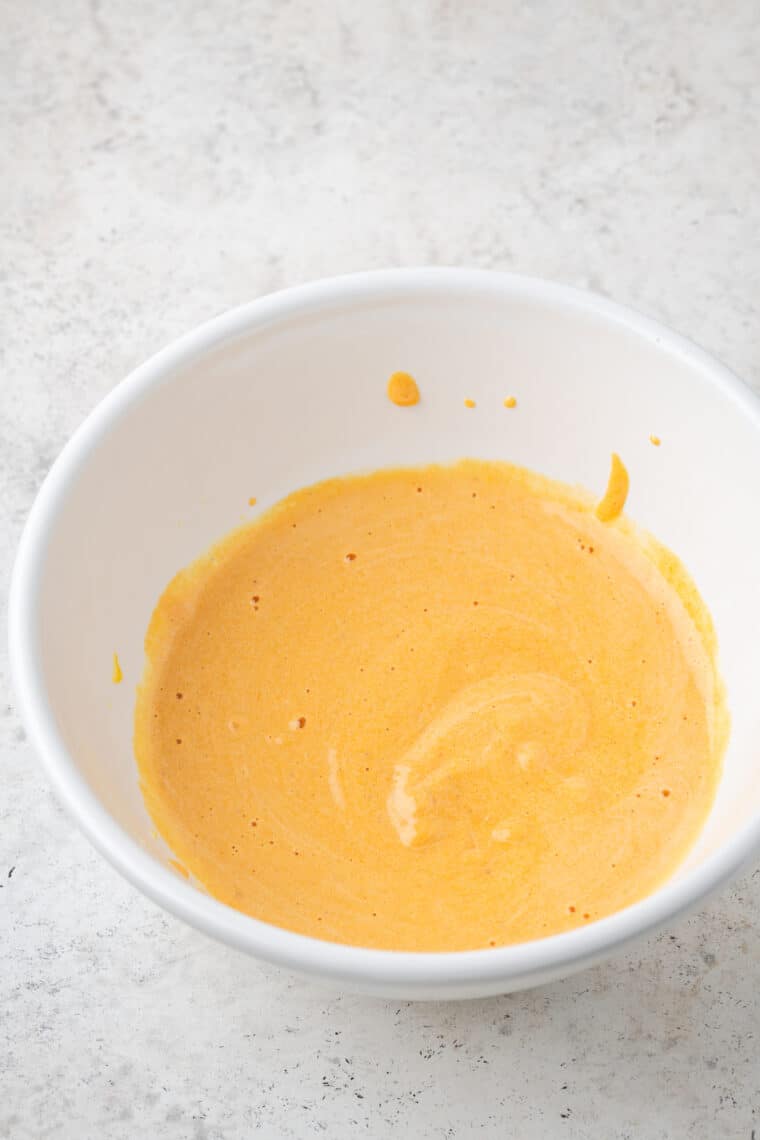
- Beat the egg yolks. Add the remaining sugar and vanilla to the egg yolks. Beat until the mixture is light yellow in color and reaches the ribbon stage (a ribbon of batter should sit on the top for a few seconds before settling back into the batter).
- Add the pumpkin. Add the pumpkin and beat again until it is evenly incorporated. The batter should be light orange in color.

- Combine the wet and dry. Add the dry ingredients to the pumpkin mixture and mix on low speed until everything is incorporated.


- Add the egg whites. Add ⅓ of the egg whites to the batter and fold it in with a spatula. Repeat with the remaining egg whites in 2 more batches (⅓ of the whites each time). Fold gently so you don’t deflate the air bubbles.


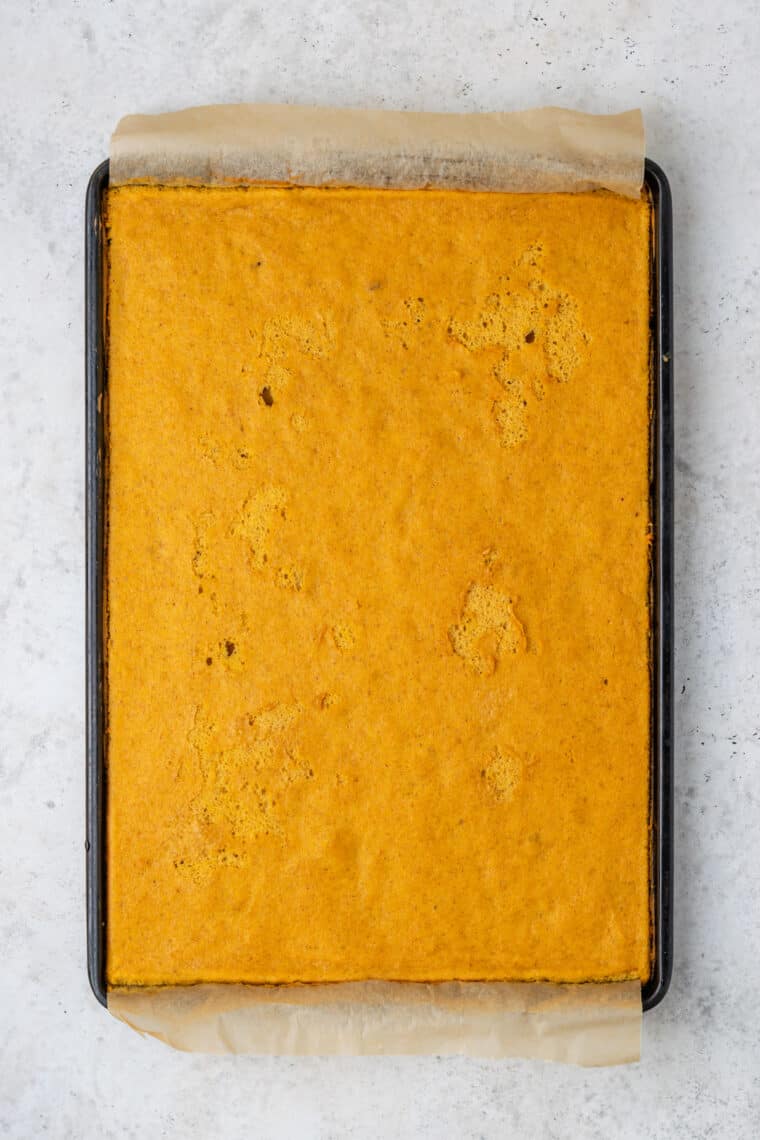
- Transfer to the pan. Spread the batter into the prepared baking sheet. Take care to make sure the batter is spread in an even layer since it won’t self-level while baking. Tap the pan on the counter a few times to release any air bubbles.
- Bake. Bake in the preheated oven for 12-13 minutes until golden and a toothpick inserted comes out clean. Do not over-bake or it will crack when rolling.
- Cool. Remove from the oven and cover the cake layer with aluminum foil until cooled to room temperature (about 1 hour). The foil will trap the moisture in the cake, keeping it from cracking when rolled. While the cake is cooling, prepare the filling.

For the Filling
- Cream the cream cheese and butter. Add the cream cheese and butter to a stand mixer fitted with the paddle attachment. Beat on medium speed until smooth. Scrape down the bowl.
- Add the powdered sugar and vanilla. Continue to beat, starting on low speed and gradually increasing the speed until the sugar is fully incorporated and the mixture becomes a little fluffy. Cover the frosting and refrigerate until the cake is ready.


Assembly
- Roll up the cake. Spread the filling evenly over the cooled cake. Use the parchment paper to lift and roll the cake, peeling the paper away as you go. Try to roll it tightly to get as many layers inside as possible.
- Chill. Wrap the rolled cake with plastic wrap and refrigerate for at least 2 hours before slicing.
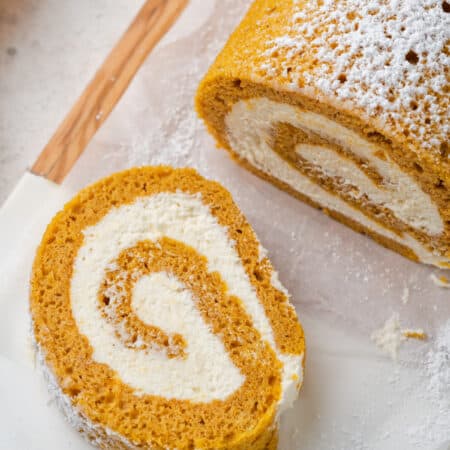
- Enjoy. Dust with powdered sugar, slice, and serve.


What Is The Secret To Rolling A Pumpkin Roll?
The trick for rolling a gluten-free pumpkin roll lies in using foil while cooling the cake. Many traditional cake recipes call for rolling the cake while it is hot, then unrolling it to fill it, then rolling it back up again. With gluten-free cake, this much handling is difficult to accomplish without breaking the cake. Covering the hot cake with foil traps the moisture and cools the cake slowly, making it pliable once it has cooled down. Then you can use parchment paper to roll up the cake. Here are the steps you’ll take:
- Remove the cake from the oven: Remove the cake from the oven and cover it immediately with foil. Let the cake cool for about 1 hour.
- Now, remove the cake from the pan: Gently remove the cake, still attached to the parchment paper, from the baking pan. Have your frosting ready.
- Frost and roll the cake: Spread a thick layer of frosting evenly on top of the cake, leaving about a 1/2-inch border around the cake. Now, starting with the narrow end, carefully roll up the cake, peeling away the parchment paper as you do so. Wrap the cake in plastic wrap and place it in the fridge to set.

More Tips for the Best Pumpkin Roll
Here are some tips that will help you make this gluten-free pumpkin roll.
- Sift the dry ingredients. A sponge cake is a lighter cake, and it especially benefits from sifting the dry ingredients before they’re added to the batter to eliminate any lumps.
- Wipe down the bowl you use to whip the egg whites. To achieve the lightest and airiest egg whites, use some lemon juice or vinegar to wipe down the bowl in which you whip the whites.
- Separate the eggs while they’re cold. While room-temperature ingredients are important in this recipe, it’s easier to separate eggs while they’re cold. So if you can, separate the eggs straight out of the fridge and then let them come to room temperature before adding them to the batter.
- Use parchment to roll the cake. I like to use parchment paper to help with the rolling process. Many traditional pumpkin roll recipes have you roll the cake twice, one time using a kitchen towel. For a gluten-free pumpkin roll, you’ll want to follow my method outlined above for the best results.
Proper Storage
- Refrigerator – Store leftover pumpkin roll in the fridge for up to 2 days (gluten-free cake does not last quite as long as a regular cake). You can prepare the pumpkin roll 1 day in advance and keep it well-covered in the fridge. You can also make the cake 1 day in advance and store it, rolled in parchment paper, in the fridge until you are ready to assemble it.
- Freezer – For longer storage, freeze the fully-assembled pumpkin roll by wrapping it tightly in plastic wrap, follow by aluminum foil to prevent freezer burn. You can freeze it for up to 3 months. Thaw overnight in the fridge before serving.

Common Questions
A chewy pumpkin roll can mean that the cake has been underbaked. So make sure to check the cake at 12 minutes and every minute after that to find the perfect spot between under and over-baked.
If you don’t use parchment paper to roll the cake, it may break. The parchment helps with handling the cake. You also want to be careful not to over-bake the cake, which can lead to cracking.
Dust powdered sugar on the pumpkin roll after it has cooled – this will help keep it from getting soggy. The sugar can cause the cake to release moisture.
Yes, you can freeze a prepared pumpkin roll. Wrap the finished pumpkin roll in plastic and then foil, and place it in the freezer for up to 3 months. Defrost the roll thoroughly in the fridge (overnight) before serving it.

More Pumpkin Desserts To Try
Gluten-Free Pumpkin Roll
Ingredients
For the Cake
- ⅔ cup gluten-free cake flour (98 grams) or 1:1 gluten free flour
- 1 teaspoon pumpkin pie spice
- ½ teaspoon xanthan gum (omit if using a 1:1 flour that already contains it)
- ½ teaspoon ground cinnamon
- ½ teaspoon baking powder
- ¼ teaspoon salt
- 3 large eggs , divided and at room temperature
- ¾ cup granulated sugar , divided (150 grams)
- 1 teaspoon vanilla extract
- ⅔ cup pumpkin puree (161 grams)
For the Filling
- 8 ounces cream cheese , at room temperature (226 grams)
- 6 tablespoons butter , at room temperature (65 grams)
- 1 cup powdered sugar , sifted (120 grams)
- 1 teaspoon vanilla extract
- more powdered sugar for dusting on top
Instructions
For the Cake
- Preheat the oven to 350℉. Line a 10” x 15” jelly roll pan with parchment paper. Make sure to leave a bit of parchment hanging over the edge of the pan to use as a handle later.
- Sift ⅔ cup gluten-free cake flour, 1 teaspoon pumpkin pie spice, ½ teaspoon xanthan gum, ½ teaspoon ground cinnamon, ½ teaspoon baking powder, and ¼ teaspoon salt into a bowl. Set aside.
- Divide 3 large eggs, placing the whites and yolks into two separate bowls.
- Divide the ¾ cup granulated sugar, and add ¼ cup granulated sugar to the egg whites. Beat on medium-high speed until stiff peaks form. Set aside.
- Add the remaining granulated sugar and 1 teaspoon vanilla extract to the egg yolks. Beat until the mixture is light yellow in color and reaches the ribbon stage (a ribbon of batter should sit on the top for a few seconds before settling back into the batter).
- Add ⅔ cup pumpkin puree and beat again until it is evenly incorporated. The batter should be light orange in color.
- Add the dry ingredients and mix on low speed until everything is incorporated.
- Add ⅓ of the egg whites to the batter and fold it in with a spatula. Repeat with the remaining egg whites in 2 more batches (⅓ of the whites each time). Fold gently so you don’t deflate the air bubbles.
- Spread the batter into the prepared baking sheet. Take care to make sure the batter is spread in an even layer since it won’t self-level while baking. Tap the pan on the counter a few times to release any air bubbles.
- Bake in the preheated oven for 12-13 minutes until golden and a toothpick inserted comes out clean. Do not over-bake or it will crack when rolling.
- Remove from the oven and cover the cake layer with aluminum foil until cooled to room temperature (about 1 hour). The foil will trap the moisture in the cake, keeping it from cracking when rolled. While the cake is cooling, prepare the filling.
For the Filling
- Add 8 ounces cream cheese and 6 tablespoons butter to a stand mixer fitted with the paddle attachment. Beat on medium speed until smooth. Scrape down the bowl.
- Add 1 cup powdered sugar and 1 teaspoon vanilla extract. Continue to beat, starting on low speed and gradually increasing the speed until the sugar is fully incorporated and the mixture becomes a little fluffy. Cover the frosting and refrigerate until the cake is ready.
Assembly
- Spread the filling evenly over the cooled cake.
- Use the parchment paper to lift and roll the cake, peeling the paper away as you go. Try to roll it tightly to get as many layers inside as possible.
- Wrap the rolled cake with plastic wrap and refrigerate for at least 2 hours before slicing.
- Dust with more powdered sugar, slice and serve.
Notes
- Because sponge cake is prone to large air bubbles, it’s important to sift the dry ingredients well.
- Wipe down your egg white bowl with a little lemon juice or vinegar prior to adding the whites. This will ensure any fat is cleaned from the bowl and allow the whites to whip better.
- It is easier to separate yolks & whites in cold eggs. Separate the eggs first, then allow them to come to room temperature.
- Many recipes call for rolling the cake while it is hot, then unrolling it to fill and rolling it again. With gluten free cake, this much handling is difficult to accomplish without breaking the cake. Covering the hot cake with foil traps the moisture and cools the cake slowly making it pliable once it has cooled down.
- I like to use the parchment paper to help with the rolling process and once it is rolled up, I pull the parchment tighter around the cake to form it into a perfect log. Wrap the cake with plastic wrap over the parchment paper and peel the paper away after it has set in the refrigerator.

Did you make this?
Leave a star rating to help others know that they should make this recipe.
Share a photo and tag @cupcakesandkalechips on Instagram!
I have a question about baking the gluten free pumpkin roll. Does the parchment paper need oil or butter before you add the cake dough to keeep it from sticking? By the way, my son in law has celiac‘s disease and we love your recipes. We are a gluten free household in order not to cross contamination. Thank you I’m advance for your feedback.
What kind words, thank you! No, you do not need to grease the parchment paper. I like to put a bit of cooking spray underneath to help it stick a little to the pan and stay in place when I pour in the batter.