
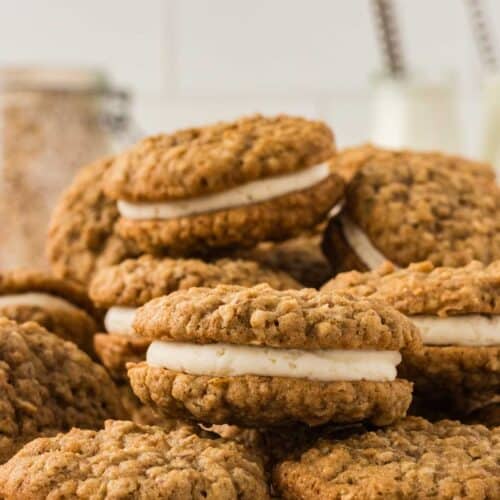
Gluten Free Oatmeal Cream Pies

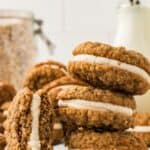

These Gluten Free Oatmeal Cream Pies feature a sweet, creamy filling sandwiched between two spiced oatmeal cookies. Quick and easy to make, they’re reminiscent of the classic Little Debbie treat – but better!

Delicious Details
- Cuisine Inspiration: American
- Primary Cooking Method: Oven
- Dietary Info: Gluten-free
- Skill Level: Moderate
My son tried Little Debbie Oatmeal Cream Pies and fell in love with them. So I decided I had to make them gluten free so we could enjoy this nostalgic treat together.
Despite the name, an oatmeal cream pie is not actually a pie, but a sandwich cookie with a sweet, creamy filling in between two soft, spiced oatmeal cookies. The inspiration for the cookies I used came from my gluten free oatmeal raisin cookies, though I had to make some adjustments to get the right texture (plus there’s no raisins). The cookies themselves are soft in texture and thinner than regular oatmeal cookies, though just as chewy.
They bake up so perfectly and easily, and the icing is just a basic buttercream and super easy to whip together in just a few minutes. I cooled the assembled cookies in the fridge for 30 minutes so that the buttercream would firm up slightly and not squish out the sides – at room temperature, the icing will be a bit softer and may squish out the sides when you bite into it. They’ll still taste amazing, so it’s your choice how you want to enjoy them.
Why We Love These Oatmeal Cream Pies
- Soft & chewy. The oatmeal cookies are super soft and chewy, which is how I prefer oatmeal cookies in general. It’s a nice contrast to the smooth, creamy filling.
- Not overly sweet. Many oatmeal cream pies are toothachingly sweet, which I don’t love. So in this recipe, I opted to make the cookie itself slightly salty by using salted butter and added salt. It helps to balance out the sweetness between the sugar in the cookie and icing. The end result is a sandwich cookie that’s sweet without putting you in a sugar coma.
- Easily gluten free. The only swaps I really needed to make to make these gluten free oatmeal cream pies was to use certified gluten free oats and 1:1 gluten free flour. The rest of the ingredients are baking staples that are already gluten free, making this an easy recipe for new gluten free bakers.

How Do These Compare To Little Debbie Oatmeal Creme Pies?
While this is not a copycat recipe, it’s impossible not to compare these homemade oatmeal cream pies to the Little Debbie treat.
Anything homemade is obviously going to taste better in general, but there are a few noticeable differences between this recipe and the store-bought version. This cookie has a little bit more cinnamon and thus a more “spiced” flavor. There’s also more depth to the flavor with the additional salt and the butter used in the filling, leading to a richer and more flavorful cookie. The filling is a little bit softer (at room temperature) and is likely to squish out of the sides a little bit as you take a bite, but that’s because we use real butter in the filling rather than just oil.
I asked all my oatmeal cream pie obsessed friends and family which they preferred, and they all unanimously voted for these.

Key Ingredients
Both parts of this recipe are made with just a handful of basic ingredients. Scroll all the way down for the full recipe card with measurements.
For the oatmeal cookies:
- Quick oats – I tried this recipe with rolled oats and quick oats and preferred the texture of the quick oats much better. If needed, check to make sure the oats are certified gluten free.
- Gluten free flour – I like King Arthur Measure for Measure flour.
- Cinnamon – Adds warm flavor to the cookie.
- Baking soda – Ensures the cookies rise just enough and have a chewy texture.
- Salt – Helps to balance the sweetness of the cookies.
- Butter – I used salted butter. It should be softened to room temperature but not melted.
- Brown sugar – I opted for only brown sugar to give these cookies a richer molasses flavor and chewy texture.
- Eggs – I used large eggs. They help bind the ingredients and contribute to the texture.
- Vanilla extract
For the cream filling:
- Butter – I used salted butter for the added flavor. It should be softened to room temperature to whip up nicely.
- Powdered sugar – Sweetens and stabilizes the cream filling.
- Salt – Helps balance the sugar.
- Vanilla extract – Adds a light flavor to the filling.
- Heavy cream – Just a small amount is needed to get the perfect texture.

How To Make Gluten Free Oatmeal Cream Pies
It’s surprisingly easy to make homemade oatmeal pies. I think the hardest part is waiting for them to cool!
- Prep. Line the baking sheets with parchment paper. Preheat the oven to 350°F.
- Combine the dry ingredients. Mix together the oats, flour, cinnamon, baking soda, and salt in a large bowl.
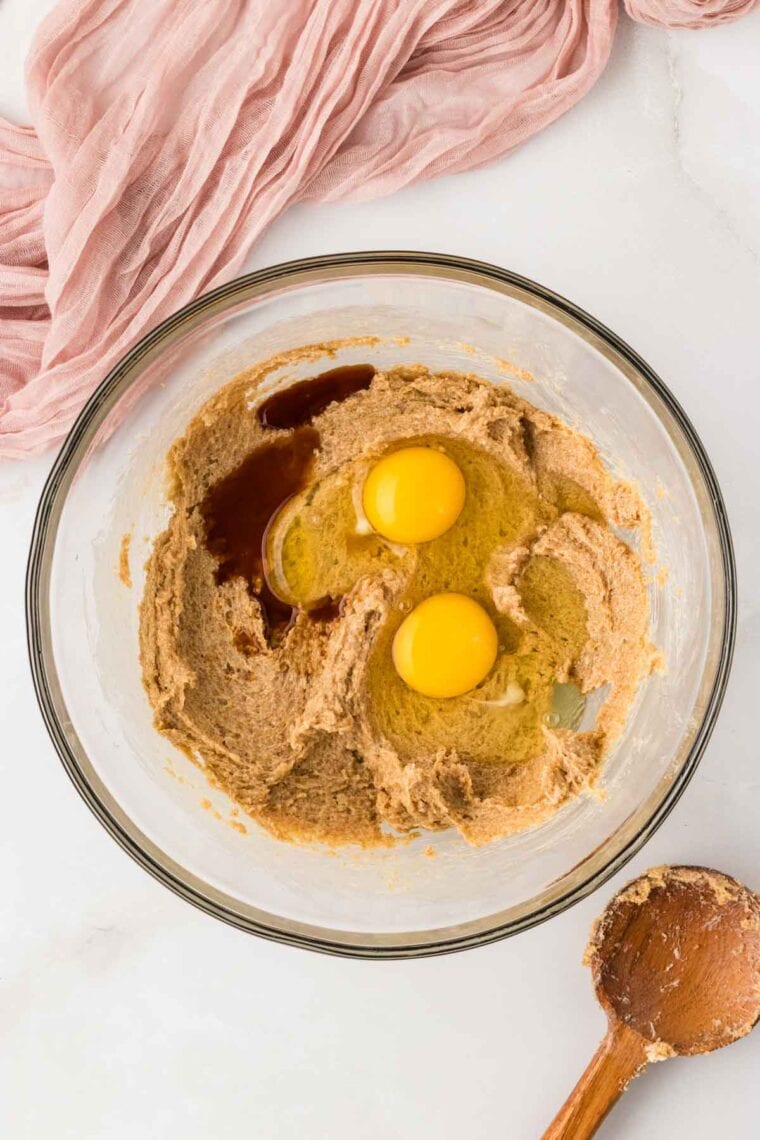
- Mix the wet ingredients. In a separate bowl, cream the butter and brown sugar until light in color and combined. Mix in the eggs and vanilla.

- Combine. Add the dry ingredients to the wet mixture. Mix by hand until a dough forms. No streaks of flour should remain.


- Shape the dough. Scoop the dough into balls. Place them on the baking sheets. Do not flatten and leave plenty of space.
- Bake. Bake for 8-10 minutes until just barely beginning to brown on the edges.
- Cool. Let the cookies cool on the baking sheet for a few minutes. Transfer to a wire rack to cool completely.


- Beat the butter. To make the cream filling, whip the butter with a mixer until smooth and white.
- Whip the icing. Mix in the powdered sugar until combined. Add the vanilla, salt, and heavy cream. Whip until the icing is light and fluffy.


- Assemble the cookies. Once the cookies have cooled, transfer the icing to a piping bag. Top half of the cookies with as much or as little filling as desired. Add the second cookie on top.


- Enjoy! Pop in the fridge to harden the filling or enjoy immediately.

Recipe Tips & Tricks
Here are a few things to keep in mind when making homemade oatmeal cream pies for the first time.
- Don’t overmix. When combining the wet and dry ingredients for the cookies, mix gently just until there are no streaks of flour. Overmixing can lead to very dense cookies.
- Leave space on the baking sheet. These oatmeal cookies will spread quite a bit on the baking sheet, so be sure to leave plenty of space between them. There is no need to flatten them before baking – they will do that automatically.
- Avoid overbaking. Since these cookies are so thin, they bake very quickly. It’s important to pull them from the oven when they are just barely beginning to brown on the edges. The centers will look under-baked. That’s okay!
- Cool on the baking sheet. Let the cookies cool on the baking sheet for a few minutes. This will allow them to finish baking and prevent them from crumbling when you try to move them.
- Scrape down the bowl. When whipping the icing, pause every so often to scrape down the sides of the bowl to ensure that everything is incorporated.
- Cool before assembling. The cookies should be cooled to room temperature before adding the filling. Otherwise, the filling will just melt, and the cream pies will be a mess.
Proper Storage
- Fridge: Keep your oatmeal cream pies in the fridge for the freshest and longest lasting cookies. Store them in an airtight bag or container in the fridge for up to a week.
- Freezer: You can also freeze them by wrapping them in plastic wrap and storing them for up to 3 months.

More Gluten Free Cookies To Try
Gluten Free Oatmeal Cream Pies
Ingredients
For the oatmeal cookies:
- 3 cups certified gluten free quick oats (295g)
- 1 ⅔ cups 1:1 gluten free flour (200, recommended: King Arthur Flour Measure for Measure)
- 1 ½ teaspoons cinnamon
- 1 teaspoon baking soda
- 1 teaspoon salt
- 1 ¼ cups salted butter , softened to room temperature ( 284g)
- 1 ½ cup brown sugar (300g)
- 2 large eggs (100g, out of shell)
- 1 teaspoon vanilla extract
For the cream filling:
- 1 cup salted butter , softened to room temperature (227g)
- 4 cups powdered sugar (368g)
- 1/2 teaspoon salt
- 1 teaspoon vanilla extract
- 3 Tablespoons heavy cream (45g)
Instructions
- Line two baking sheets with parchment paper and preheat the oven to 350°F.
- In a large bowl, combine 3 cups certified gluten free quick oats, 1 ⅔ cups 1:1 gluten free flour, 1 ½ teaspoons cinnamon, 1 teaspoon baking soda, and 1 teaspoon salt. Mix until thoroughly combined and set aside.
- In another large bowl, add 1 ¼ cups salted butter and 1 ½ cup brown sugar, and cream them together using a hand mixer or wooden spoon until light in color and combined.
- Add 2 large eggs and 1 teaspoon vanilla extract and mix again, then add in the dry ingredients.
- Gently mix by hand until a dough forms, and there are no more streaks of dry ingredients.
- Using a tablespoon or a small cookie scoop, scoop the dough into balls and place them on the prepared baking trays. Do not flatten the balls, as they will spread on their own in the oven. Make sure there’s plenty of room for the cookies to spread without bumping into each other.
- Bake at 350°F for 8-10 minutes, just until they are barely beginning to brown on the edges. Don’t over bake, as you want these cookies to be soft.
- Allow the cookies to cool on the baking sheet for a few minutes until cool enough to move to a wire rack to finish cooling completely.
- While the cookies are baking, prepare your cream filling (buttercream icing) by whipping the 1 cup salted butter with a hand or stand mixer until smooth and white.
- Once whipped, add 4 cups powdered sugar and just mix until combined before adding the 1 teaspoon vanilla extract, 1/2 teaspoon salt, and 3 Tablespoons heavy cream.
- Whip the icing until light and fluffy, scraping down the sides of the bowl occasionally to make sure everything is fully incorporated.
- Once the icing is done and the cookies are cooled, fill a gallon bag or piping bag with your icing and cut the tip off. Use the bag to fill your cookie halves with as much or as little filling as you want, then assemble your sandwich cookies.
- Enjoy fresh or pop in the fridge until you’re ready to eat!

Did you make this?
Leave a star rating to help others know that they should make this recipe.
Share a photo and tag @cupcakesandkalechips on Instagram!